How to Use the Communications Dashboard
The Communications Dashboard shows statistics on the announcements you’ve sent. This information can be useful to help you know if your students are receiving and reading the announcements you’ve sent. You can find more information about who received the announcements in the Email Delivery Statuses report. Finally, if you like to work ahead and schedule announcements to be sent later, you can review the scheduled announcements on the Communications Calendar. Read on for more.
First Steps
The Communications Dashboard is most useful after you’ve been using Communications to send General Announcements, to set up Automated Messages, and to create Message Flows.
To see how many people have read an announcement on the Communications Dashboard:
On the main Dashboard, click the Communications icon. You see the Communications Dashboard.
Each General Announcement you’ve sent is displayed in a box, with the most recent at the top. If you have scheduled an announcement to be sent later, you will see the scheduled announcement(s) at the top.
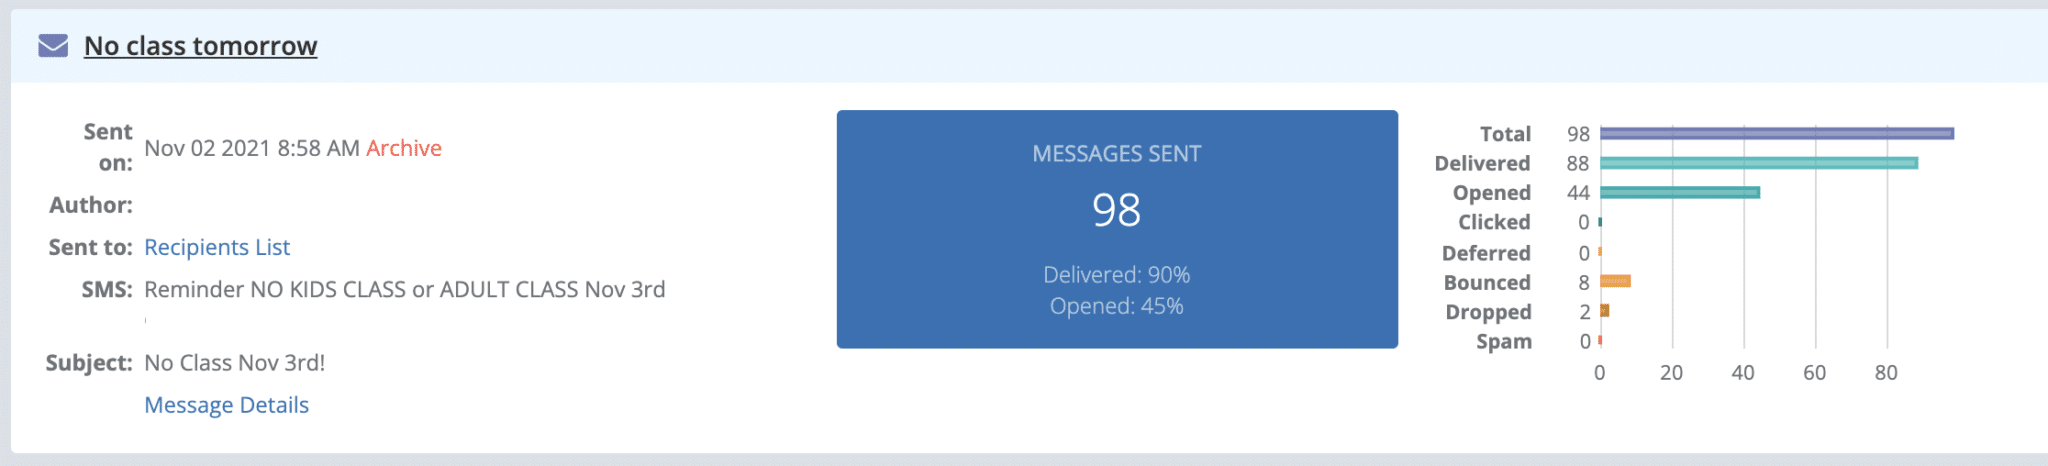
The title of the announcement is in the blue at the top of the box.
On the left are the date the message was sent, the author of the message, the recipients (click Recipients List to see the status, programs, or individuals selected as recipients). If the message was sent as an SMS Text message, you will see the message. Finally, you see the subject of the announcement.
In the middle is the number of messages sent, as well as the percentage delivered (the percentage of messages that were received in the recipient’s email inbox. You also see the percentage of the messages that were opened in the recipient’s email inbox. (These percentages only reflect email messages; SMS text messages are not tracked.)
If you click the blue box in the middle, you can see more information on the delivery status for each student who was sent the announcement. If you see Delivered-Q, Dropped, or Bounced in the Delivery column, you may need to ask the student for a different email address. These delivery statuses indicate that the email announcement is not being received.
On the right side of the box is a bar graph showing further details of the announcement. For example, you can see how many email messages were opened and clicked (if there is a link within the message). You can also see the number of messages that were not received in the Deferred (delayed), Bounced, Dropped, and Spam bars. If a message was bounced or dropped, you may have an invalid email address. If you see a lot of messages in Spam, you may need to ask your students to indicate in their email programs that your messages are not spam.
To see if email addresses are receiving messages in the Email Delivery Statuses report:
On the Communications Dashboard, click Reports and then click Email Delivery Statuses.
The list shown contains all students, prospects, and family email addresses in your Kicksite account that you have sent an announcement to. You might see the same email address more than once in the list, for example, if multiple family members have the same email address.
Where this list is helpful is to find out if you have any email addresses that are not receiving your announcements. For example, in the following screenshot, we clicked Status to sort by the status of the emails. The email addresses that were not delivered appear at the top.
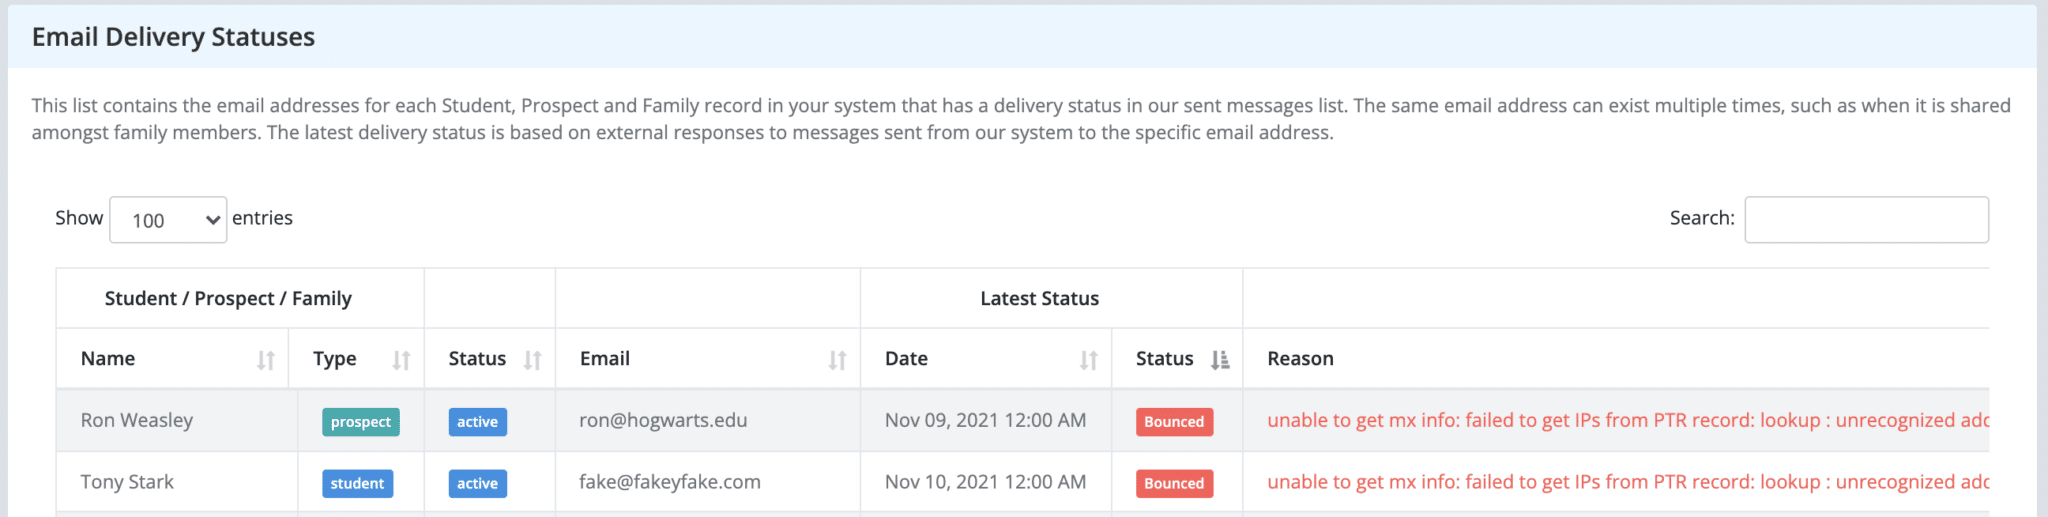
If you see the status as Bounced, you might need to correct the student’s or prospect’s email address. It may have a typo or otherwise be an invalid email address.
To view scheduled announcements on the Communications Calendar:
On the Communications Dashboard, click Calendar. The current month appears, and any announcements that you have scheduled appear on the calendar.
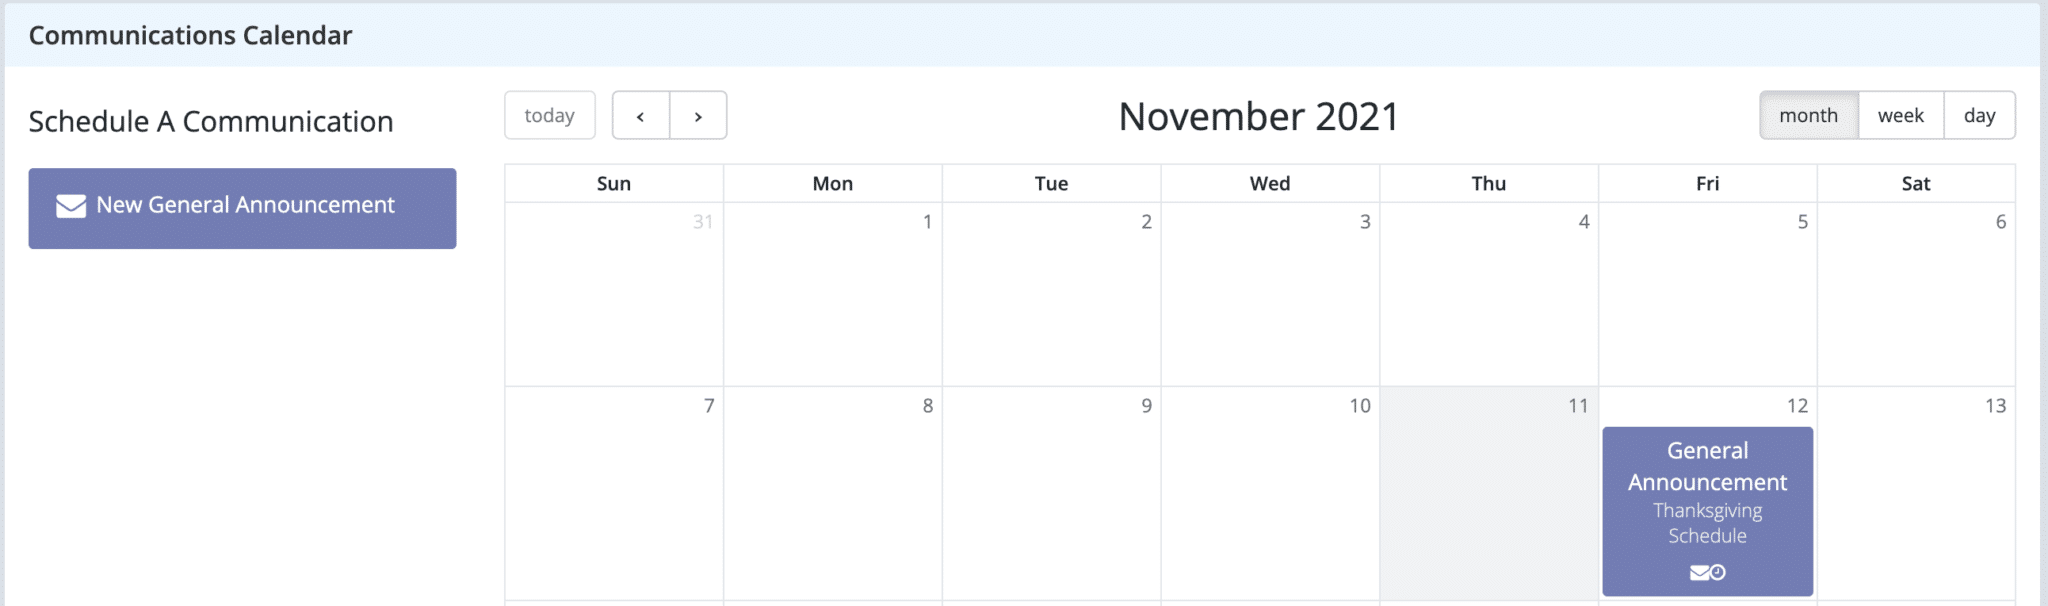
You can click the announcement on the calendar to view information about a scheduled announcement, as shown in the following screenshot. If you need to create a message, click New General Announcement.

Click Edit to make changes to the announcement; click Delete to remove it permanently (and never send it). Click Save as Template if you anticipate sending a similar message multiple times; see the article on creating a General Announcement Template. (For example, you might find it saves time to create a template for messages such as newsletters, schedule or holiday updates, or promotion test reminders.)
What’s Next?
If you’re fairly new to Kicksite, or even if you’re an experienced administrator, you might find some areas that you haven’t yet explored in Kicksite by going over the Getting Started articles on basic Kicksite tasks or on bringing in new students with Marketing Tools.