How to View the Events List Page
After you’ve created one or more events and invited students to the event(s), you may need to manage the event. (For example, to check how many students have registered for the event, to invite other students, and so on.) If you created a General Event well ahead of time, you will need to send the event invitations as the event date draws near. This is where the Event List page is helpful.
First Steps
First, you need to create the General Event or create the Belt Testing Event. (With a Belt Testing Event, you may then need to review the Candidate List and manage the Belt Testing Event.)
To view the Event List:
Click Events in the left panel, and then click Event List.
The Event List displays all events that have been created. You can click the Future Events tab to see events in the future; the Current Events tab shows events that are coming up soon; the Past Events tab shows events that have already happened. If you see a [T] beside an event, that is a Belt Testing Event. A General Event will only show the event’s name.
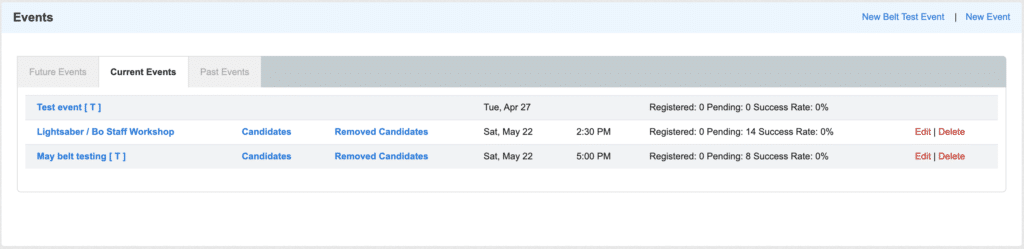
From the Event List page, you can:
- Click the name of the event to go to the Event page.
- Click Candidates to view the list of invited people.
- Click Removed Candidates to view the list of people you did not invite.
- Click Edit to make changes to an event.
- Click Delete to remove the event.
- Click New Event to create a new General Event.
- Click New Belt Test Event to create a new Belt Testing.
To manage a General Event:
From the Event List page (click Events in the left panel, and then click Event List), click the name of the event.
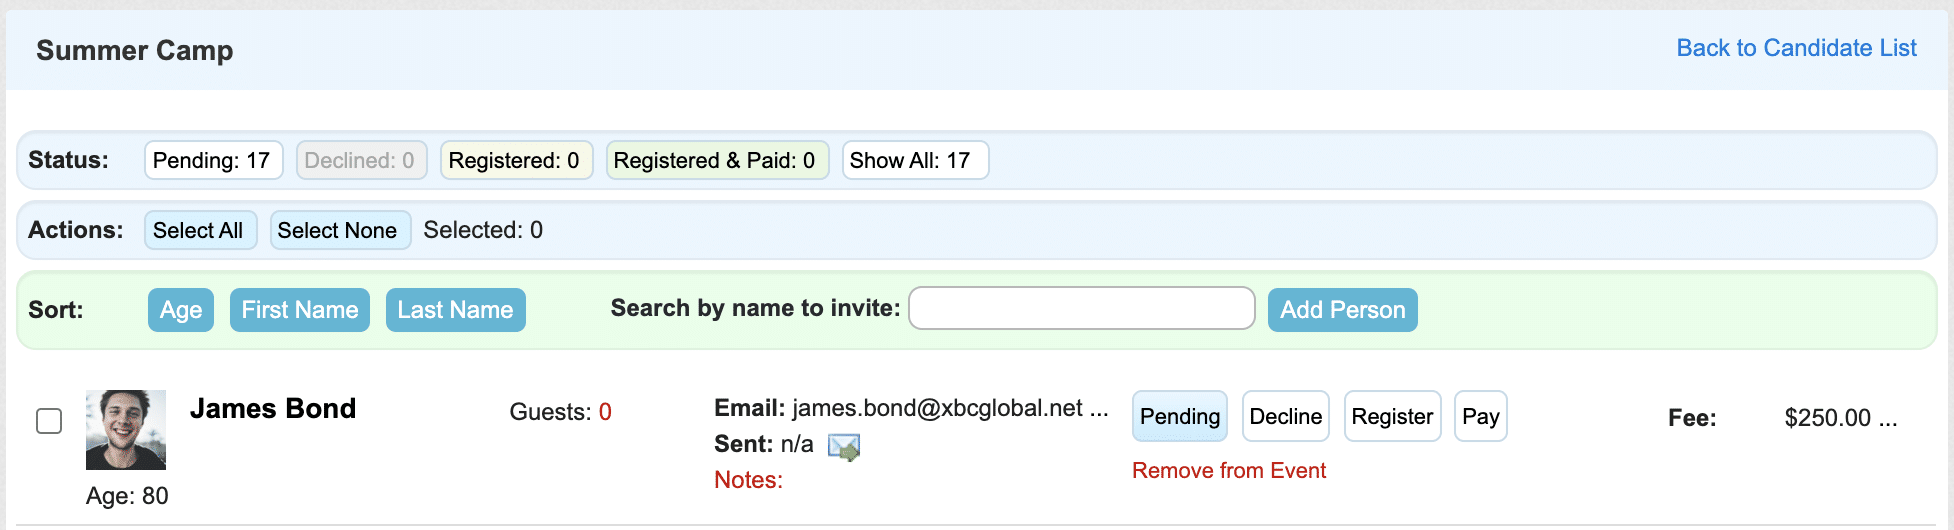
On the Event page, you can:
- On the Status row: View how many are in Pending (they haven’t responded yet), Declined (they responded that they will not attend), Registered (they will attend), or Registered & Paid (they will attend and have paid any applicable fee) status. Show All shows the total number of invitees.
- On the Actions row: Click Select All to select all invitees; click Select None to deselect all invitees. Selected shows the number of invitees currently selected. When you select one or more invitees, you have the option to Decline, Register, Pay, or Remove from Event.
- On the Sort row: Click Age, First Name, or Last Name to change the list order. To add an invitee, you can start typing a name in the Search by Name to Invite field. Select the correct name and then click the Add Person button to add them.
Each invitee has information displayed in a box. Within the invitee’s box, you can:
- Select the check box at the far left to select that person.
- View how many Guests they will bring. (If your school is part of an association, you will see the invitee’s association’s membership information.)
- View the invitees email address, if the invitation was sent (and the date sent), and any Notes.
- View the status. Pending means the invitee has not yet responded to the event invitation; the box’s background is white. Decline means they responded that they will not attend; the box’s background is gray. Registered means they responded that they will attend; the box’s background is green if they have paid, or yellow if they have not yet paid. Pay means they have not paid, and Paid means they have paid the event fee; the box’s background is green. (If the event has a fee; you can see the amount on the right side of the invitee’s box). Click the Remove from Event link if you would like to rescind the invitation for that student or prospect. (Note that Remove from Event is only available if the invitee is in Pending status.)
On the right side of the Event page, you can see:
- Event Details: See the date(s) and time(s) of the event, the number of Students, Guests, and Total number of people who have responded that they will attend. Click the + next to Selected Audience view more information about the invitees. (For example, if you invited only students of certain programs and ranks, you will see the list of program(s) and rank(s) invited.)
- Notifications: Click the Send Event Announcements link to send the invitations via email. (This is helpful if you created an event in Kicksite well ahead of the event date, so you don’t want to invite people to the event until closer to the actual event’s date.)
- Documents: Click the + next to Exports to view the lists you can export to a .csv file. You can export all invitations, pending, declined, registered, or paid. Click the + next to Testing Forms to export a Belt Testing Document, a Belt Order Form (Confirmed Students), or a Belt Order Form (Confirmed & Pending Students). Click the + next to Belt Labels to export a .pdf for All Belt Labels, Registered Belt Labels, or Promoted Belt Labels. Click the – (minus) to collapse the document category.