How to Use a Barcode Scanner for Attendance
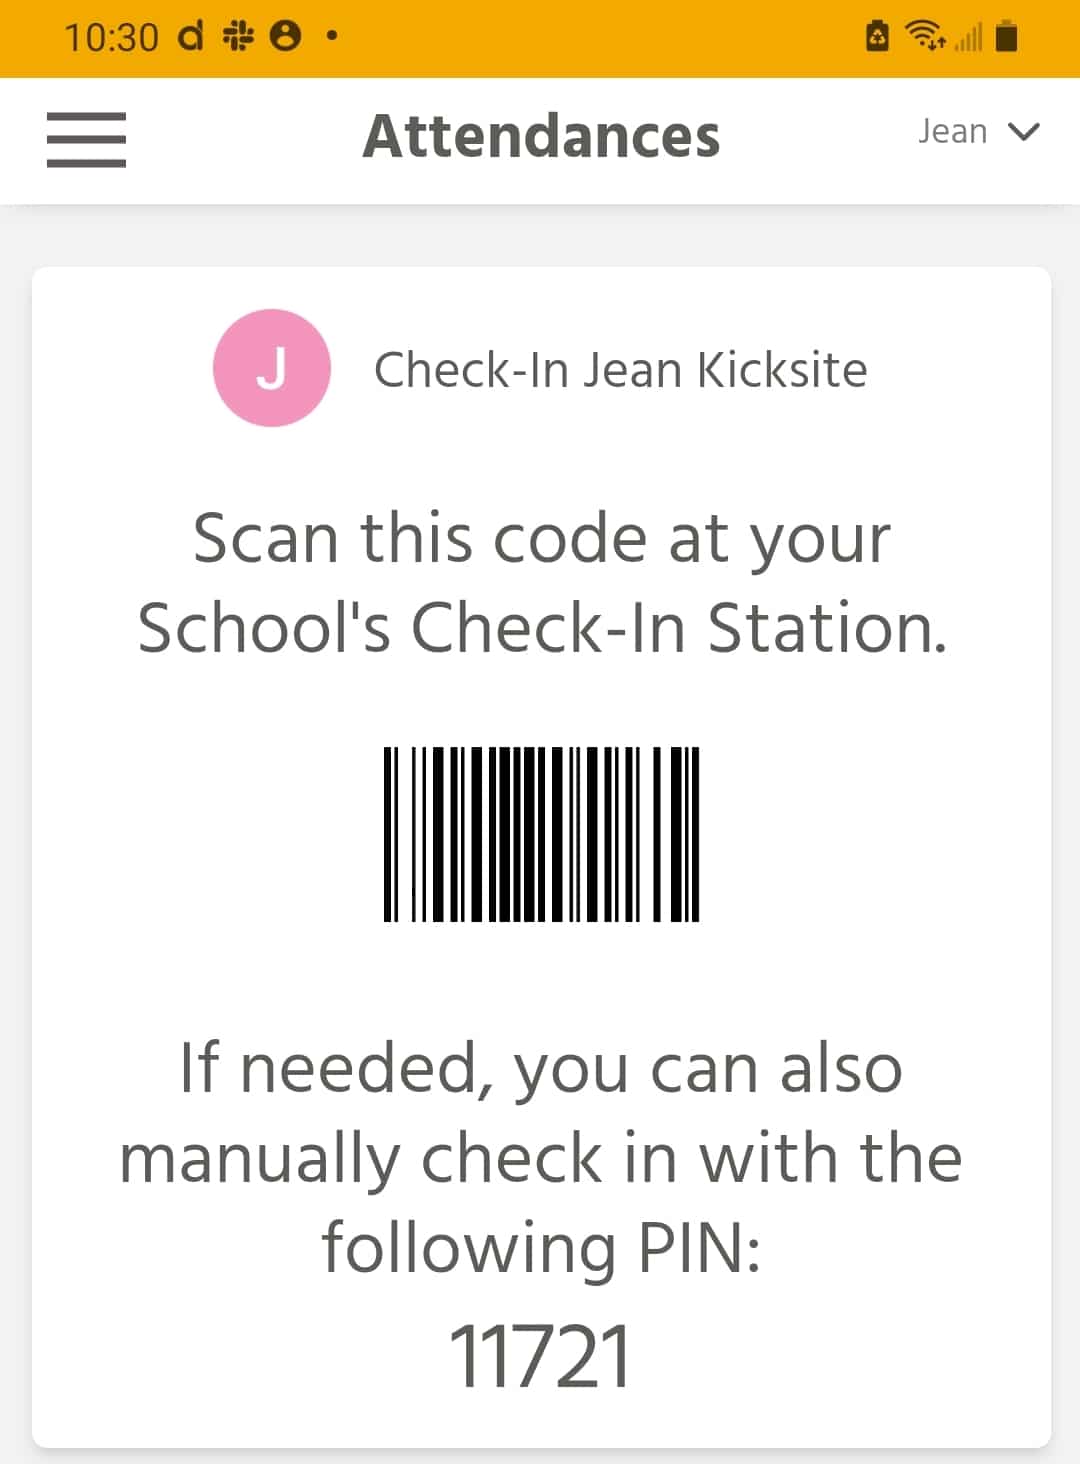
The updated Member Portal automatically generates a barcode for student check ins. A student can log into their Member Portal on their smartphone, bring up the barcode, and scan it to check in for attendance. All you need is a 2D barcode scanner and to connect it to a device running the Student Check In Screen.
What you need to use a barcode scanner
1. In your Kicksite account, click your username in the upper-right corner and then click Settings.
2. Click the Attendance tab, and then toggle Enable Barcode Check-in to On.
After you toggle the Enable Barcode Check-in to On, students will be able to pull up their barcode by logging into their Member Portal.
3. If you don’t already have a barcode scanner, you’ll need to purchase one. Important: Make sure you purchase a 2D barcode scanner.
Many scanners are available at reasonable prices; try searching “2D barcode scanner” on your favorite online retail site. If you want to connect to a tablet, make sure the 2D scanner has Bluetooth connectivity.
4. Connect the barcode scanner to your computer or tablet.
Some barcode scanners connect via USB, in which case you’ll connect the scanner to a laptop or desktop computer; other scanners may connect via Bluetooth, in which case you can connect to a tablet. Refer to the documentation for your scanner for how to connect it and to find out which devices it can connect to.
5. On the connected device, log in to your Kicksite account and go to the Student Check In Screen. (Tip: Kicksite recommends creating an employee account for attendance and to create a shortcut to the Student Check In Screen to save time.)
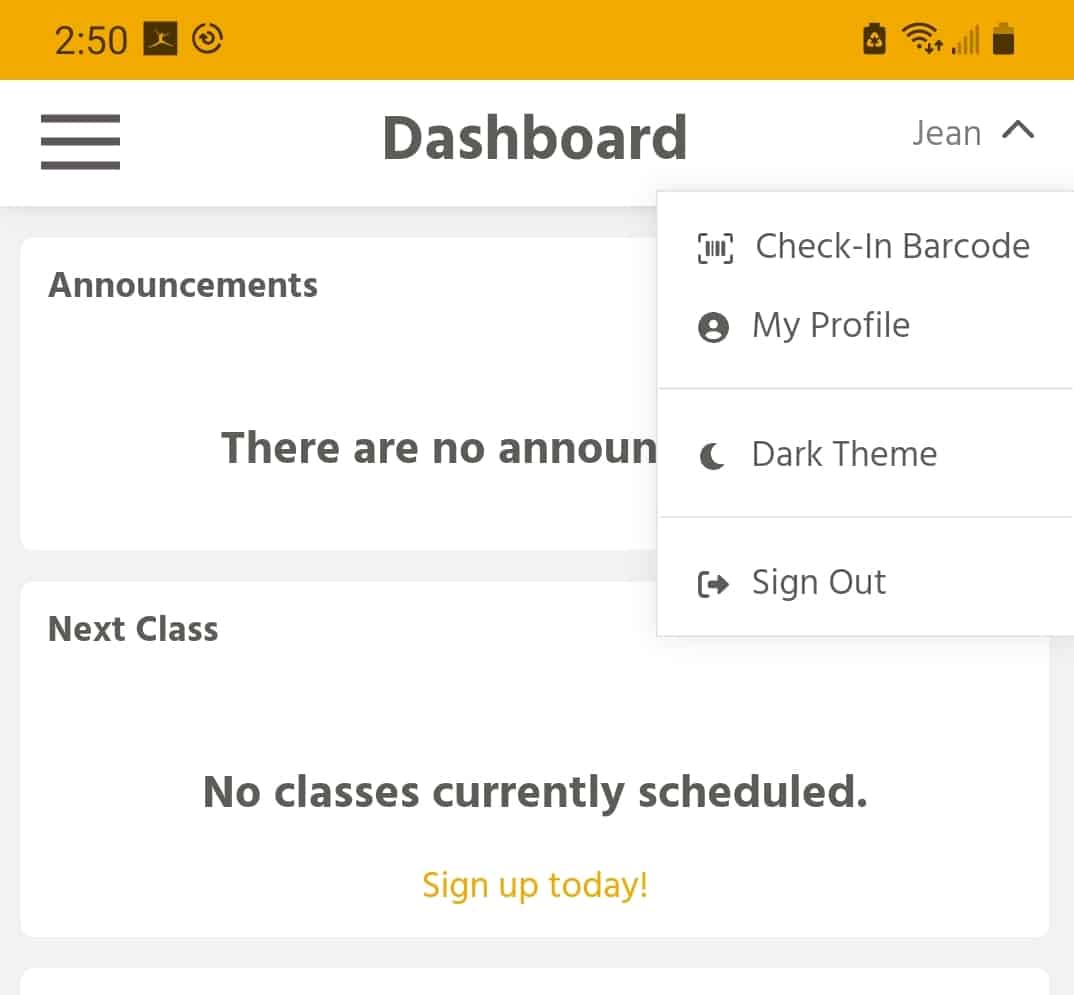
6. Students scan their barcode. They can either scan their printed barcode, or they can log into their Member Portal on their smartphone, tap their username, and tap Check in Barcode.
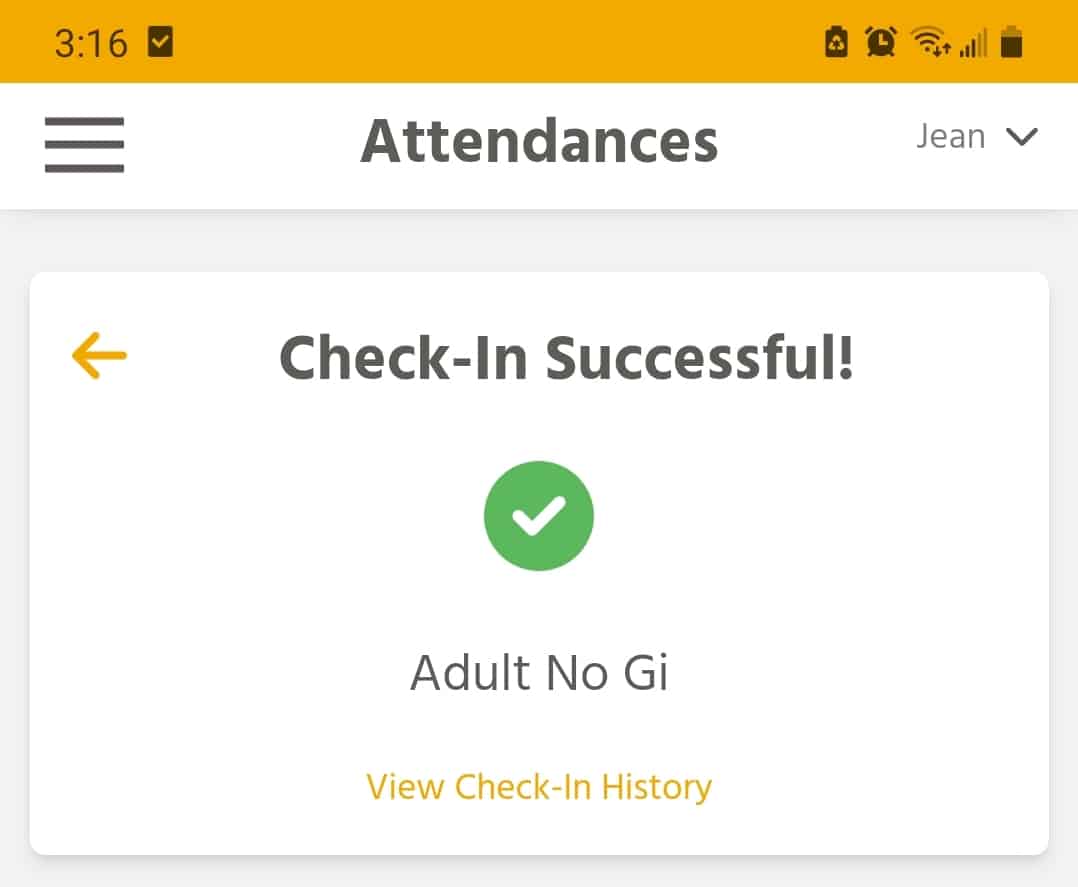
If the student has only one program, the attendance is logged. If the student has more than one program attached, they will need to select which program they’re checking in for on the device running the Student Check In Screen.
Here’s what the student sees on their Member Portal: