How to Use the Kiosk Check-In Screen
The Kiosk Check-In screen lets Students and Prospects log their own attendance when they arrive for class, so you can focus on teaching.
You can use a computer or tablet for Kiosk Check-In, but we recommend a tablet on a stand. Placing a few tablets by the entrance to the training area prevents a long line.
Checking In
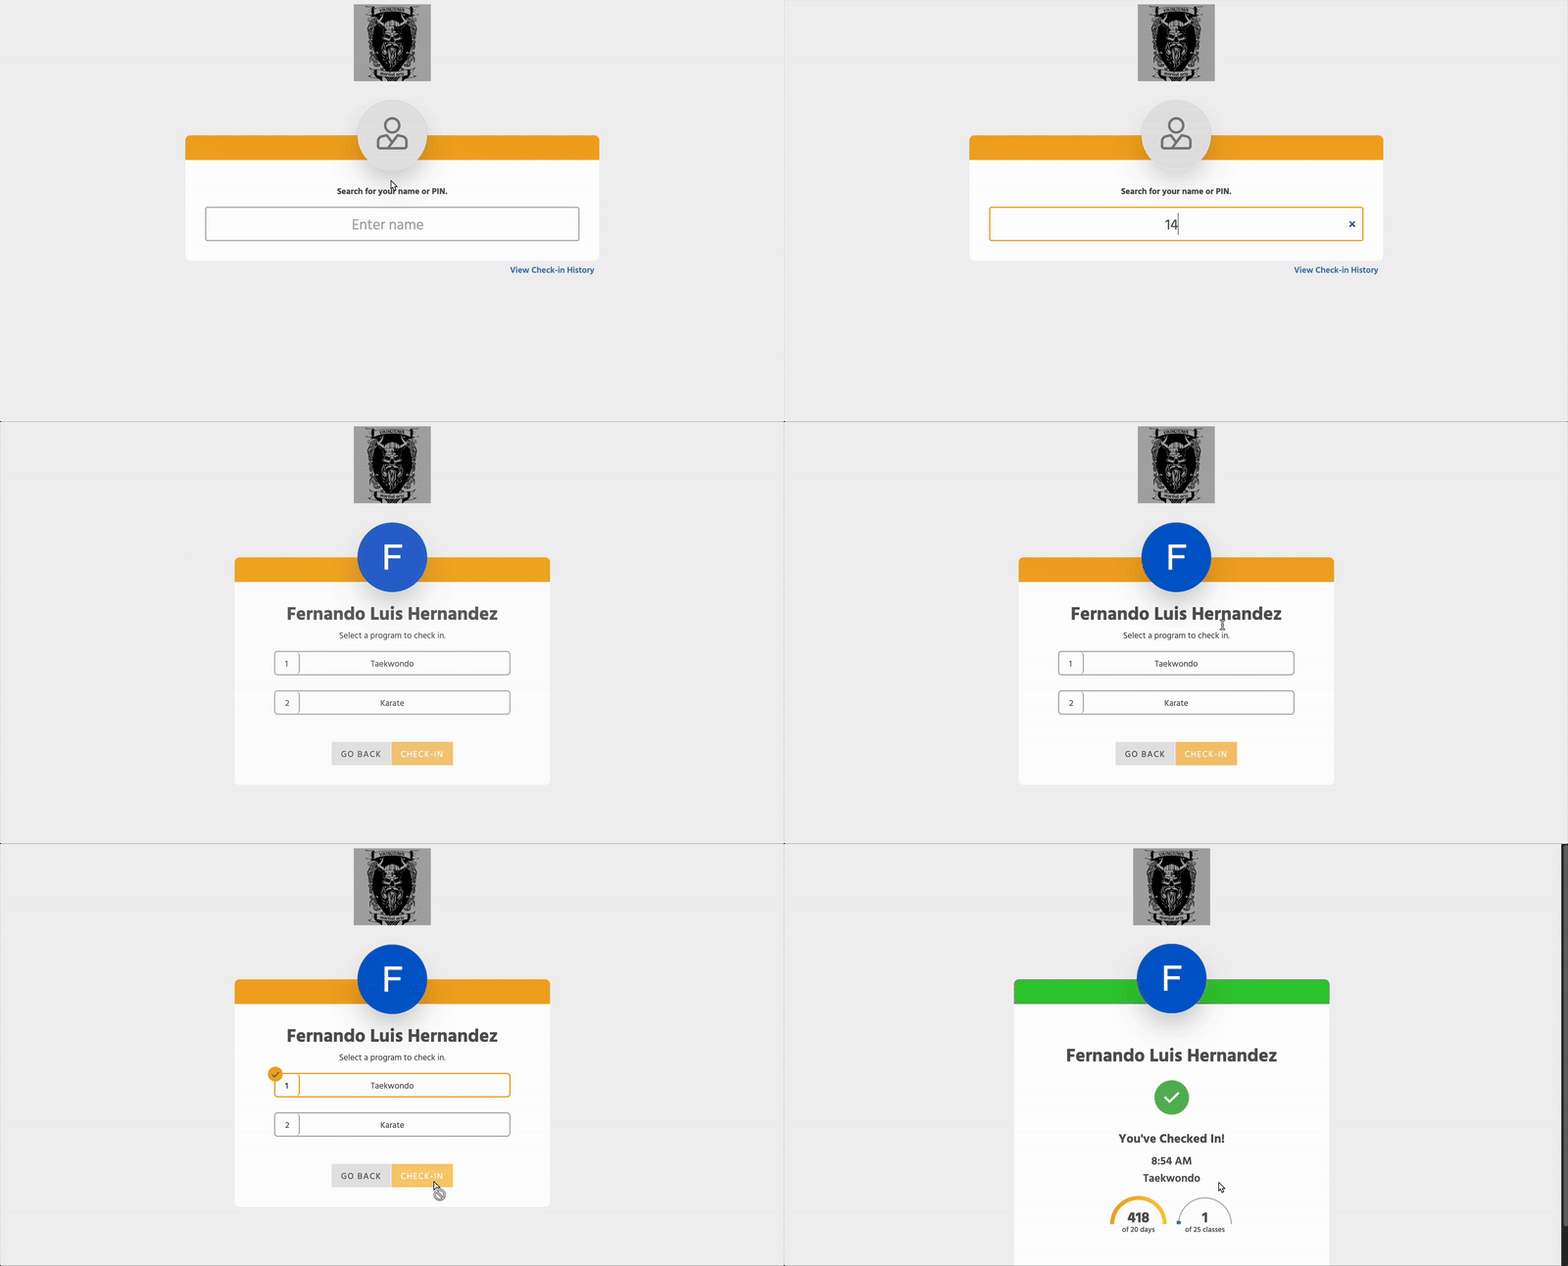
Once a Student or Prospect enters their PIN, barcode, or name, they will choose the Program they’re attending for. This counts towards Classes at Rank – one Check-In at a rank counts as one Class. If you have Classes set up, they can even choose the specific Class they’re attending.
Frozen and Inactive Students can’t check in. Frozen Students must meet with you to be reactivated first. Inactive Students won’t show up in Name Search or when entering their PIN.
There are three main ways to use the Kiosk Check-In Screen: PIN entry, barcodes, and name search.
PIN Entry
The default way for Students and Prospects to check in is by entering their PIN. This number is assigned randomly when their profile is created in Kicksite, but it can be changed.
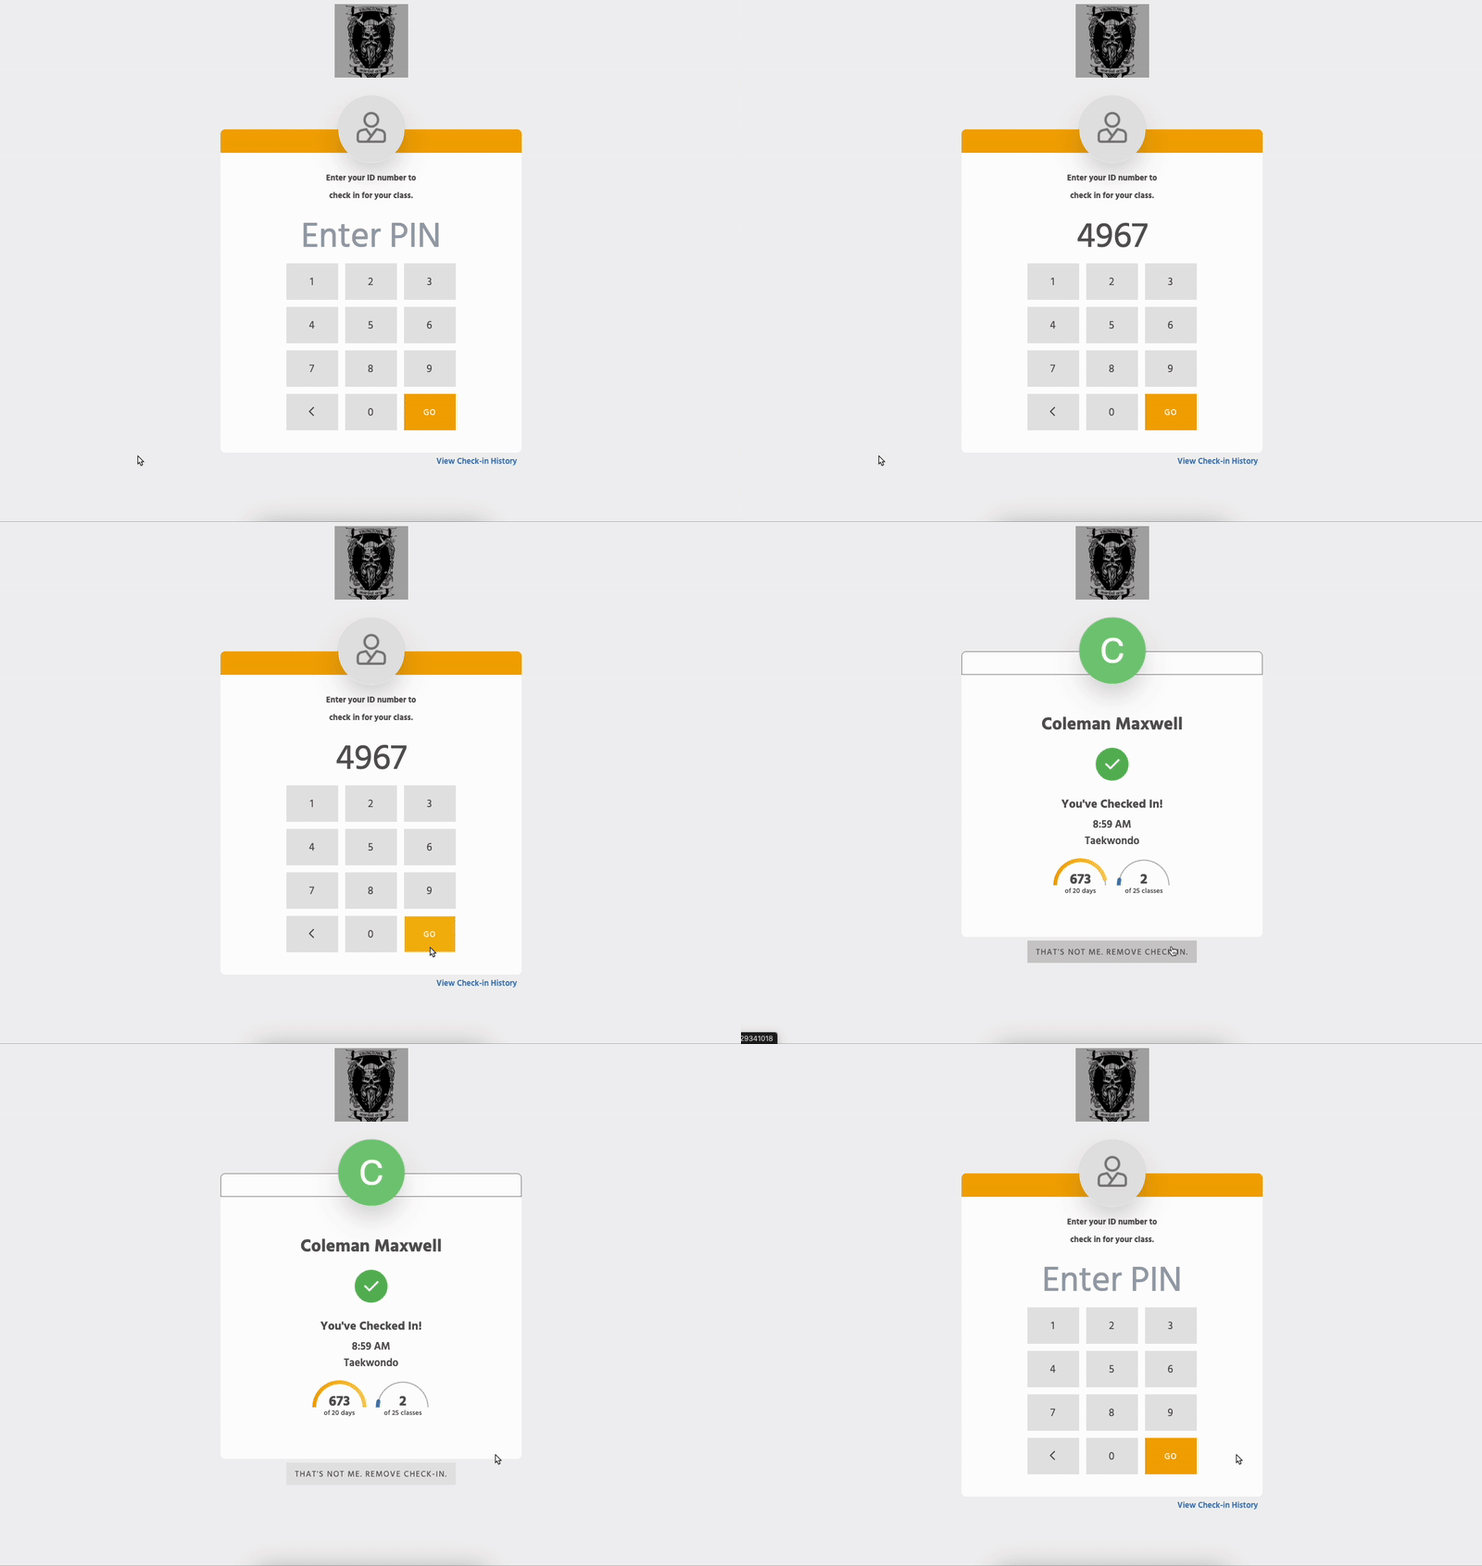
PINs are four digits long by default, but you can adjust that to be up to 8 digits. Go to Attendance Settings to change Custom PIN Length.
Name Search
Instead of requiring a PIN for check in, Students and Prospects can search for their name. Turning Name Search on replaces the “Enter PIN” box with a text search field, but Students and Prospects can still enter their PINs. You can also still scan barcodes with Name Search enabled.
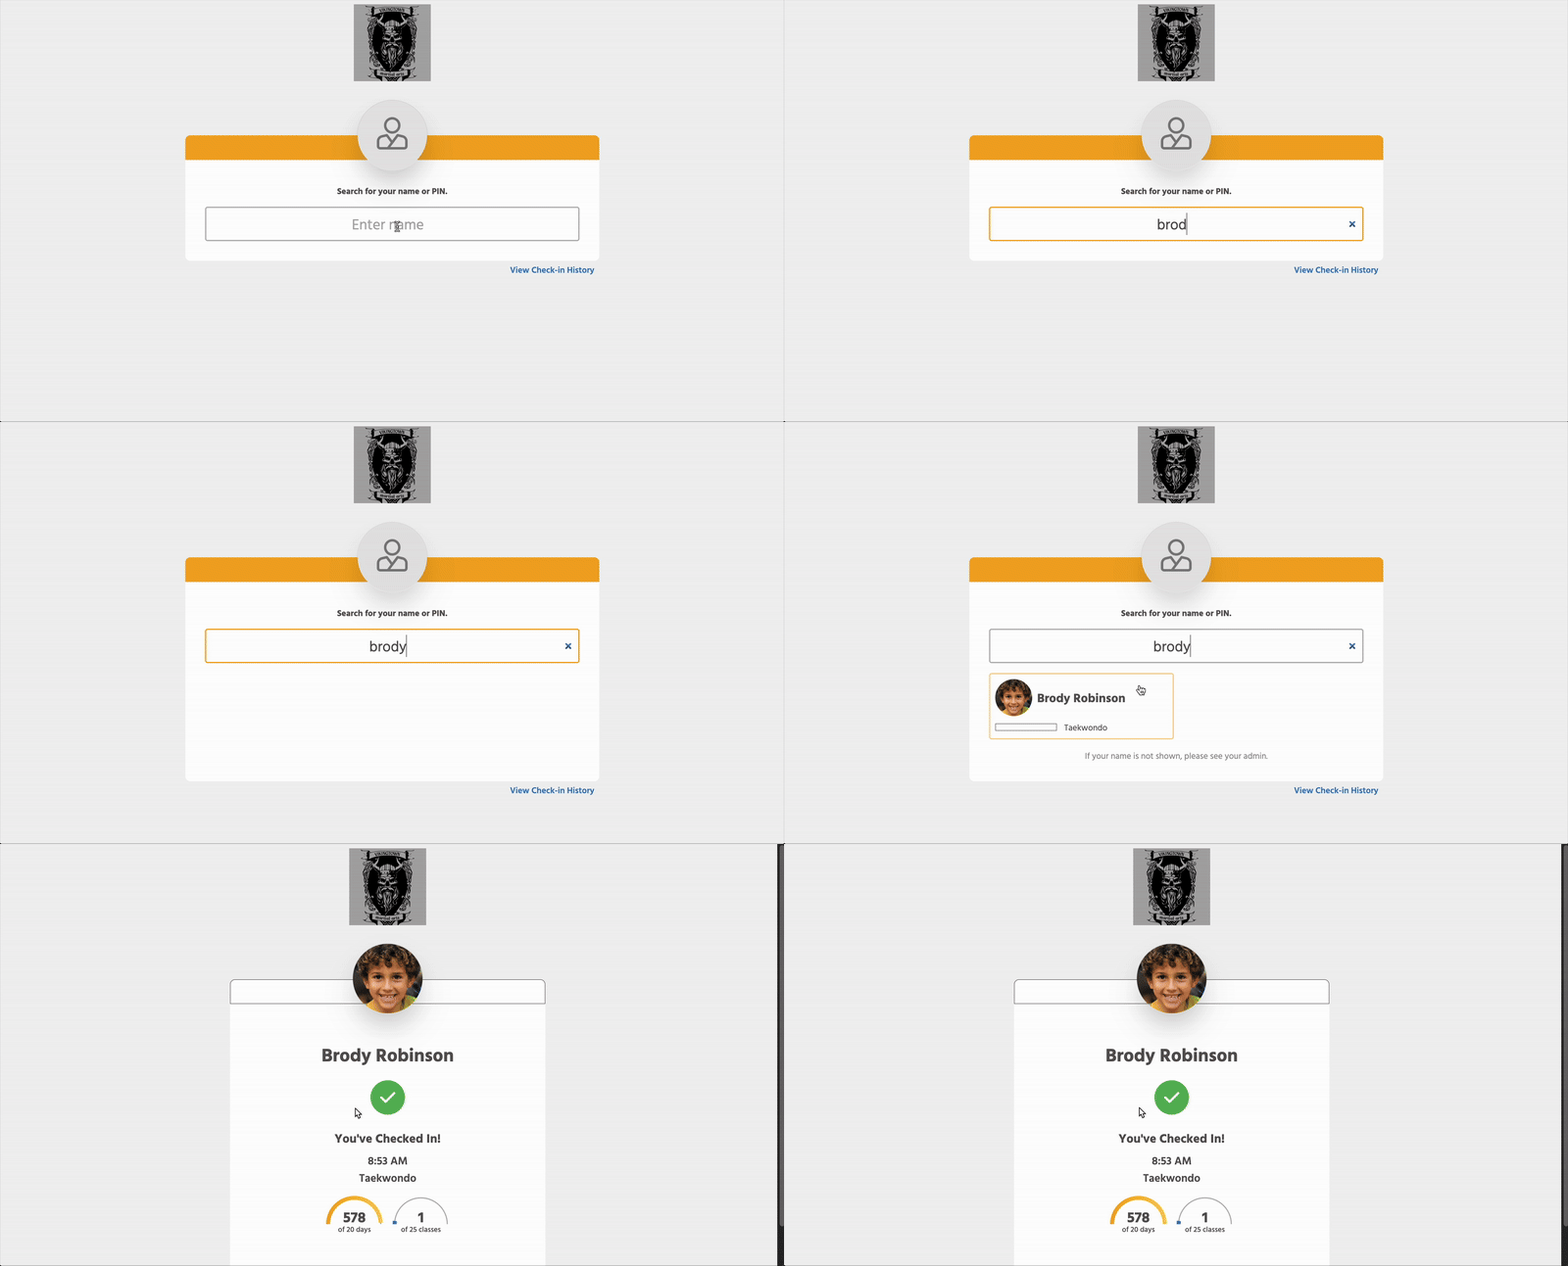
If you use Name Search, we recommend using profile pictures to help distinguish profiles with the same name. Additionally, the first two Programs and Ranks will be shown for each person.
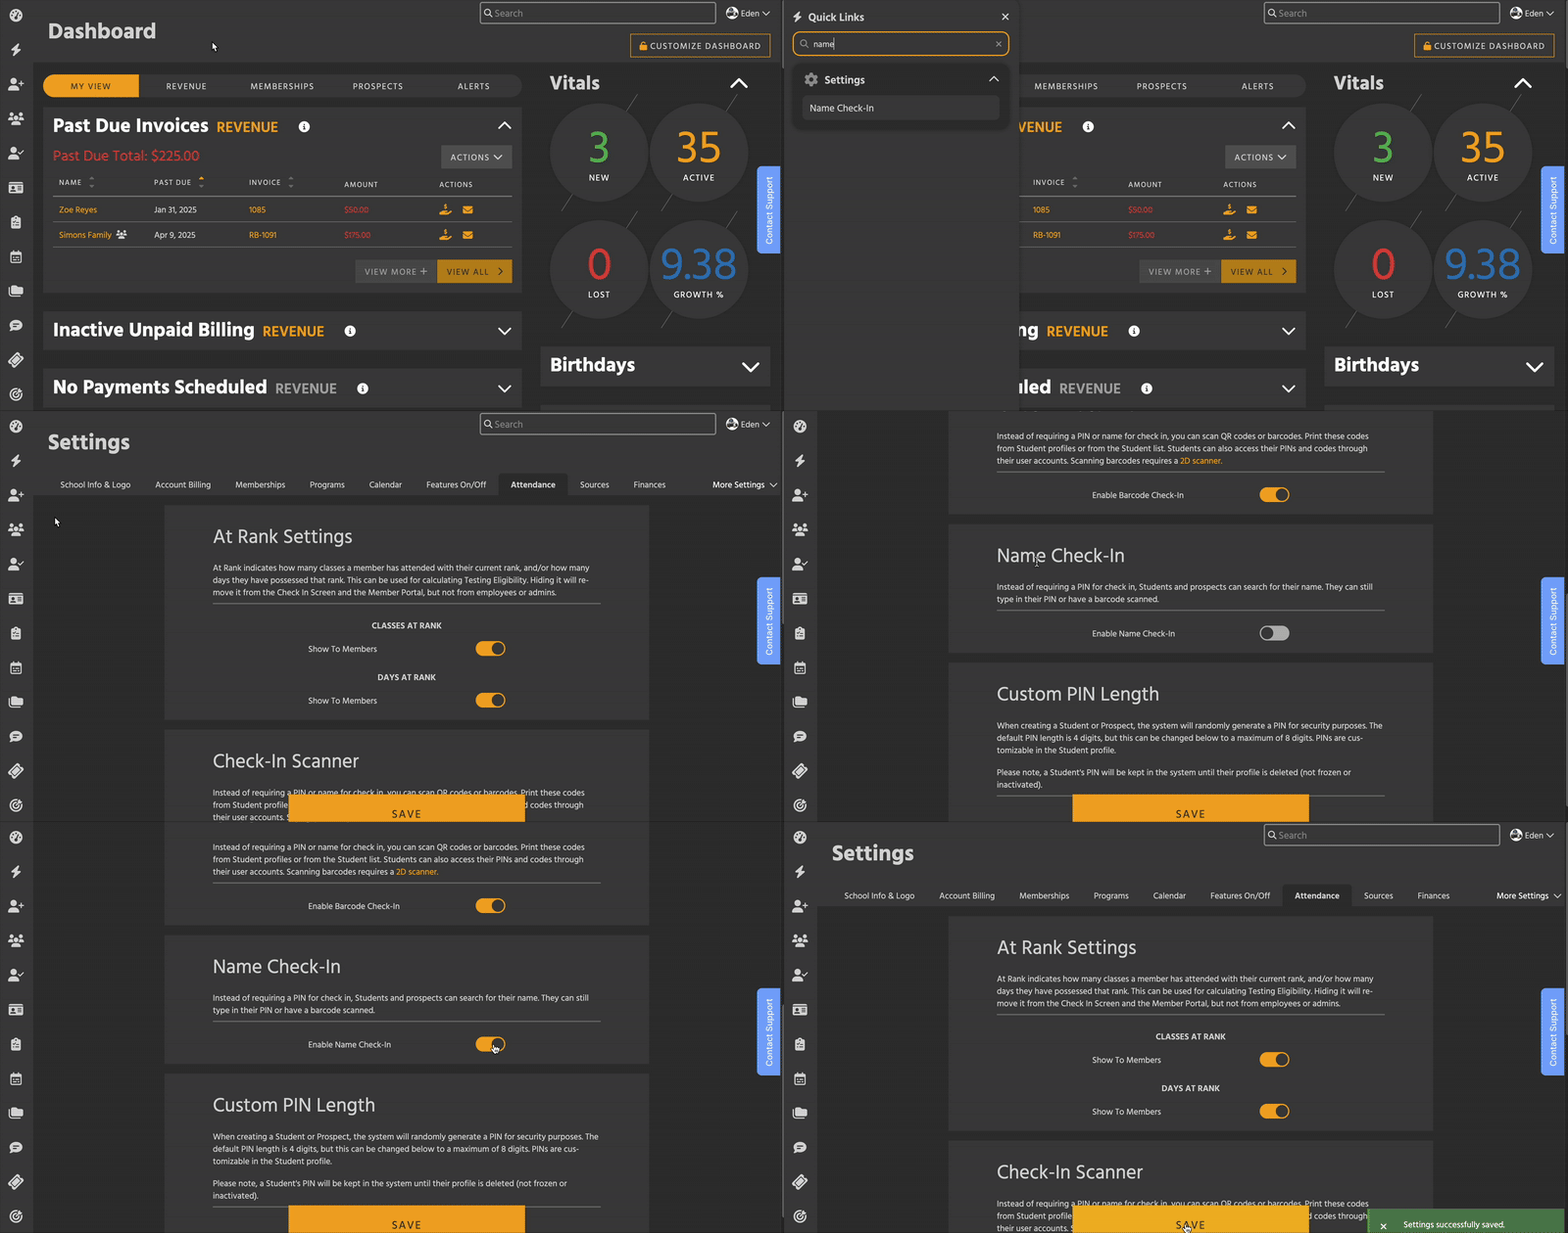
To turn on Name Search, go to Attendance Settings, then scroll down to Name Check-In. After you toggle it on, click Save.
Barcode / QR code
The Check-In Scanner is great for those who have a hard time remembering PINs, or if you want to use keycards or badges. Each Prospect and Student will have a barcode and QR code generated for them.
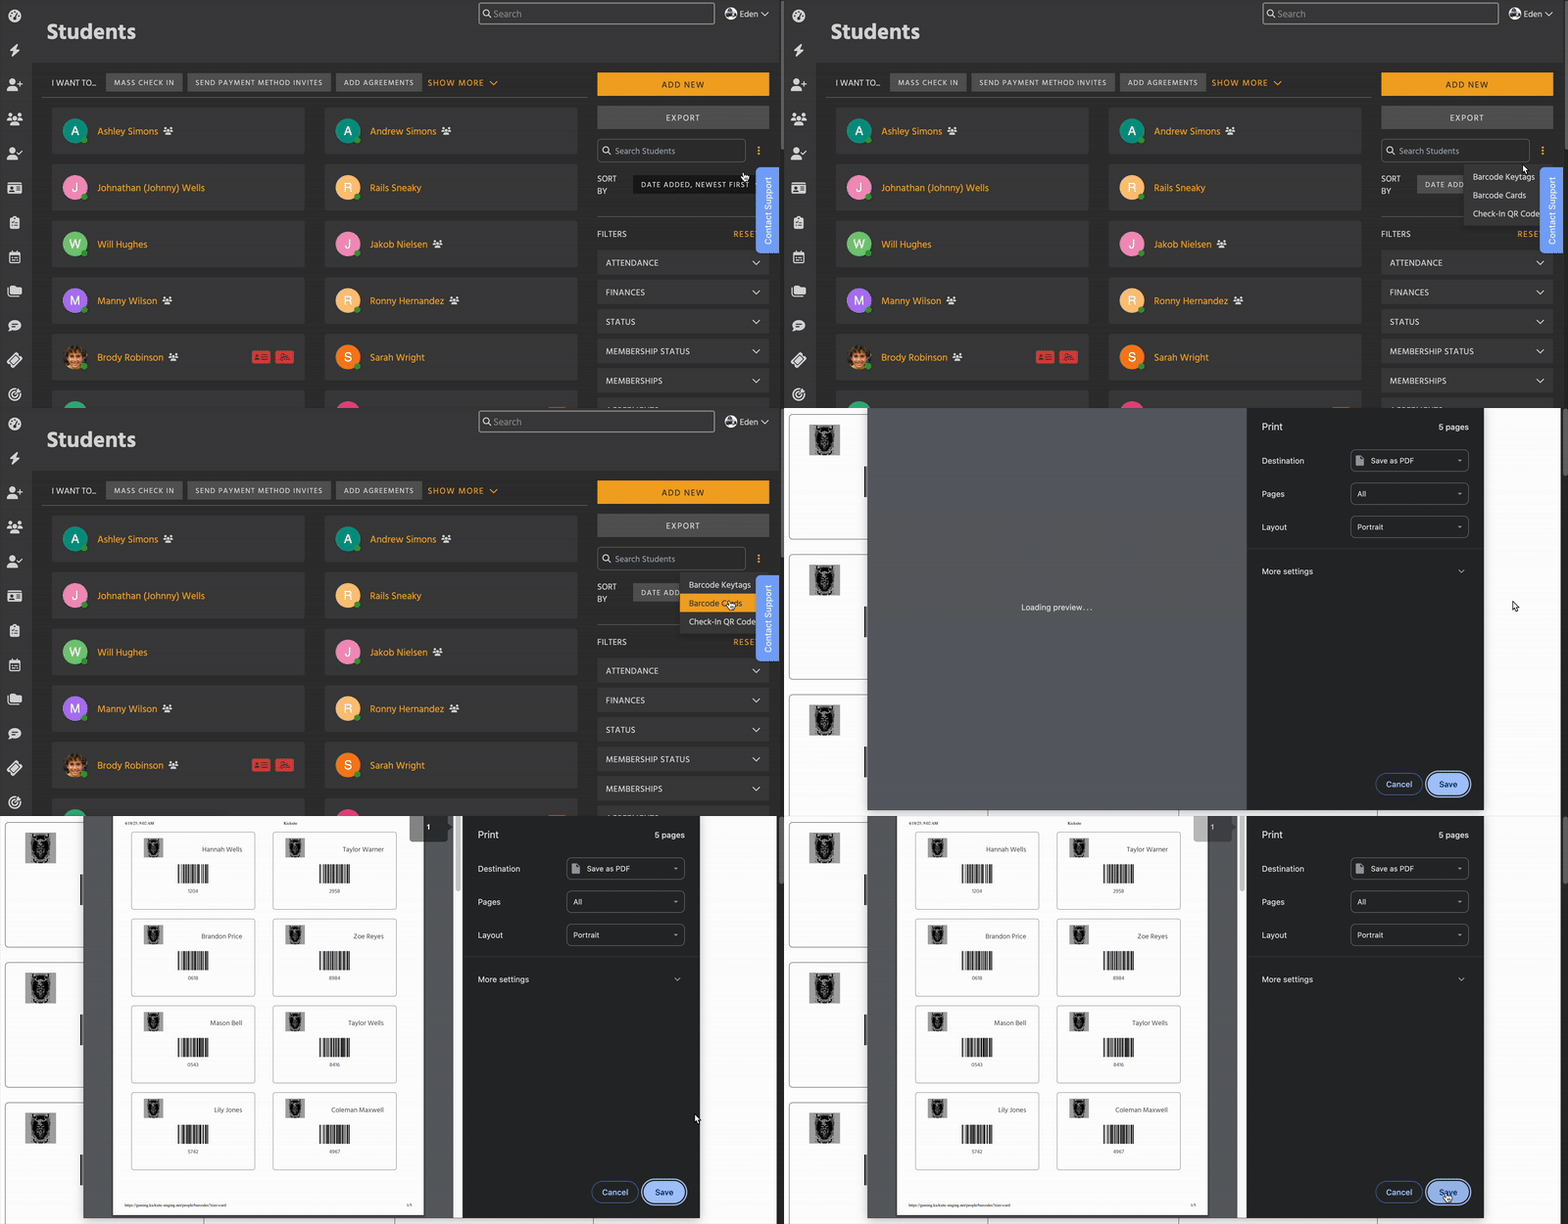
Print these codes from Student or Prospect profiles or from the Student list. Students can also access their PINs and codes on the Member Portal.
Scanning barcodes or QR codes requires a 2D scanner. Many scanners are available at reasonable prices. If you want to connect to a tablet, make sure the 2D scanner has Bluetooth connectivity or a suitable cord.