How to Print Barcode Labels for Attendance Check In
If you use a barcode scanner for attendance, you can have students check in either by using their Member Portal on their smartphone or by using a printed barcode or QR code.
Some school owners prefer not to have students use the Member Portal; in that case, you would need to print out the barcodes or QR codes for students.
Tip: Laminating the barcodes or QR codes after printing them will help prevent the paper from wearing out or tearing. Self-sealing laminating pouches are available; you can also purchase a laminating machine and laminating sheets or pouches. Another option is to use a printing store or office supply store’s laminating services.
Remember: If you change a student’s PIN (ID number), this will change the barcode or QR code. You will need to print a new barcode or QR code for the student; see the “To print a barcode or QR code for an individual student” section for details.
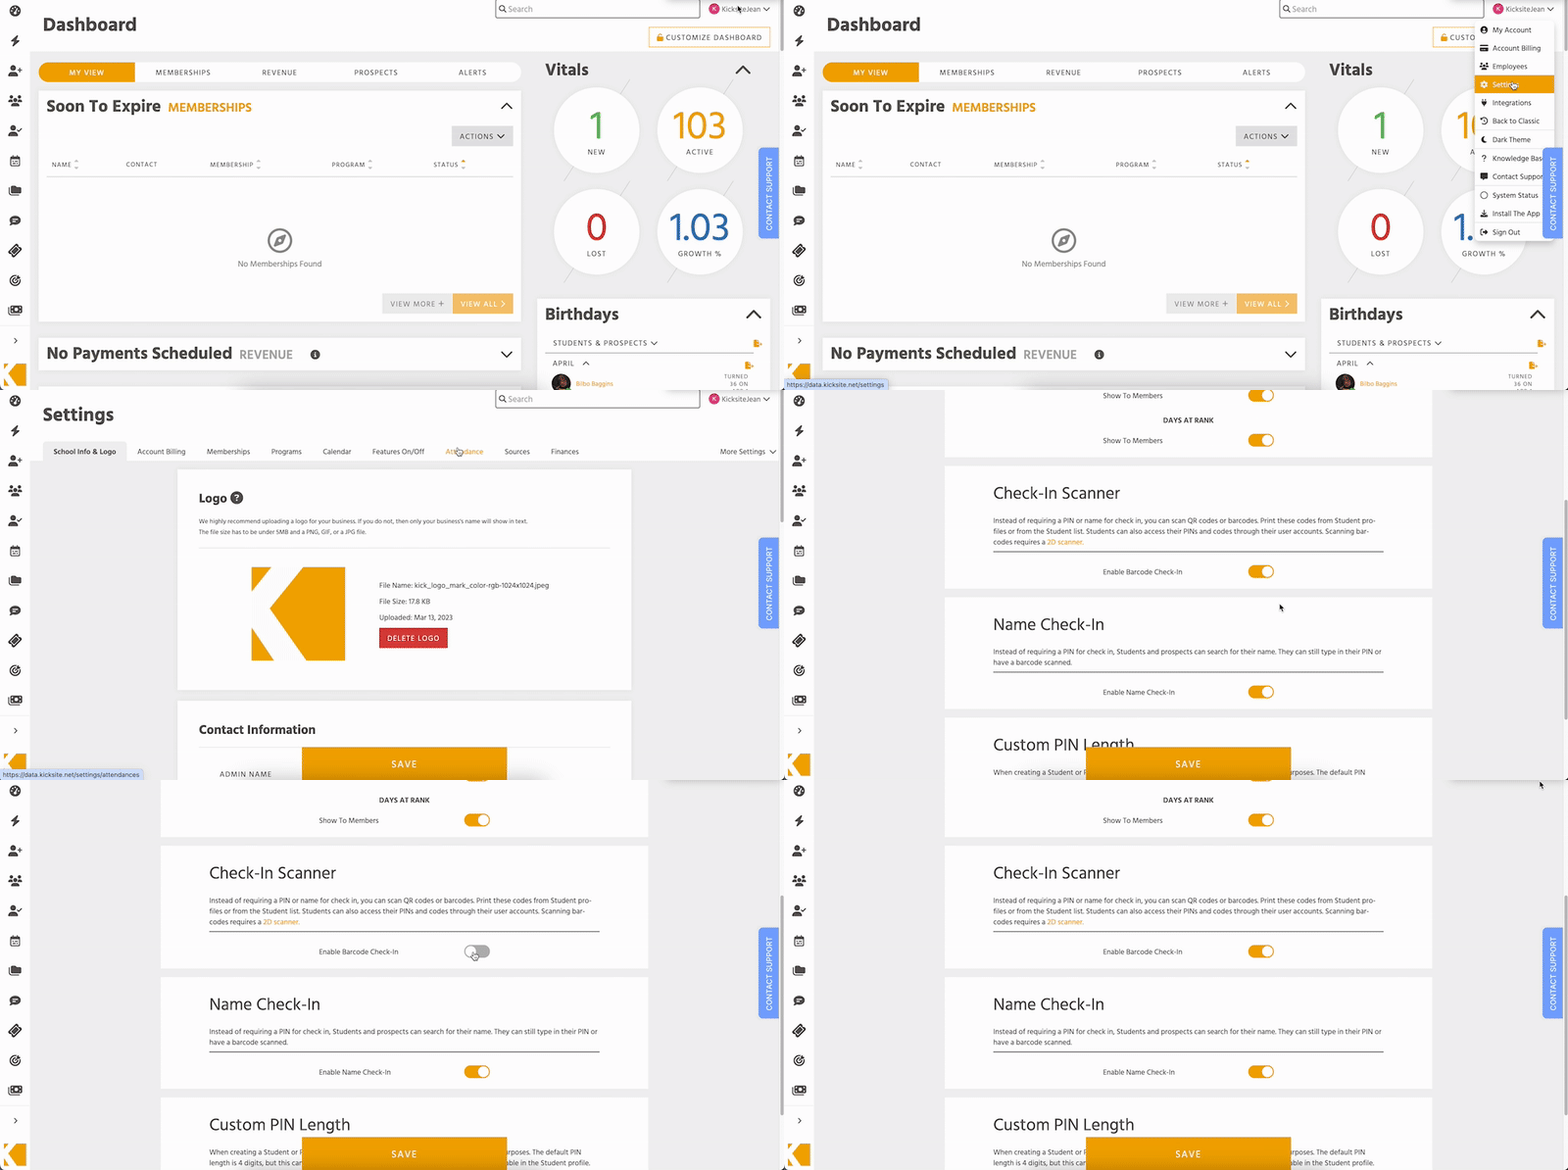
First: Enable barcode check ins
1. Click your username in the upper-right corner and then click Settings.
2. Click the Attendance tab.
3. Toggle the Enable Barcode Check-In setting to on (highlighted).
4. Click Save.

To print barcodes or QR codes for all active students
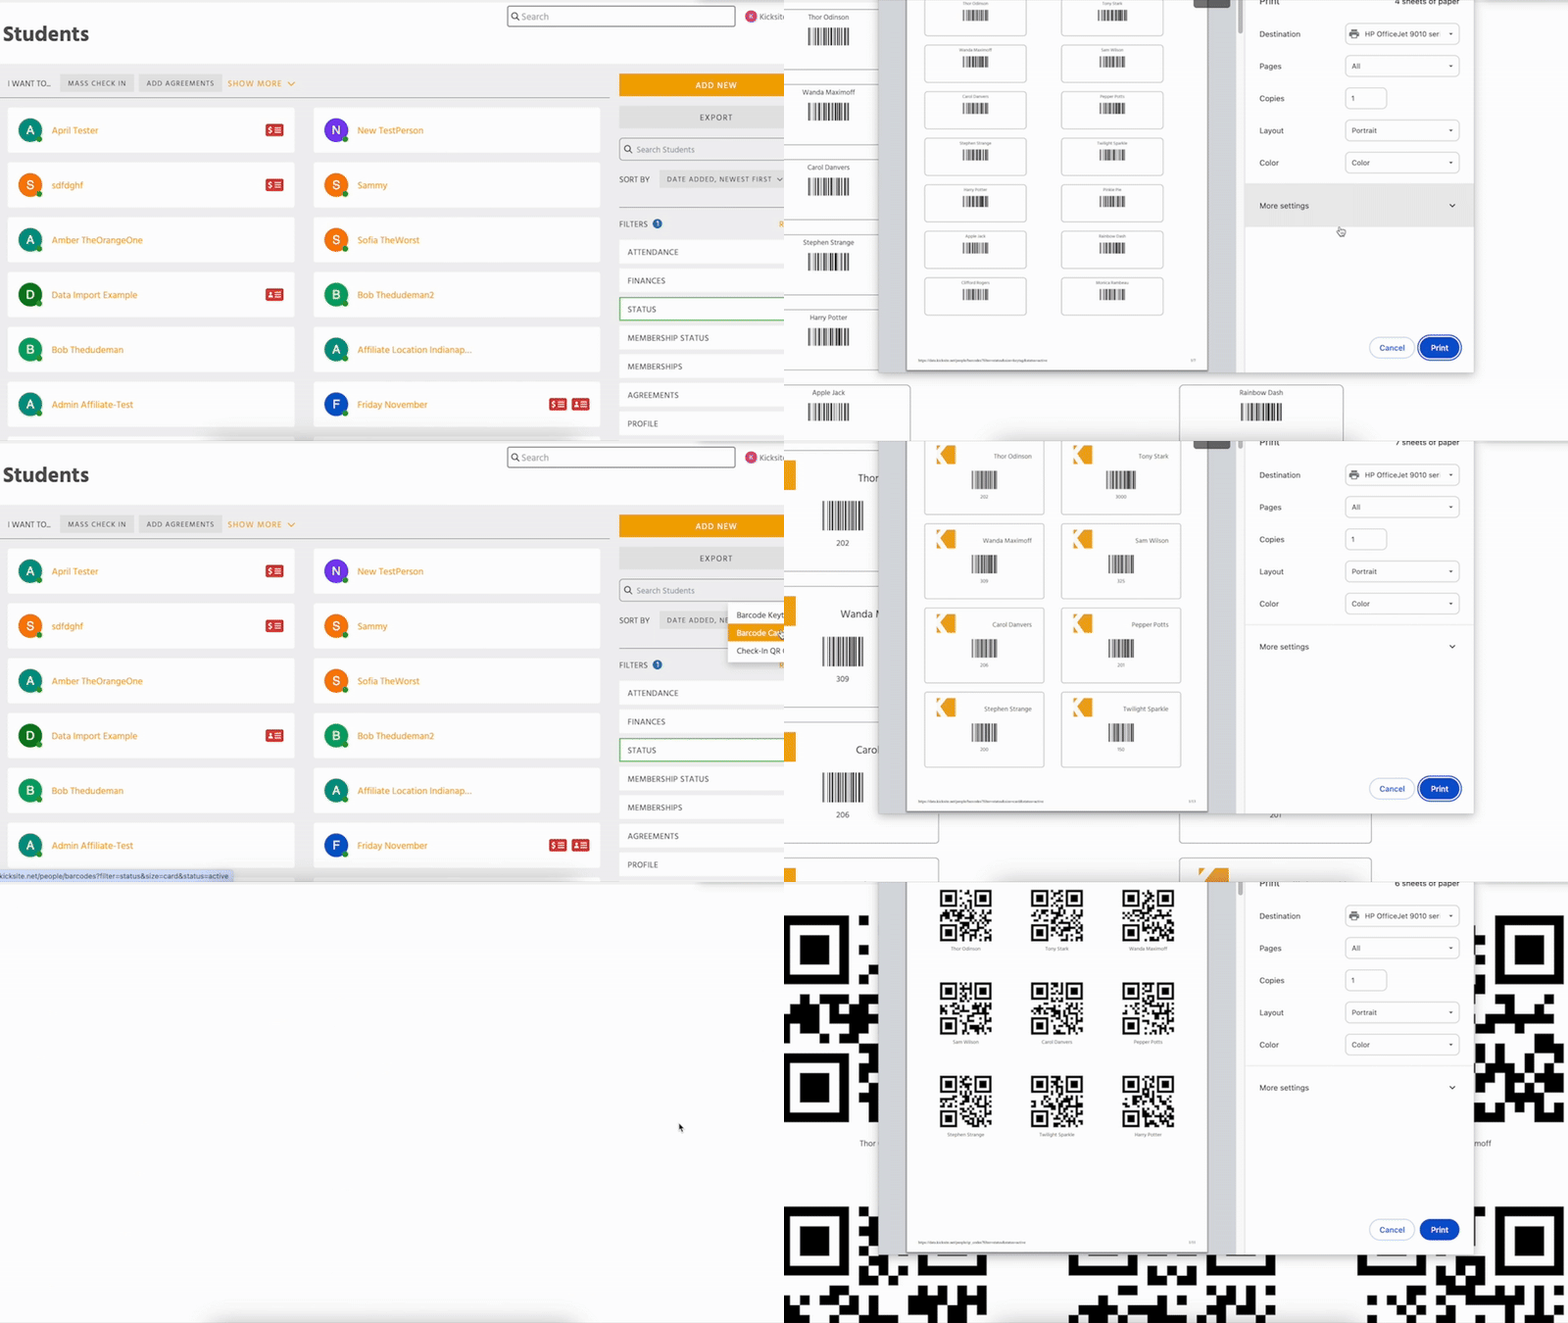
1. On the left panel, click Profiles and then Students to go to the Student List.
2. Click the three vertical dots (just to the right of the Sort By drop-down list) and then click Barcode Cards, Barcode Keytags, or Check-In QR Code.

- Barcode Keytags creates a page with smaller barcodes that are the size of a keytag; the tags contain the student’s name and the barcode. (See the GIF image above.)
- Barcode Cards creates a page with business-card size barcodes. The cards include your school’s logo, the student’s name, the barcode, and the student’s PIN. (See the GIF image above.)
- Check-In QR Codes creates a page with QR codes. The cards include the student’s name and QR code.
3. (If you don’t see a Print window, use your browser’s Print command.) If needed, make adjustments in your browser’s Print window. For example, most browsers have More Settings that enable you to remove the header and footer text from the printed pages.
4. Click Print to print out the cards or keytags.
If you have a laminating machine or self-sealing pouches, you can laminate the cards or keytags. A printing service store or office supply store typically offer laminating services as well.
To print a barcode or QR code for an individual student
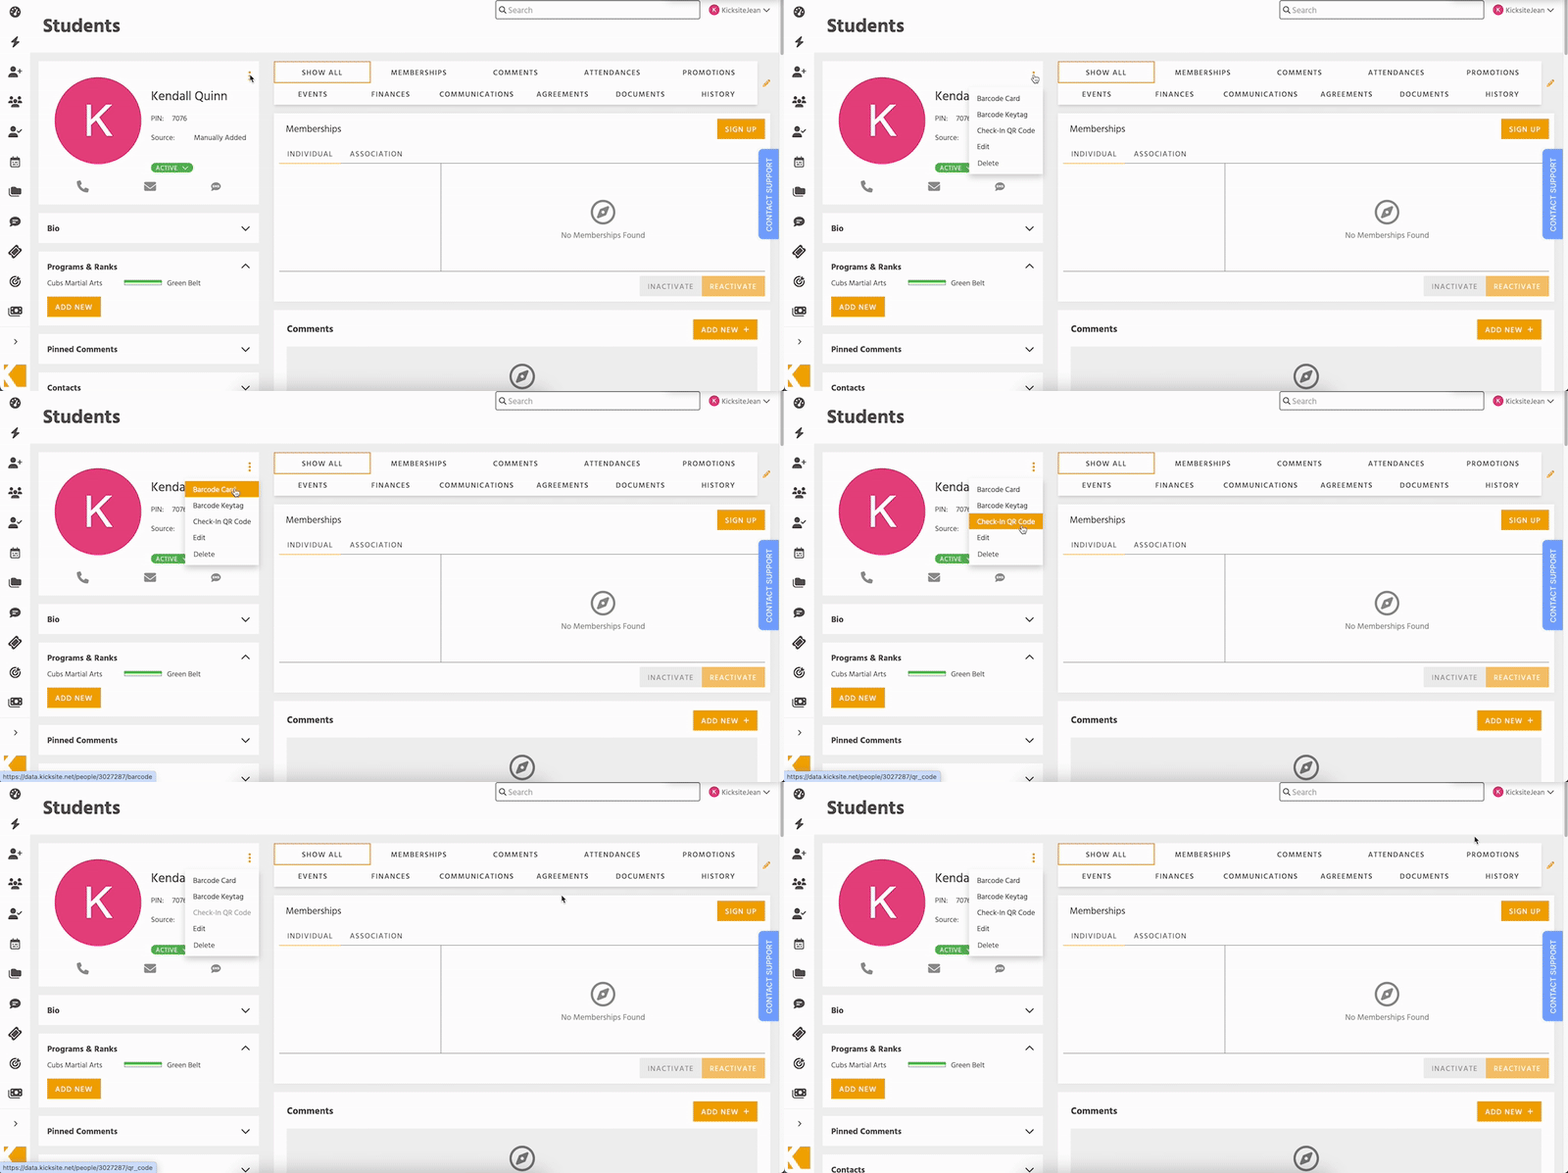
1. Go to the student’s profile by either searching the student’s name in the Search field, or by finding the student’s name in the Student List and clicking their name.
2. Click the three vertical dots above and to the right of the student’s name (the top-right corner of the left column). Click Barcode Card, Barcode Keytag, or Check-In QR Code.

- Barcode Card creates a page with a business-card size barcode for the student. The card includes your school’s logo, the student’s name, the barcode, and the student’s PIN.
- Barcode Keytag creates a page with a smaller barcode that is the size of a keytag; the tag contains the student’s name and the barcode.
- Check-In QR Code creates a page with a QR code for the student. The card includes the QR code and the student’s name.
3. If needed, make adjustments in your browser’s Print window. For example, most browsers have More Settings that enable you to remove the header and footer text from the printed pages.
4. Click Print to print out the card or keytag.
If you have a laminating machine, you can laminate the card or keytag.