Kicksite Knowledge Base
How to Use Mass Check In
Mass Check In is an easy way to record attendances for many students at once. Using it instead of the Kiosk Check In screen is helpful when you have a roster of students, you’d rather not use the kiosk, or you’re recording a past class.
You can choose any date or time for the check in. For example, you can retroactively add attendances for a morning class at the end of the day.
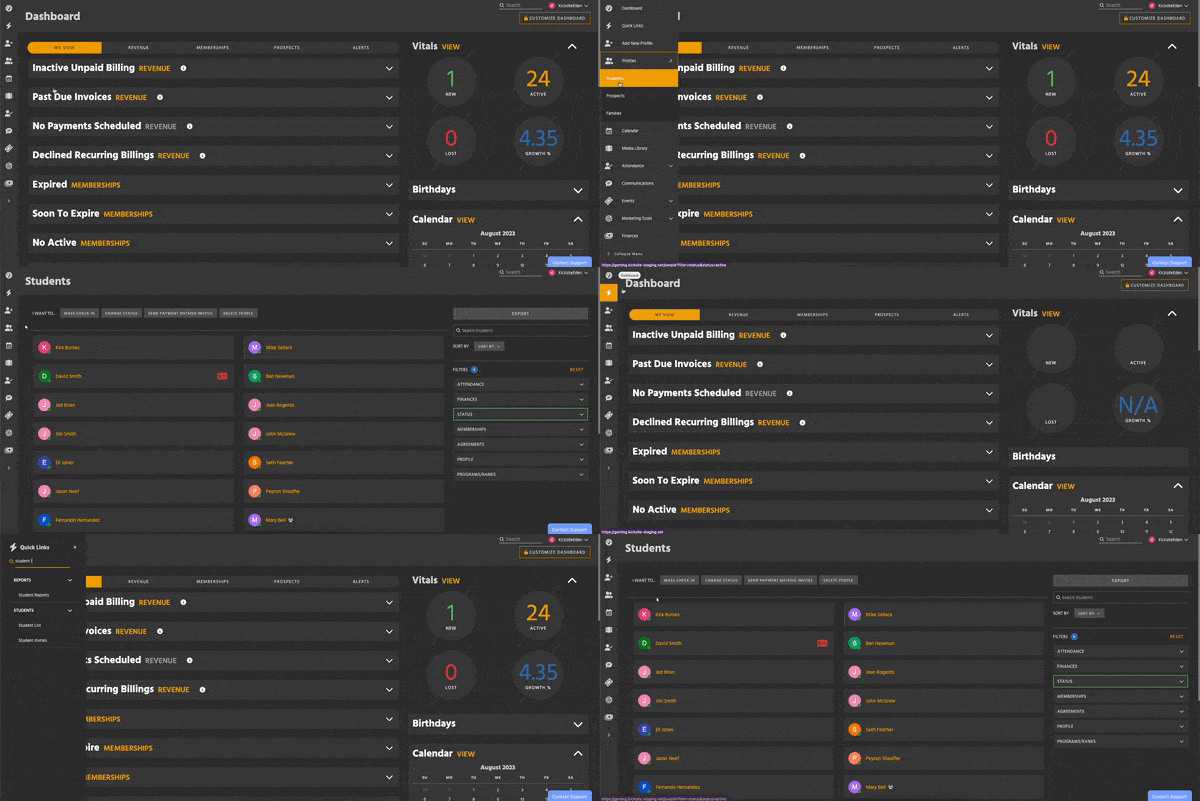
Before you can use Mass Check In, navigate to the Student List. All filtering options available on the Student List can be used to narrow down the students you’re checking in.

Using Mass Check In
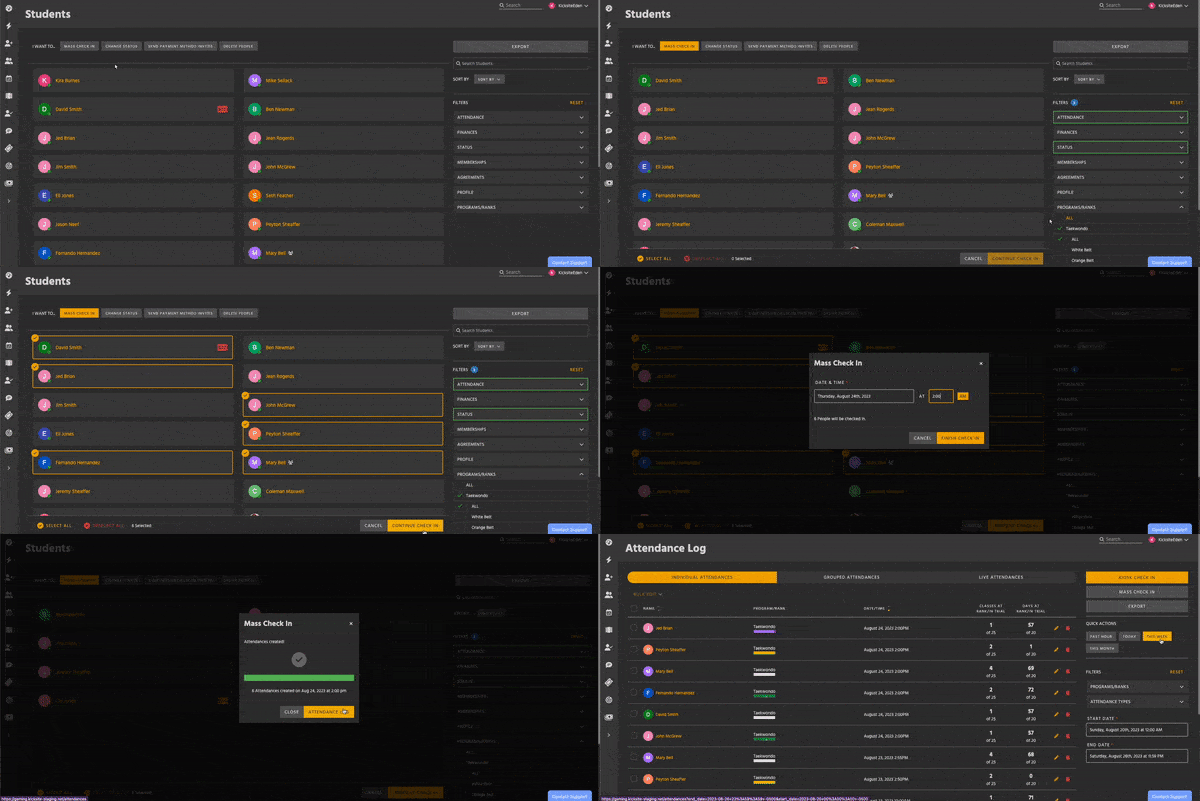
- Select the Mass Check In action. This applies two filters:
- Active status – Only active students can check in.
- Not Checked In Today – Students who have already attended today are removed by default, to make your selection easier. Remove this filter if your students attend more than one class a day.
- Select at least one Program from the filters on the right side of the screen.
- When selecting a program, all of its ranks are also selected. Click on individual ranks to select them instead.
- Select the people you want to check in by clicking on the cards behind their names, or use Select All.
- Selected cards have an outline and checkmark.
- Clicking a card a second time will de-select it. There’s also a Deselect All button for convenience.
- Click Continue Check In.
- On the confirmation screen, choose a date and time. If any students have more than one program, choose from the drop-down menu.
- Click Finish Check In. The final screen shows the check in’s progress. Anyone that couldn’t be checked in will be listed, with the reason why.
- You can close this screen at any time without canceling the action.
- You can also navigate to the Attendance Log.
