How to Use the Attendance Log
The Attendance Log shows check in history for the students and prospects at your school. Filters allow you to customize the date range or programs you’re viewing. You can also use the new Live Attendances tab to see check ins as they happen.

Understanding the Log
There are three different tabs in the Attendance Log: Individual Attendances, Grouped Attendances, and Live Attendances.
Individual Attendances
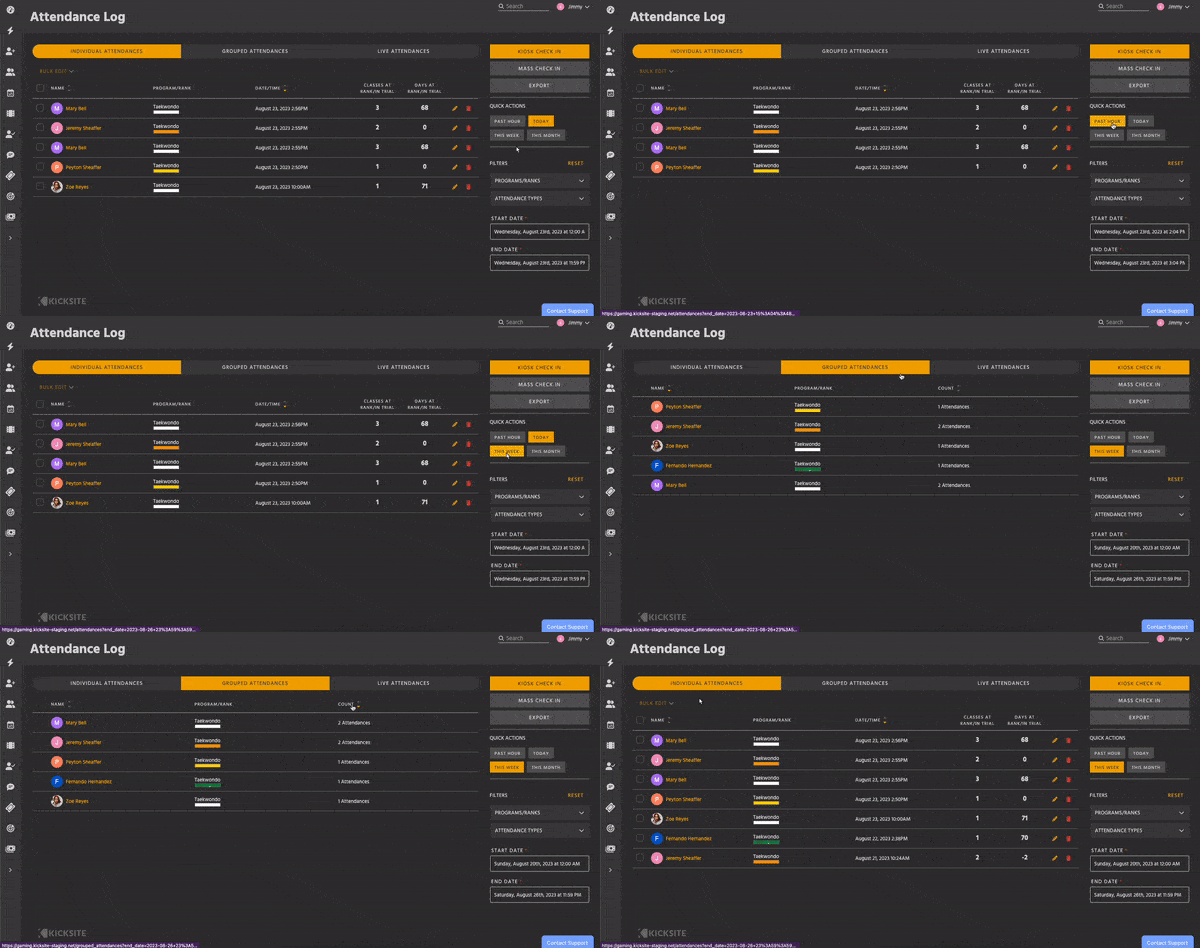
This tab is a chronological list of all check-ins by students and prospects. By default, the most recent attendance is at the top, but you can sort by date/time or name.
- The Quick Actions filters let you quickly pick a time period to look at. You can also use the Start and End Date boxes.
- The Programs / Ranks filter is identical to the one on the Student List. By default, all programs and ranks are included, but you can easily narrow it down to several results.
- The Attendance Type filter allows you to view both student and trial attendances, or just one type.
Grouped Attendances
If you want a big picture view of each student’s attendance habits, use the Grouped Attendances tab. It shows how many times a student has checked in at each rank they have.
- For example, if viewing this month, a student promoted halfway through would be listed twice – once with their number of attendances as a white belt, and again with their attendances as a yellow belt.
- Grouped Attendances is helpful when looking at large ranges of time, especially to see if attendance habits change at different ranks.
- Prospects and their trial attendances aren’t listed in Grouped Attendances because they don’t have a program or rank.
Live Attendances
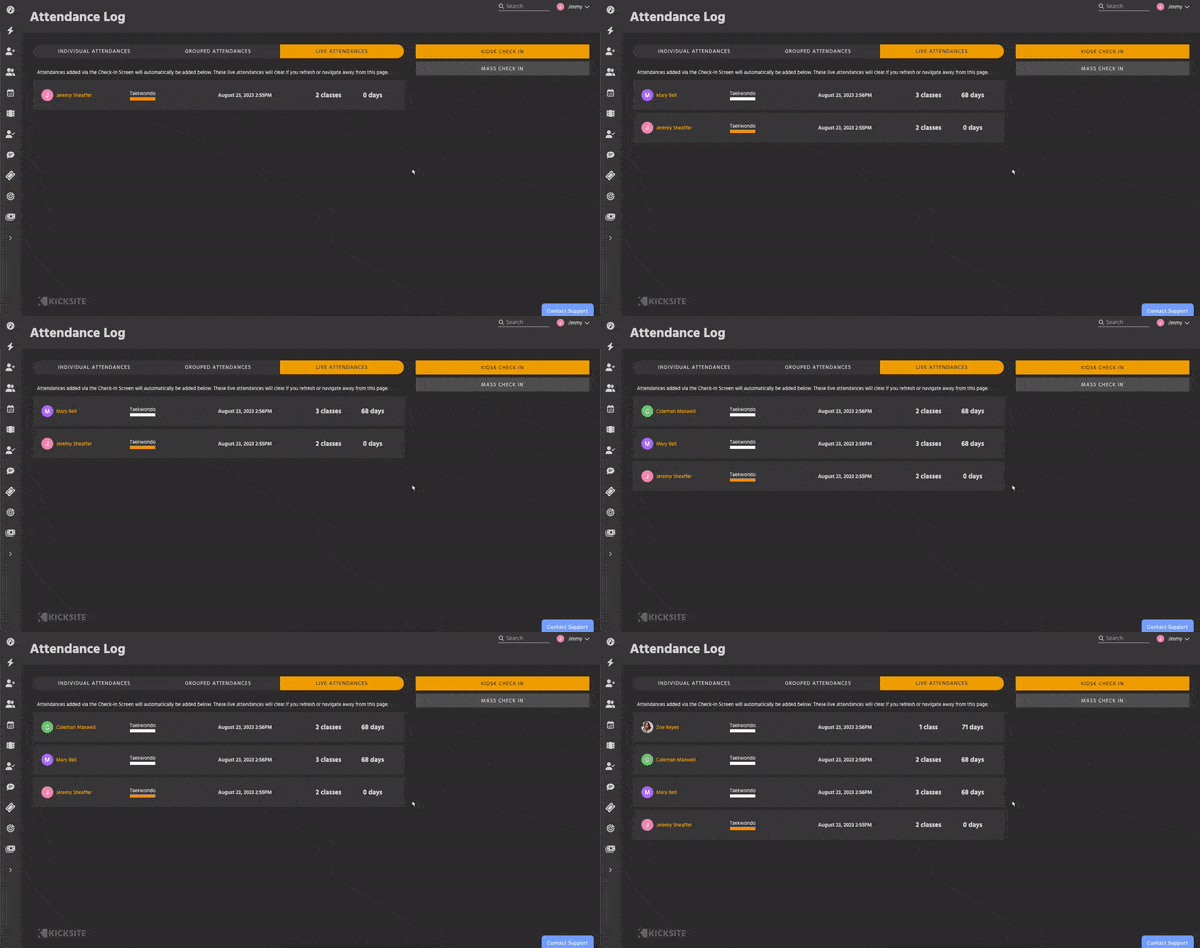
For schools that use the Kiosk Check-In Screen, Live Attendances shows who is checking in exactly as it happens. Without needing to refresh the page, you can view each student and prospect that attends class.
- Navigating away from Live Attendances or refreshing the page will clear it; however, all attendances are still visible in the Individual Attendances tab.
- For security reasons, your Kicksite session will time out after 2 hours, which will require you to log in again. This will also reset the Live Attendances view.

Actions on Attendance Log
In addition to the filters in the Individual Attendances and Grouped Attendances tab, there are several other options on the Attendance Log:
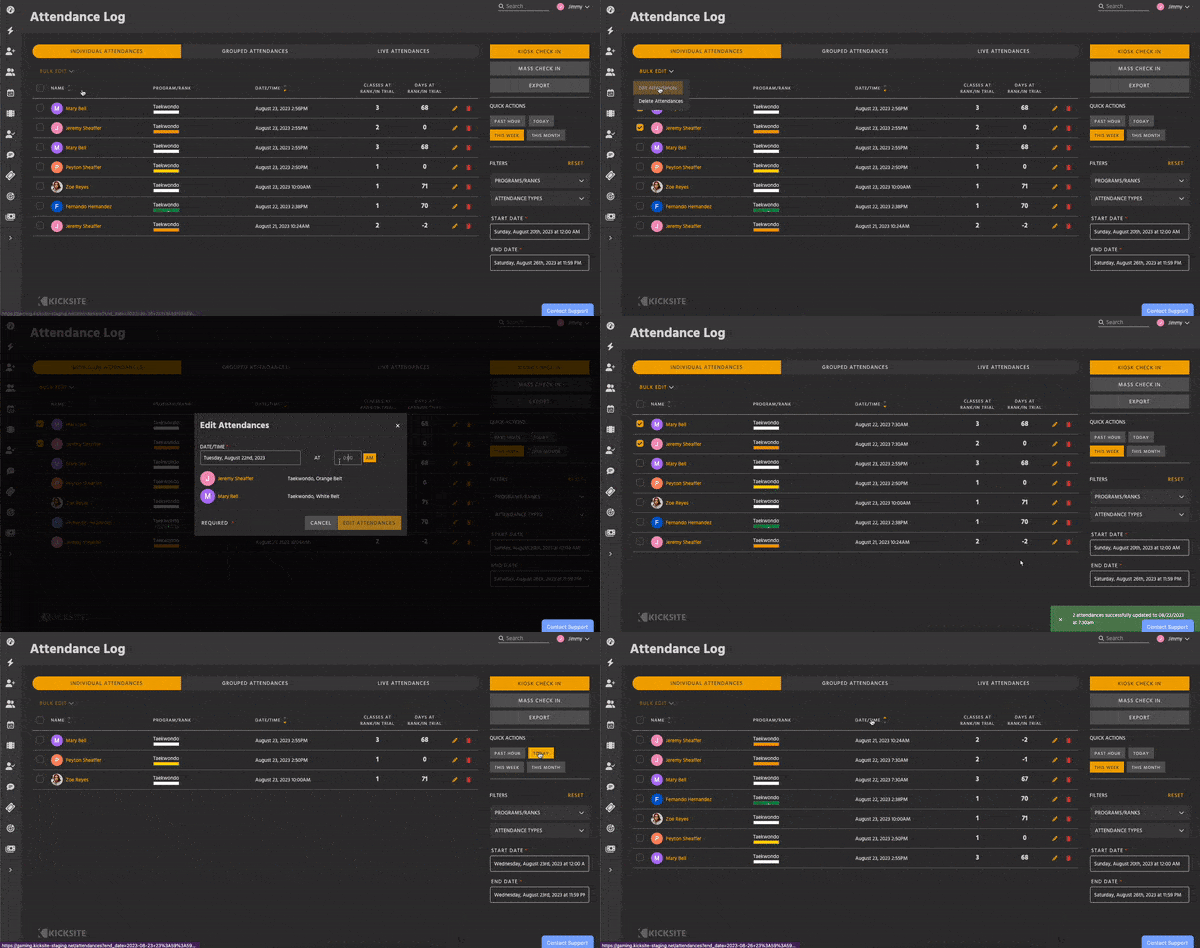
Bulk Actions let you select one or more attendances, which can be edited or deleted.

Clicking Kiosk Check In redirects you to that page.
- Please note that for security reasons, this signs you out of your Kicksite account. You’ll need to re-enter your login information to access Kiosk Check In.
Clicking Mass Check In redirects you to the Student List with the Mass Check In action selected. To learn about how Mass Check In works, read here.
Clicking Export downloads a .csv of the data you’re currently looking at. This data can then be opened in Excel or another spreadsheet application.
- Any filters or date range you’ve applied will also apply to the export.