How to Create a Lead Capture Form
A Lead Capture form enables prospective students to fill in a simple web form on your website. This form might be a request to schedule a trial class or a form to request more information about your school. When someone fills in the form and submits it, the information they enter is brought into your Kicksite account as a new prospect.
To create a new Lead Capture Form
1. On the left panel, click Marketing Tools and then click Lead Capture Forms.
2. Click the Create New button.
3. Click in the Name field and add a descriptive title for the new form.
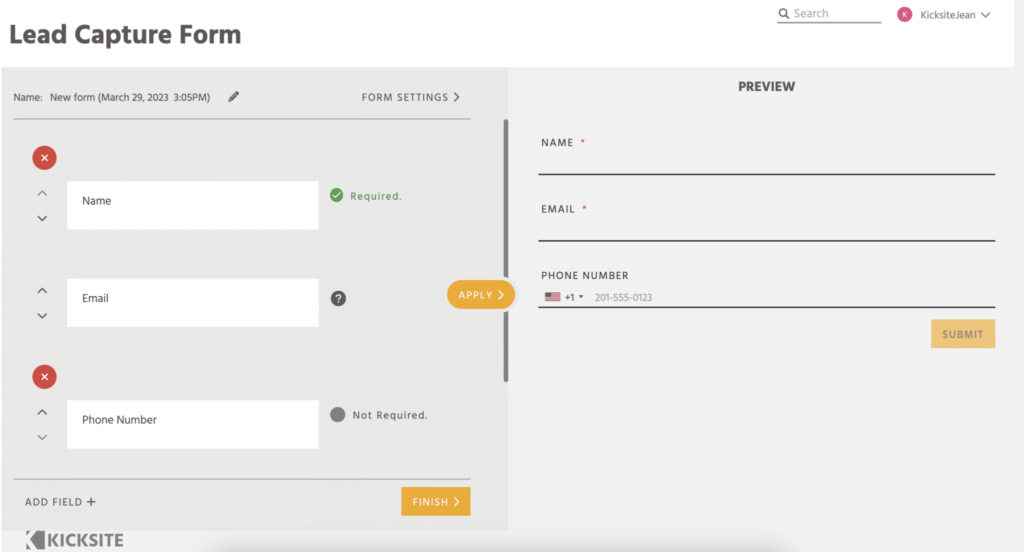
4. (Optional) Click Form Settings to review and update settings:
- Select if want the information submitted from the form to be stored as a prospect (toggle off if you do not; keep it on if you do).
- Select an option from Source if you’d like to see a specific source on the created prospects.
- Select the colors you’d like to use for the form.
- Select if the confirmation should go to a web page and if so, enter the URL.
- Select if the form should use Quick Connect.
5. To add a field to the form, click the Add Field button. Choose which field to add from the list.
6. (Optional) To add a custom field, click the Add Field button and click Create Custom Field. In the field that appears in the form, type a name for the new custom field and then click the Create button.
7. You can make adjustments to customize your form:
- To make a field required, click the Not Required toggle next to the field name. (Note that the name and email fields are required by default.) Required fields are indicated in the preview and on your website with an *.
- To remove a field, hover the cursor over the field and click the red X that appears in the upper-right corner.
- To change the field’s order on the form, click the up or down arrow to the left of the field name.
- To see what the form will look like on your website, click Apply to update the preview.
8. When you’re happy with the form, click the Finish button.
After you create the Lead Capture form, consider creating a Landing Page to provide more information about the form and what a prospect is signing up for. You can share the Lead Capture Form. Also, consider some of the tips to nurture your prospects.