How to Pay an Open Invoice
If a student has one or more open invoices (that they haven’t paid or have only partially paid) or past due invoices, you can take a payment for the open balance to get the student caught up on their payments.
How to pay open or past due invoice(s)
You can take a payment for part or the total balance of open or past due invoices from the student’s profile page or from the Finances page.
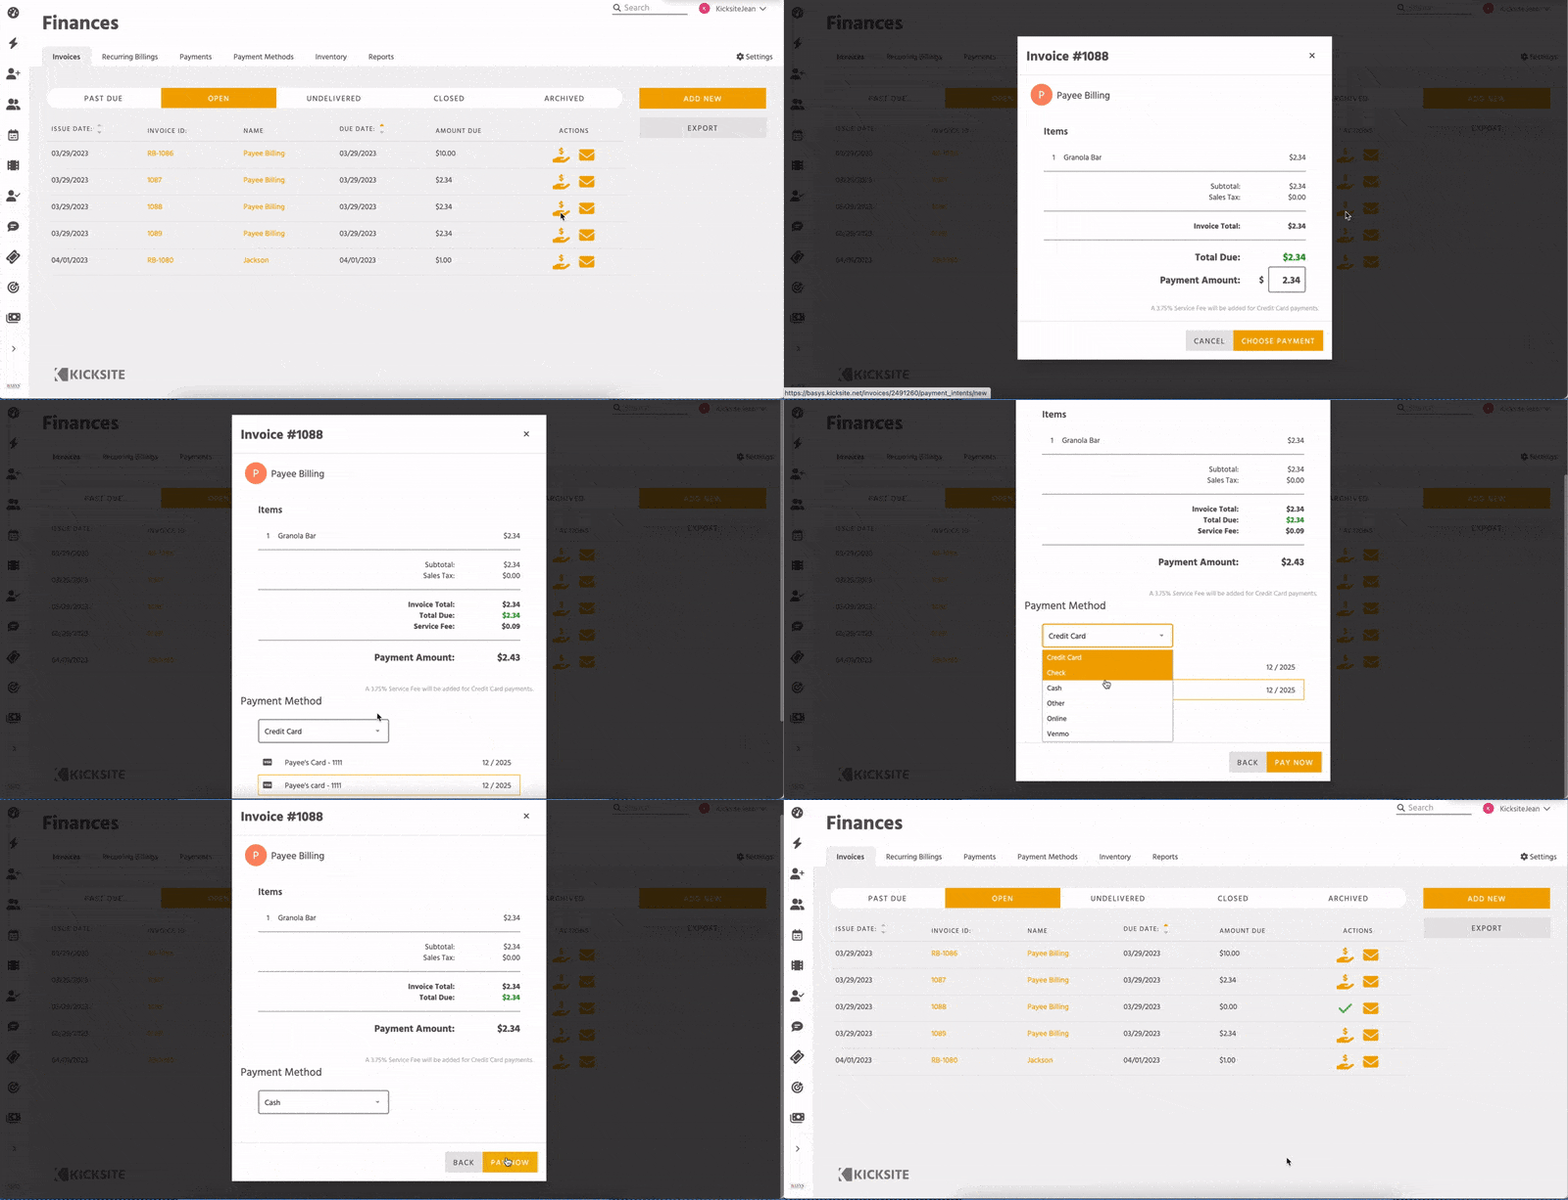
1. From the student’s profile: Find the invoice in the Finances module – it can be in Open or Past Due status – and click the Pay icon. From the Finances page: Make sure you’re on the Invoices tab and then click the Open tab or Past Due tab. Find the invoice. Click the Pay icon.
Alternatively, if you want to review the invoice, you can click the Invoice ID number; when you’re ready to pay the invoice, click the Pay button on the invoice.
The rest of the steps are the same, whether you started from the student’s profile or from the Finances page.

2. (Optional) If you’re taking a partial payment, enter the amount paid in the Payment Amount field. (The default is to pay the full balance of the invoice.)
3. Click the Choose Payment button.
4. Click the Payment Method drop-down list and select the desired option. If you chose Credit Card and the student has more than one Payment Method saved, select the correct card. (Note: If you do not process payments with Kicksite, you can choose a Payment Type, but you will not be able to add or select a Payment Method, or charge the invoice to a card or ACH.)
5. Click the Pay Now button.
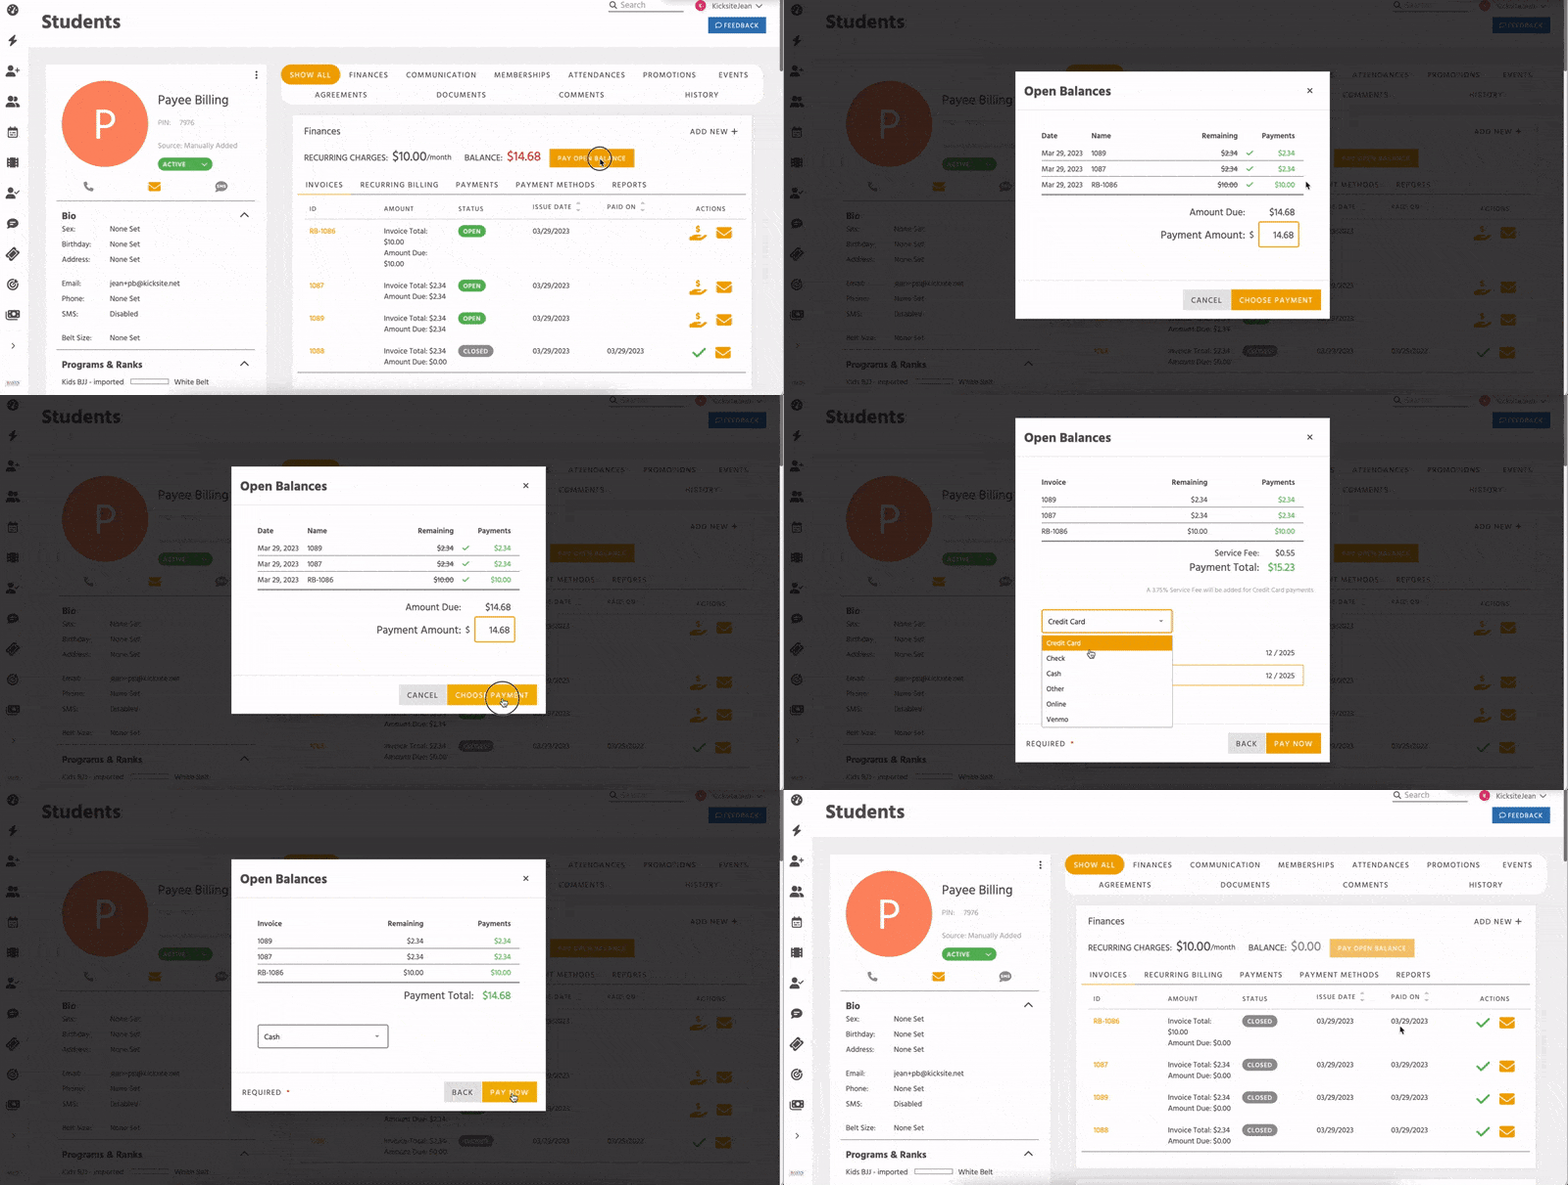
If the student has more than one open or past due invoice, on their profile page, you can click the Pay Open Balance button at the top of the Finances module to collect payment for all unpaid invoices. After you click Pay Open Balance, follow Steps 3 through 5.

If the student pays the full amount, the invoice changes to Closed status. If any balance remains, the invoice remains in Open status.
If the student has multiple open or past due invoices and makes a partial payment, the partial payment will be applied to the oldest invoice first, then the next oldest, and so on. For example, if the student has three open invoices for $100 each, and they pay $250, the payment will fully pay and close the two oldest invoices (shown in green) and partially pay the last invoice, leaving it open with a $50 balance (shown in yellow).