How to Use Groups for Communications
When you send a general announcement, you can select to send the message to a group (as well as to students or prospects by status or by program and rank). Groups can be helpful if you need to communicate regularly with a subset of your school’s students, prospects, or employees. Some examples would be assistant instructors, a demo or competition team, or even students and parents who regularly volunteer to assist with events.
Click the following link to watch the video that shows how to create a new group.
First Steps
Make sure you have email addresses entered on the student, prospect, or employee profiles. If you want to text the group, make sure that student, prospect, or employee has SMS text enabled and a valid mobile phone number entered.
How to create a new group:
1. Click Quick Links on the left panel, click Communications, and then click Groups. (Alternatively, click Communications in the left panel. Hover over Settings and then click Groups.)
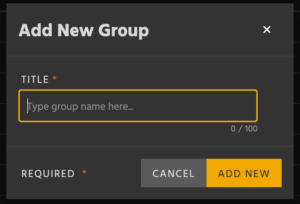
2. Click the Create Group button.
3. Type a name for the group in the Title field, and then click the Add New button.
4. In the field below Add People, start typing the person’s name who you wish to add to the group. Click the correct name in the search results.
5. Repeat step 4 until you have added all the members you wish to the group.
To edit a group:
1. Click Quick Links on the left panel, click Communications, and then click Groups. (Alternatively, click Communications in the left panel. Hover over Settings and then click Groups.)
2. Click the name of the group you want to update.
3. You can then edit the group or members:
- To change the group’s name, click the three vertical dots and then click Edit. Type the new name and then click the check mark.
- To delete the group, click the three vertical dots beside the group’s name and then click Delete. Click the Delete button to confirm.
- To remove a person from the group, click Remove to the right of their name. (You can add them back in by typing their name in the Add People field.)
4. Click Back to Groups List if you need to edit another group.

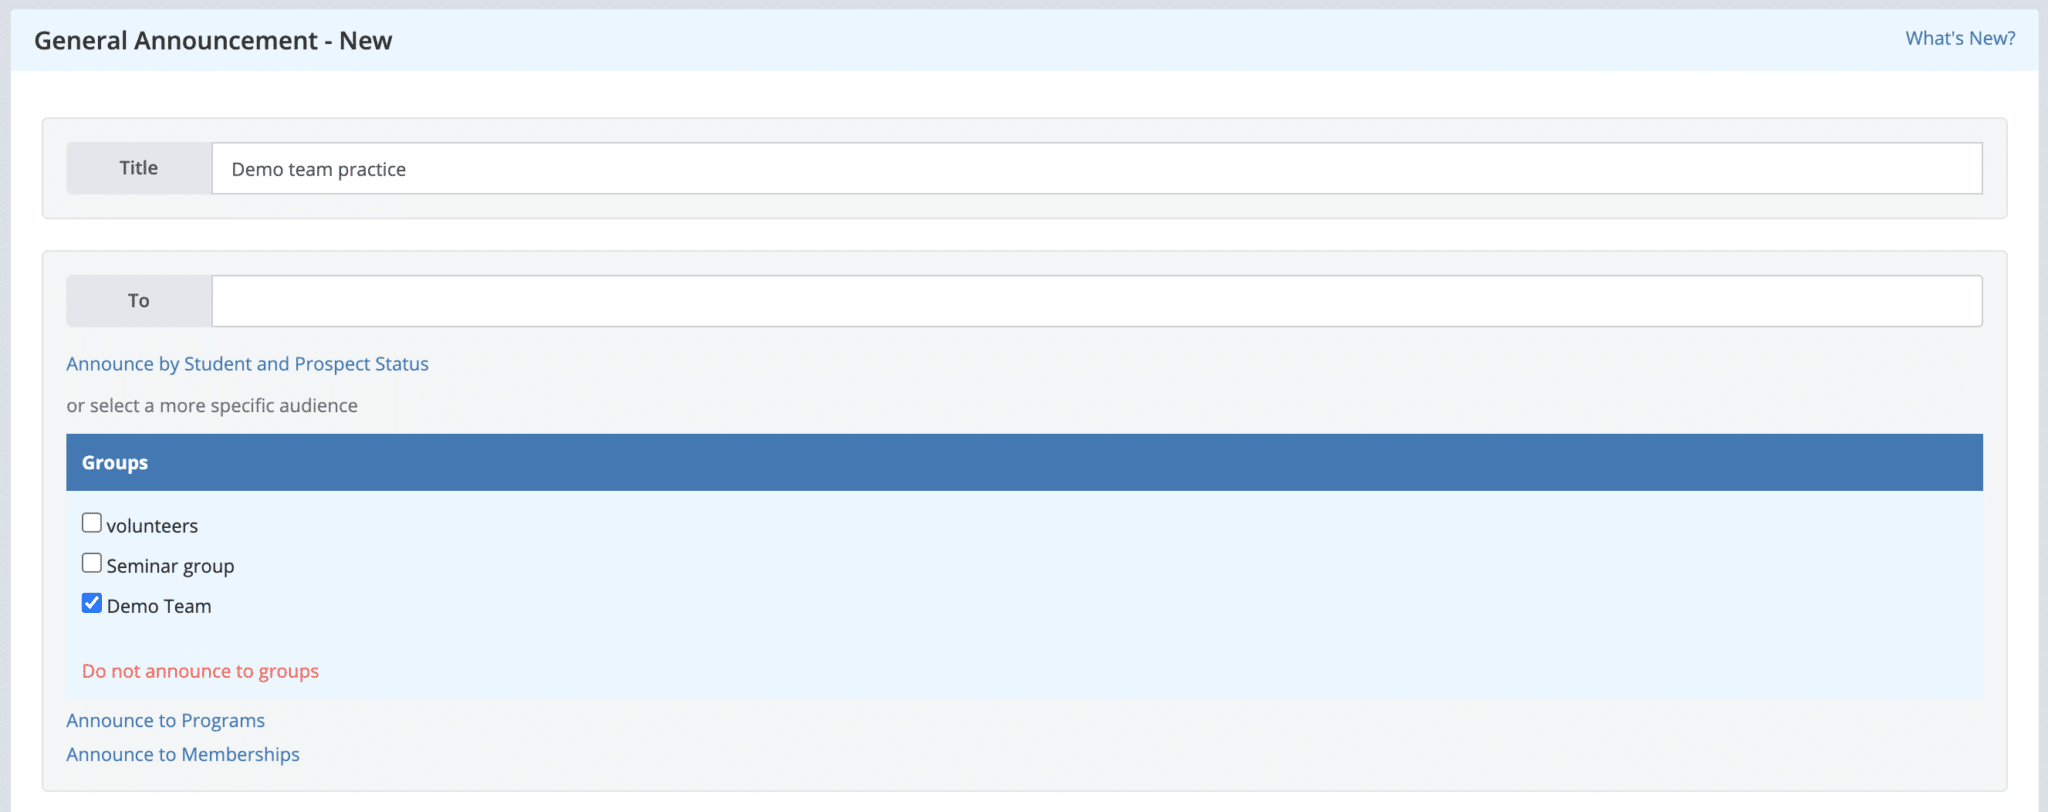
After you have added at least one person to a group, you can then use the group to send announcements. Under To, click the Announce to Groups link, and then select the check box(es) next to the group(s) you want to communicate with.
What’s Next?
After you have added a group (or maybe several), you can create a general announcement template and send a general announcement.