How to Update Attendance Settings
The Attendance tab on the Settings page enables you to choose which attendance features you wish to see or use. Read on for details!
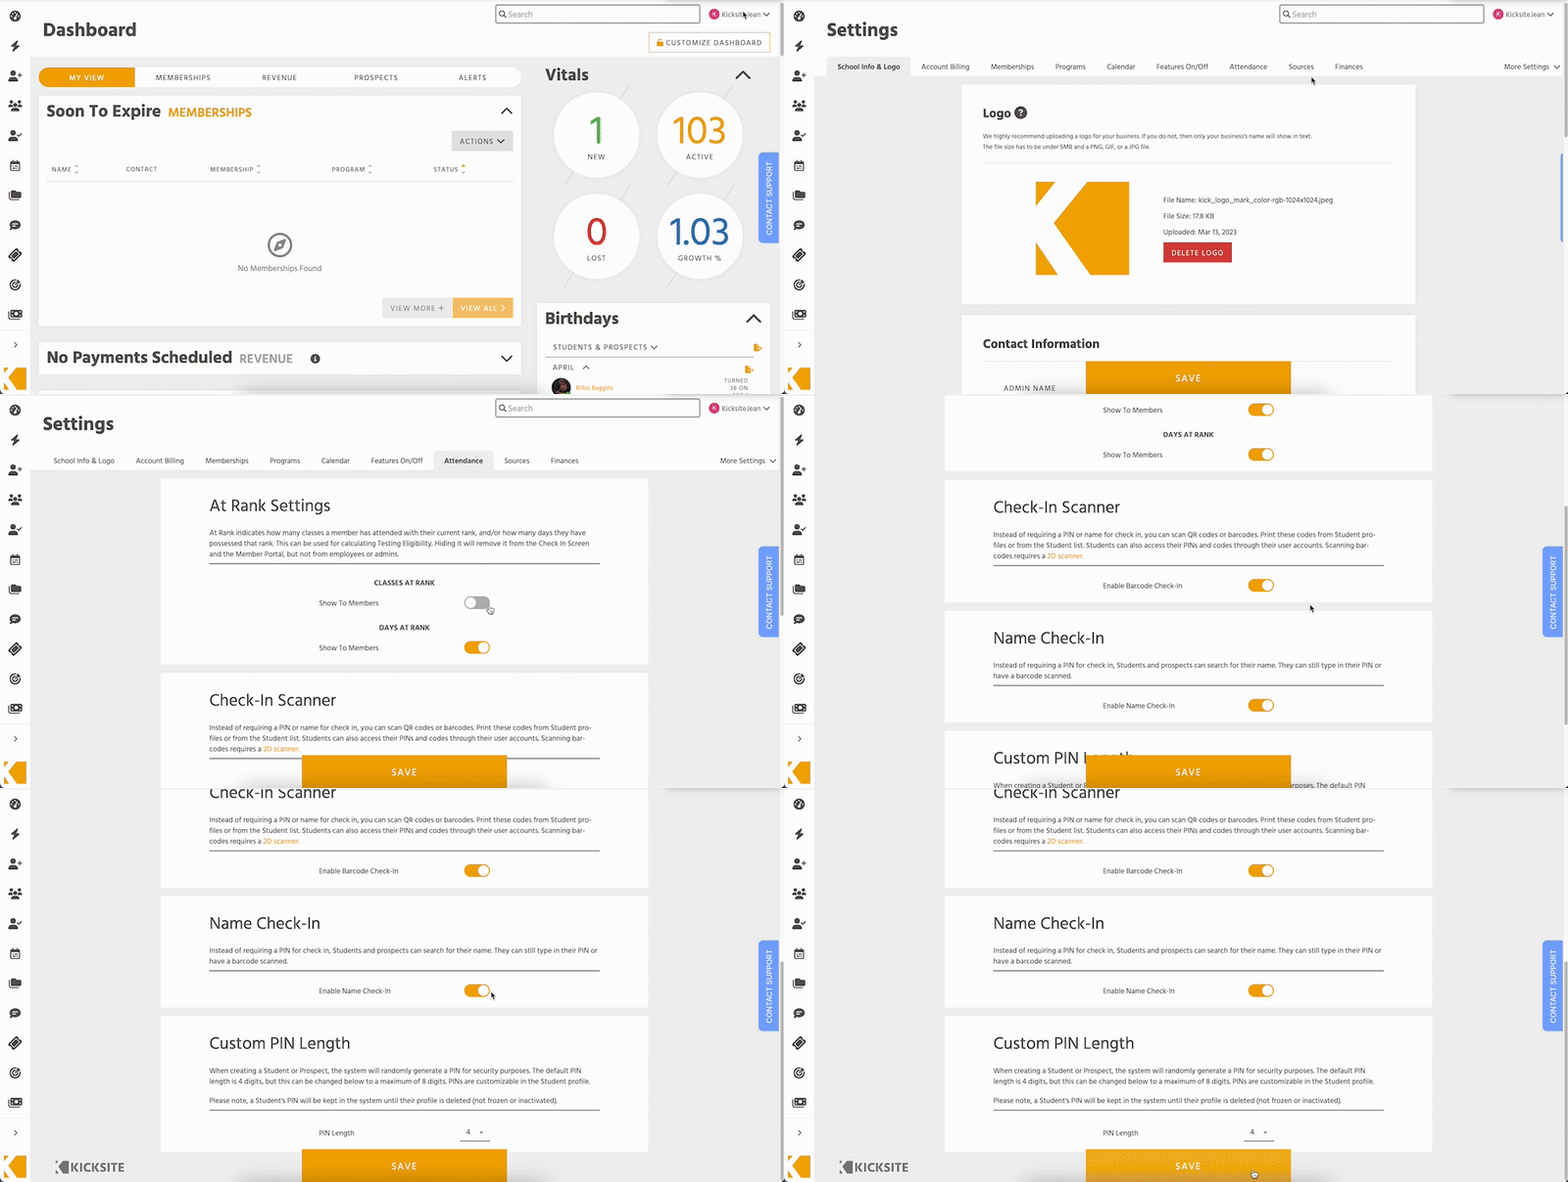
To view the Attendance settings
1. Click your username in the upper-right corner, and then click Settings.
2. Click the Attendance tab.

At Rank Settings
In the At Rank Settings section, you can choose to show or hide the number of classes and/or how many days students have been at their current rank. If you toggle off the Classes At Rank and/or Days At Rank option, students will not see these on the Kiosk Check In screen or in their Member Portal.
Note that whether you toggle these options on or off, employees and administrators can still see the attendances on the Student Profile page. Employees and admins also can still see the students in the Eligible to Test page as well.
Make sure you click the Save button if you change either or both of these settings.
Check-In Scanner
Toggle on the Enable Barcode Check-In option if you want to use barcodes for student check in. Remember to click the Save button if you change this option.
If you’d like to use barcodes for attendance, be sure to read the articles on how to print barcode labels and how to use a scanner for attendance.
Name Check-In
You can enable students to type their name to check in on the Kiosk Check In screen.
Toggle the Enable Name Check-In option to On (orange), and then click the Save button.
Note that if you enable this option, students can still type in their PINs to check in for attendance on the Kiosk Check In screen.
Custom PIN Length
By default, a student’s PIN number (the ID number they use to check in on the Kiosk Check In screen) will be 4 digits long. This means that each student receives a random PIN of 4 digits when you create a new student. (You can change the PIN if needed; just remember that the PIN needs to be unique.)
If you desire, you can select a different length (between 4 and 8 digits) from the PIN Length drop-down list. For example, if you select 6, all new students will receive a random, 6-digit long PIN when you create them. (Note that students that you previously created or that were imported will NOT have their PINs changed if you update the default PIN length.)
If you change the PIN Length drop-down list, remember to click the Save button.