How to Sign Up and Use Quick Connect
Quick Connect is a new feature that you can add to a Landing Page. When a new prospect enters their information on that Landing Page, you will receive a text message. From the text, you can immediately text the prospect or call them.
If you haven’t already created a Landing Page, you may want to do so first. After you have enabled Quick Connect (see the following steps), you can add Quick Connect to a new Landing Page or an existing Landing Page.
To enable Quick Connect
1. Click your username in the upper-right corner, and then click Integrations on the menu.
2. Click the Quick Connect icon.
3. In the dialog box that pops up, enter the required information and then click the Submit button.
4. In the dialog box that appears, click the X button to close it.
A Kicksite team member will follow up with you to let you know when Quick Connect is ready to use.
After Quick Connect is enabled in your Kicksite account, you can add it to a Landing Page to receive a text notification as soon as a new prospect signs up.
To add Quick Connect to an existing Landing Page
1. In the left panel, click Marketing Tools, and then click Landing Pages.
2. In the list of already created Landing Pages, click the Edit link on the page you want to add Quick Connect to.
3. Click Page Settings.
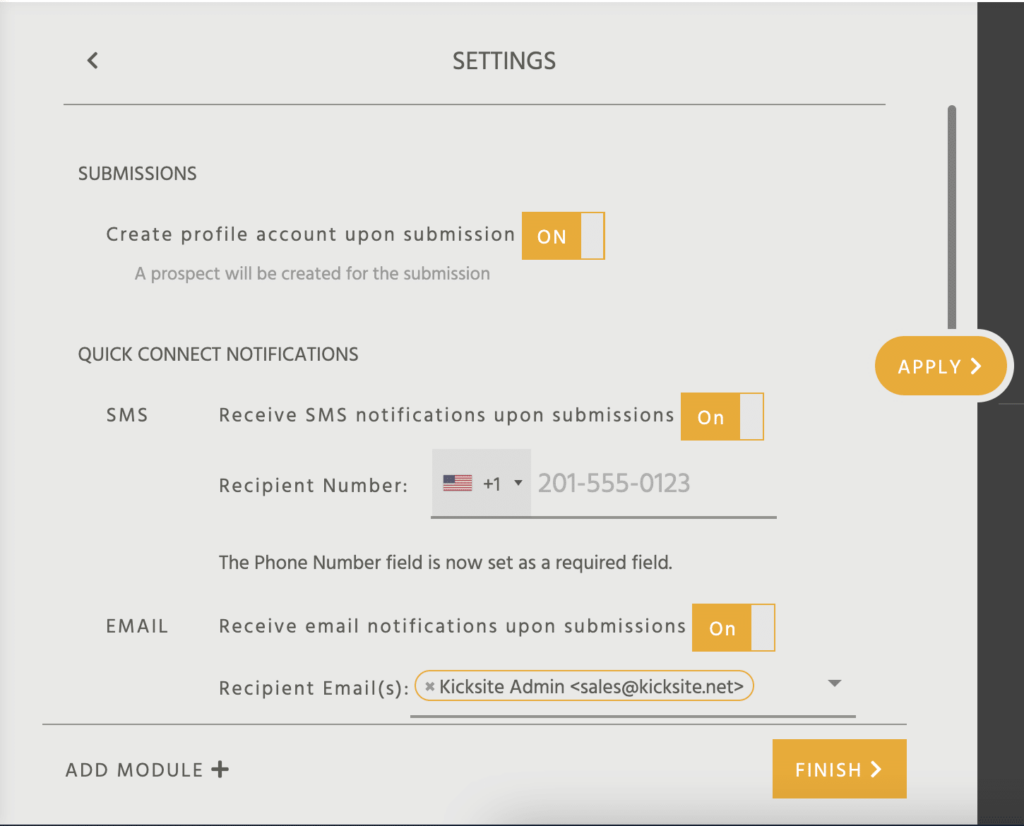
4. Under Quick Connect Notifications, click the Off toggle next to SMS Receive SMS Notifications upon Submission.
5. In the Recipient Number field, type the mobile number you want to receive the text messages.
6. Click the Finish button to update the Landing Page settings.
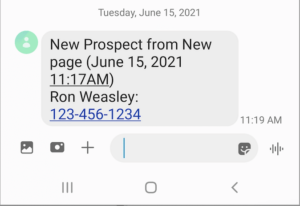
You will now receive a text message at the phone number you entered when a new prospect enters their information in that Landing Page. Tip: Make sure you add a Phone field in your Lead Capture Form. You may want to make that a required field to ensure that you will have a phone number to call or text in the Quick Connect text message you receive. (The screenshot below is from an Android phone; it may look slightly different on an iPhone.)
Note that you will not receive a text for any prospects that entered information before you enabled Quick Connect and entered a phone number in the Landing Page settings.
When you receive the text message notifying you that a new prospect entered their information on your Landing Page, you can follow up with them via text or phone call. You might consider some of the tips to nurture your leads as well.