How to Activate a Message Flow
Message flows are a functional, stepped communication program that allows a studio to set up multiple communications for prospects or students. An example message flow for a prospect might be to send a welcome message after they sign up on your website, and a few days later, to send a message with details about trial membership options.
After you’ve created a new message flow or a message flow template, you need to add at least one step to activate the message flow.
First steps
First, you need to create a Message Flow Template.
If you want to send a single message based on one topic, such as an expired membership or absent student, set up an Automated Message.
To add steps to the message flow and activate it:
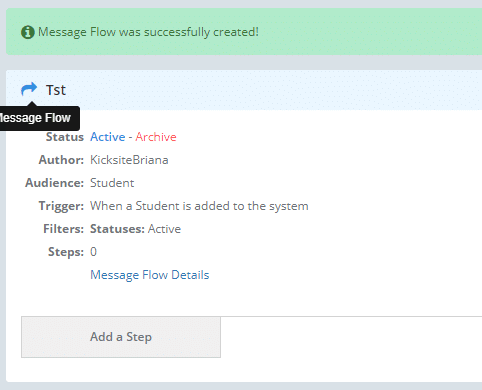
After you create a message flow, it will show on the screen as a summary. You have a few more steps before the message flow is “live” and will start sending messages when the trigger occurs.
1. If you just created the message flow template, click the Edit link to the far right (not visible in the following image).
(If you created a message flow earlier, or you want to activate a previously created message flow template, click Communications in the left panel. Click the Message Flows menu and then click Message Flows or Message Flow Templates. Click the name of the desired message flow, and then click the Edit link on the far right.)
2. To add a step to the message flow, click on Add a Step; the screen below appears.

3. Enter the title of the message flow in the Step Title field.
4. Enter the subject of the message flow in the Subject field.
5. Enter the stages based on when they will be sent out:
- Send Immediately
- Schedule for Later

- The message can be sent via SMS (text) or email.
- Each step can be set up differently, including the method of delivery.
- If the message is an email, you can attach a file.
6. To add more steps, click the Add a Step button and repeat Steps 3-5.
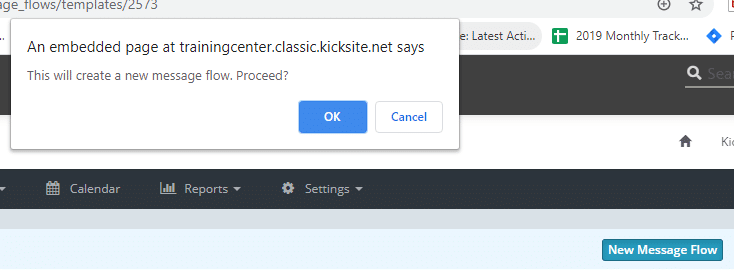
7. After you’ve added all the steps you need in the message flow, click the New Message Flow button at the top of the message flow steps.
8. Click the OK button in the pop-up window.
9. Click the Save Message Flow button. Your message flow is now live.
Keep in mind that the message flow you created will only be triggered by events that happen after it is live. A message flow can’t retroactively send messages. For example, a message flow for new students will not send messages to already existing students.