How to Create a New Prospect
Creating prospects in Kicksite allows you to connect with your leads more efficiently.
To create a new prospect:

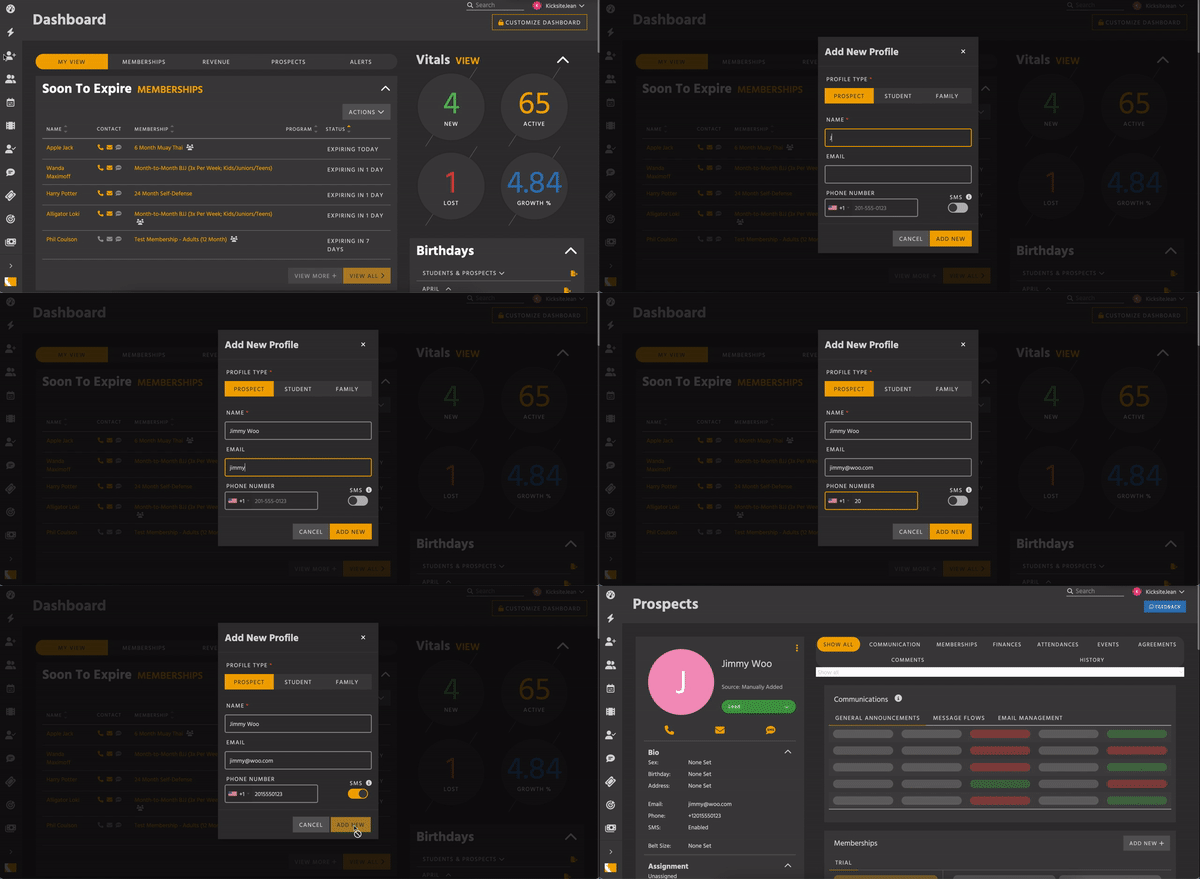
1. On the left panel, click the Add New Profile icon.
2. Under Profile Type, click Prospect.
3. Type the prospect’s name in the Name field; type the email address and phone number in the Email and Phone Number fields, respectively. If you wish to text the prospect, click the SMS toggle to on.
4. Click the Add New button. You’ve just created a new prospect!
To add information to a prospect:
If you’d like to add more information to the prospect, click the View Prospect button in the green note field. (It will appear at the bottom of the screen.) Alternatively, type the prospect’s name in the Search field and click the correct result.
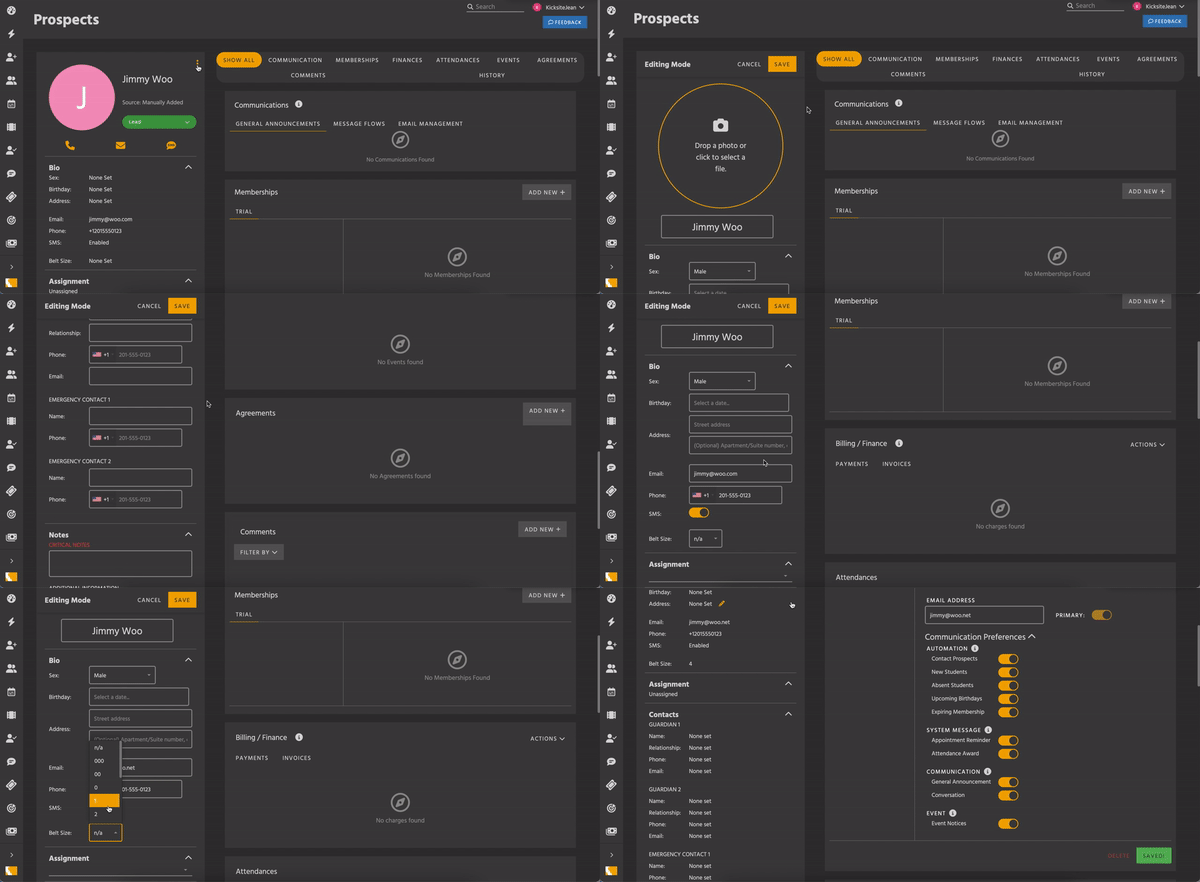
Hover over a field you want to update and click when you see a pencil icon. Type to add more information, and then click outside the field to save the information. (Adding a birthday is helpful if you want to wish prospects a happy birthday or market your birthday party offers.)

Alternatively, you can edit multiple fields by using edit mode. Click the kebab (the three vertical dots) to the right of the prospect’s name, and then click Edit. In edit mode, you can edit or add information in text fields, select from drop-down lists, and so on. Click the Save button at the top of the column to save all your changes.
- In the top left section, you can click the circle to upload a picture of the prospect. You can also edit the prospect’s name.
- In the Bio section, you can add the Sex, Birthday, Address (for home/street address). If needed, you can update or add the Email, Phone, and select whether to enable or disable SMS texting. You can also add the Belt Size.
- In the Assignment section, you can select an employee to the prospect.
- In the Contacts section, you can add up to two Guardians and two Emergency Contacts. For Guardians, you can add a Phone and Email. For Emergency Contacts, you can add a Phone.
- In the Notes section, if needed, you can add notes.
On the right side of the profile, you see information specific to that prospect. Scroll down to view the modules or click a tab at the top of the screen. For example, on the Agreements module, you can click Add New+ to add and send an agreement to the prospect.
Next Steps
A great way to gather prospects is to use a Lead Capture form and Landing Page. This will save you time because the information the prospect enters into the form (from your website or a link shared on social media) will automatically come into Kicksite as a new prospect.