How to Create or Edit Programs
Programs in Kicksite are a flexible way to group people in the same curriculum. Some schools create specific Programs for each age group (for example, “Kids Karate” and “Adults Karate”), while others use broader Programs (for example, “Karate” would encompass kids and adults).
Creating a Program
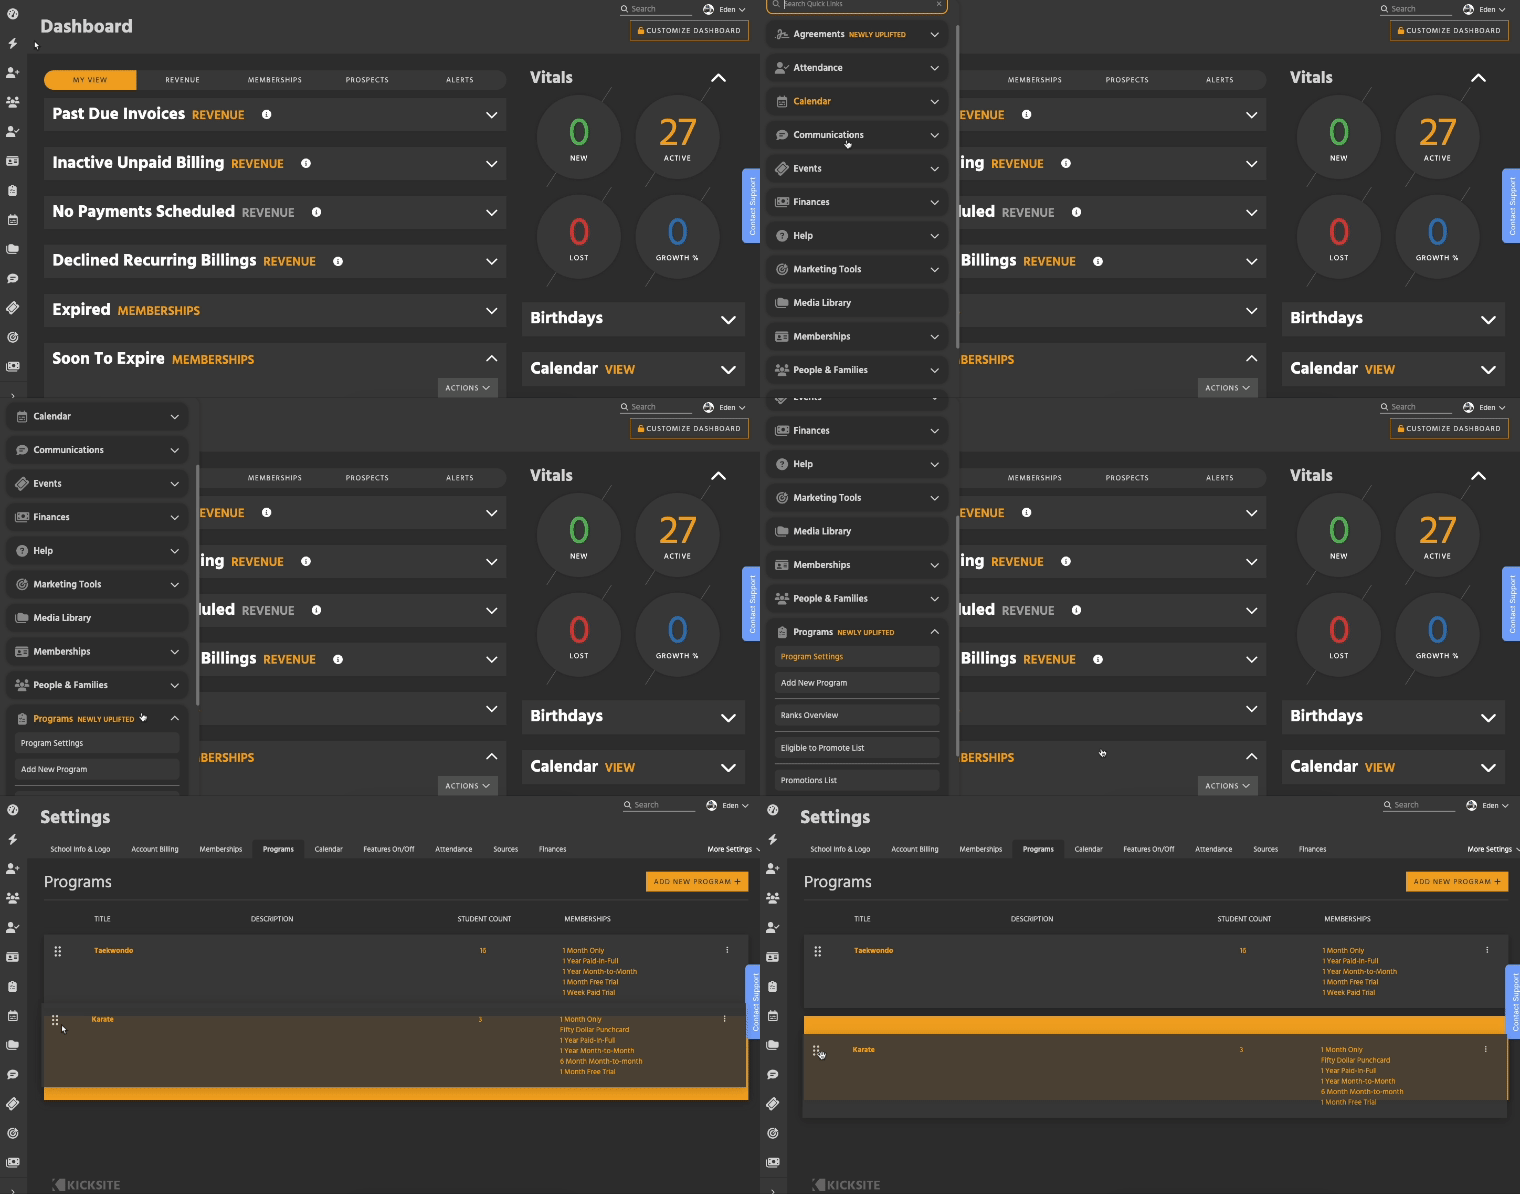
- Open Quick Links (the lightning bolt in the sidebar). Then, search for Add NewProgram, or click Programs > Add New Program.
- You can easily open Quick Links by clicking
/on your keyboard.
- You can easily open Quick Links by clicking
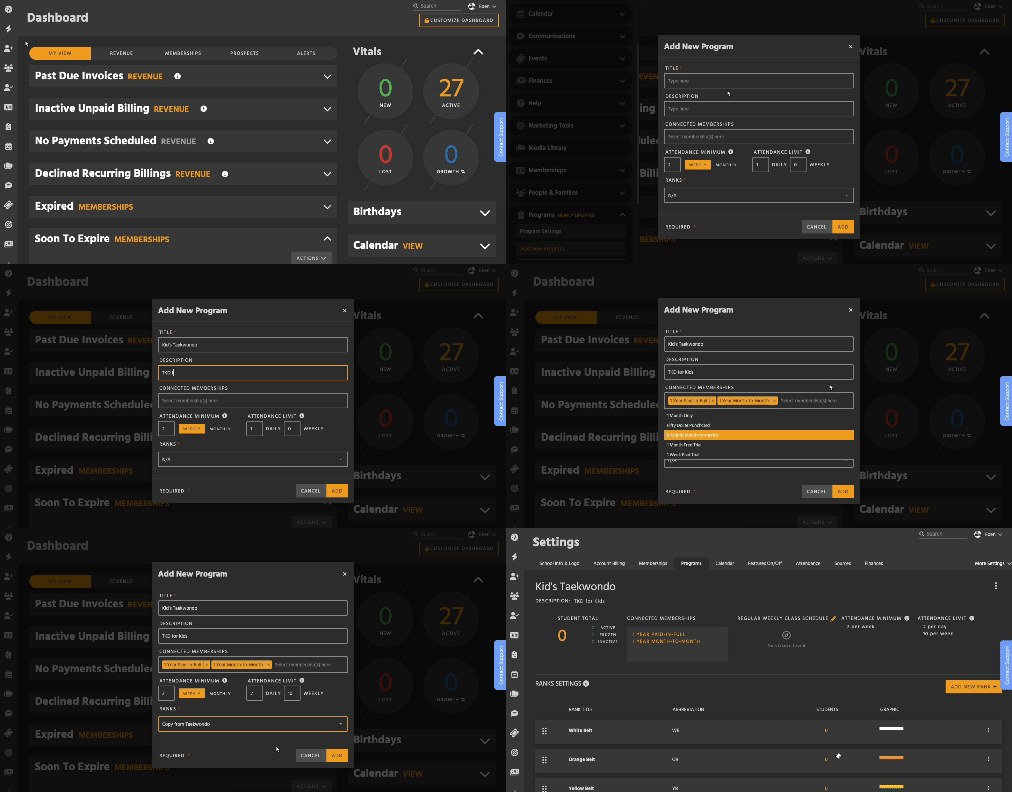
- Enter a title.
- Enter a description (optional).
- Select at least one Membership Template to connect to the Program. Learn more about Membership Templates here.
- Specify at Attendance Minimum. Students who don’t meet this are marked absent on reports.
- If you don’t want to enforce a minimum, set this to 0.
- Specify an Attendance Limit. This is the maximum number of times someone can check in.
- If you don’t want to enforce a maximum, set this to 0.
- You can set a weekly limit and/or a monthly limit.
- Select what Ranks to use. You can copy Ranks from another Program at your school, or start from scratch by selecting N/A or Custom Ranks.
- Click Add to finish. Now, this Program can be added to Profiles and in Student Sign-Up.

Managing Programs

On the Programs Settings List, use the gripper dots on the left side to rearrange Programs.
The Edit modal lets you change the title, description, connected memberships, and attendance details (minimum and maximum).
There are several ways to open the Edit Program modal:
- In the upper right of the Program’s settings page, click the kebab (three vertical dots), then Edit.
- On the Program Settings List, click the kebab on the far right of a Program’s card, then Edit.
- On Ranks Overview, click the Edit button to the right of the Export button.
If you remove a Membership from a Program, that only affects future sign ups. Anyone in the Program already using that Membership will keep it.
Deleting a Program
There are two ways to delete a Program:
- In the upper right of the Program’s settings page, click the kebab (three vertical dots), then Delete.
- On the Program Settings List, click the kebab on the far right of a Program’s card, then Delete.
A Program can’t be deleted if it’s attached to any Students. Going to the Student List and filtering to that Program is a fast way to find everyone who needs to be removed.
To remove a Program, go to a Student’s Bio, then the Programs and Ranks dropdown, and click the red X by the Program you want to remove.
Keep in mind that punch card (attendance based) Membership Templates need at least one Program attached to function.
Creating a Rank
- On the Program’s Settings page, click Add New Rank.
- Enter a title.
- Enter an abbreviation (optional).
- Create the Rank’s graphic.
- You can have one or two colors, as well as up to two emblems.
- If you don’t set up a graphic, the belt won’t show for this Rank.
- Click Add.
Managing Ranks
Click the kebab menu (three vertical dots) to edit or delete a Rank. A Rank can’t be deleted if it’s attached to any Students.
To rearrange the Ranks, click the gripper dots on the left side of a card and drag. The Rank at the top is the lowest, while the one at the bottom is the highest in Promotion order.
Next Steps with Programs
Once a Program is set up, it will be visible on the Eligible to Promote and Ranks Overview pages.
To add a Program to a Student, choose it when selecting their membership(s) in Student Sign-Up. Alternatively, you can choose it in the Programs & Ranks section of their Bio.