Tip: How to Use a Kindle Fire Tablet for the Kiosk Check In Screen
Many schools use a tablet to run the Kiosk Check In screen. This tablet can be almost any device, as long as it fairly new and can connect to the Internet via WiFi. (See which devices are NOT supported to make sure you purchase a supported tablet.) For example, an iPad, Kindle Fire, or Android tablet can be used to run the Kiosk Check In screen.
You can find many affordable options for a bracket to mount a tablet to the wall or to a desk. Check Amazon or other retailers and search for “tablet wall mount” or “tablet table mount”. Install the mount and tablet near where students enter for class.
This article covers how to use the Kiosk Check In screen on one of the most affordable tablets, the Kindle Fire. The Knowledge Base team used an older Kindle Fire tablet to test the steps and to take screenshots. Your particular Kindle Fire tablet may look a little different, depending on its size and version.
To open the Kiosk Check In screen on the Kindle Fire tablet:
1. Tap the Silk Browser icon on the Home screen.
2. Type your school’s unique URL in the link field at the top of the screen. (The URL will be yourschoolname.kicksite.net, but yourschoolname will be your school’s unique subdomain.)
3. Enter the username and password you use for attendance. (A best practice is to create an employee account just for attendance.)
4. From the dashboard, tap Attendance, and then tap Kiosk Check In.
5. Enter your username and password again. (While this is tedious, it is important to prevent a student from accidentally backing into your Kicksite account.)
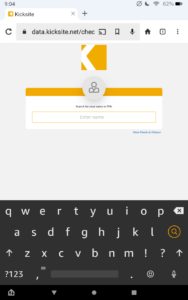
Students can now enter their PIN number and tap Go to check in. (If you enabled Name Check In, students can type their name or PIN to check in.)
- If the student is only in one program, the system will log their attendance immediately.
- If the student has multiple programs attached, the system will display those programs and the student must select the appropriate one.
To bookmark the Kiosk Check In screen in the Silk Browser:
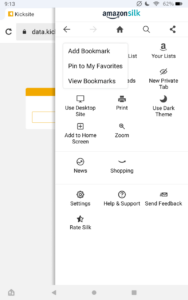
1. From the Kiosk Check In screen (navigate there as described in the previous section), tap the three vertical dots in the upper-right corner.
2. On the menu, tap Bookmarks.
3. Tap Add Bookmark.
4. (Optional) Change the text in the Bookmark Name field, and tap the Bookmarks Folder to designate a folder.
5. Tap Add.
To go to the Kiosk Check In screen from a bookmark:
1. Tap the Silk Browser icon on the Home screen.
2. Tap the three vertical dots in the upper-right corner.
3. On the menu, tap Bookmarks.
4. Tap the bookmark for the Kiosk Check In screen.
You may not need to log in if the Kiosk Check In screen was active recently.