How to Refund a Payment
At some point, you will need to issue a refund. (Click the following link if you need to void or credit an invoice.) Read on to find out how to use refunds to correct errors, and even re-collect the payment with a new Payment Method.
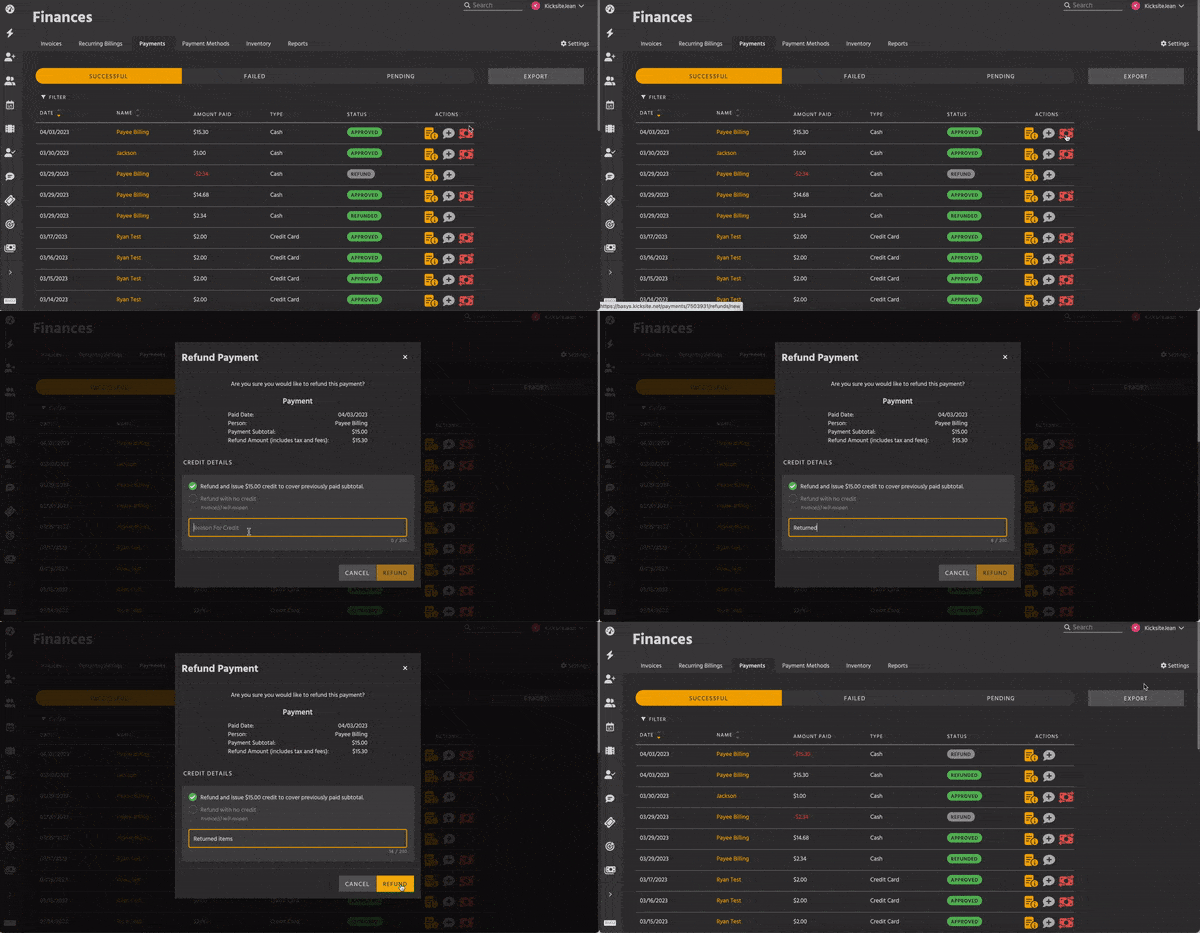
How to refund a payment
If you need to refund a payment, keep in mind that you will have to refund the full invoice. (Partial refunds may become available later, but at the time of this writing, only full refunds are available.)
1. To refund a payment, first find the invoice that you need to refund; you can find it in two places:
- Click the Finances icon in the left panel, and then click the Payments tab. You can sort by the Date or Name column to more easily find the payment that needs refunded.
- Go to the student’s or prospect’s profile by typing their name in the Search field, and click the correct result. In the Finances module, click the Payments tab. If they have a lot of payments, you can click the View More or View All button to find the payment that needs refunded.

2. When you find the correct payment, click the Refund icon.
3. In most cases, you will want to leave the Refund and Issue $XX Credit check box selected. If the invoice still needs to be paid, select the Refund with No Credit check box. (For example, if the student asked to pay an invoice using a different payment method, you would want to select the Refund with No Credit check box so you could refund the original payment and accept a new payment.)
4. Type a short description of why you’re issuing a refund in the Reason for Refund text field.
5. Click the Refund button.
If you want to collect the payment with a different Payment Method, go the Invoice or Pay Open Balance and proceed.