How to Run a Test Payment
When your billing goes live, the first thing you want to do is run a test payment. Verify in your business checking account that you received the amount for the test payment (you should see the funds within two to three business days).
Errors in the billing set up, processing, and deposits are rare. However, your money is important! The best practice is to run a test payment to verify that everything works correctly before you start charging students. If you encounter an error or do not receive the deposit, please contact your Onboarding Specialist (or support@kicksite.net). If needed, Kicksite can assist with contacting your merchant billing provider.
How to run a test payment
To run a test payment, you will need to create an invoice for a small amount, enter card information, and pay the invoice. You will also want to verify that the payment deposited into your business account (this may take a few days). After verifying that the payment processed and deposited successfully, you can refund the payment.
1. Recommended: Create a test prospect; on the left panel, click Add New Profile in the left panel. Click Prospect, type a name (such as “Test Prospect”) in the Name field, and click Add New.
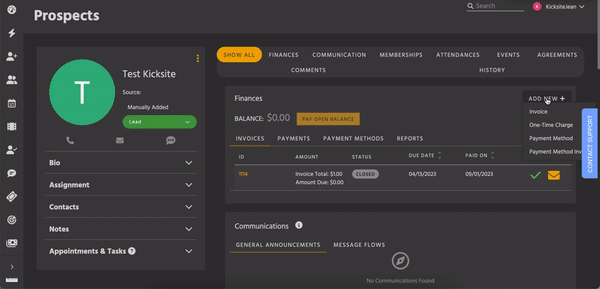
2. Go to the test prospect’s profile, and 0n the Finance module, click Add New+ and select Invoice.
3. Leave the Issue Date of the invoice at the default (today’s date). Make sure the Late Fee drop-down list shows No Late Fee. Make sure the Term drop-down list shows Immediately.
4. Type Test fee or similar in the Item field. In Price, enter a small fee, such as 1.00.
5. (Optional) You can add a note to the invoice by typing the information in the Notes field. (Perhaps type Test payment or similar, so you know this invoice is testing payment processing.)
6. Click the Add button.
7. To immediately pay the invoice, click the View Now button in the green pop-up notification. (Alternatively, on the Finances page, make sure you’re on the Invoices tab, click the Open tab, and click the invoice ID for the invoice you just created.)
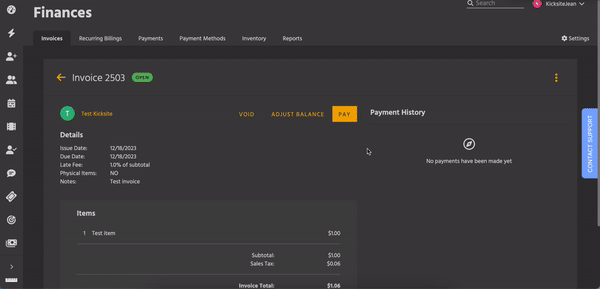
8. Click the Pay button.
9. Click the Choose Payment button.
10. If needed, click the Payment Method drop-down list and select Credit Card.
11. Type the card information: Enter the card number, the expiration date, the CVV, and Zip code. (The image to the right shows fake card information; for a test payment, you will need to use a real credit or debit card.)
12. If you do not want to save the card information, deselect the Save for Later check box.
13. Click the Pay Now button.
The invoice status updates to Closed.
Check your business account in a few days to make sure the amount you charged on the test invoice is deposited.