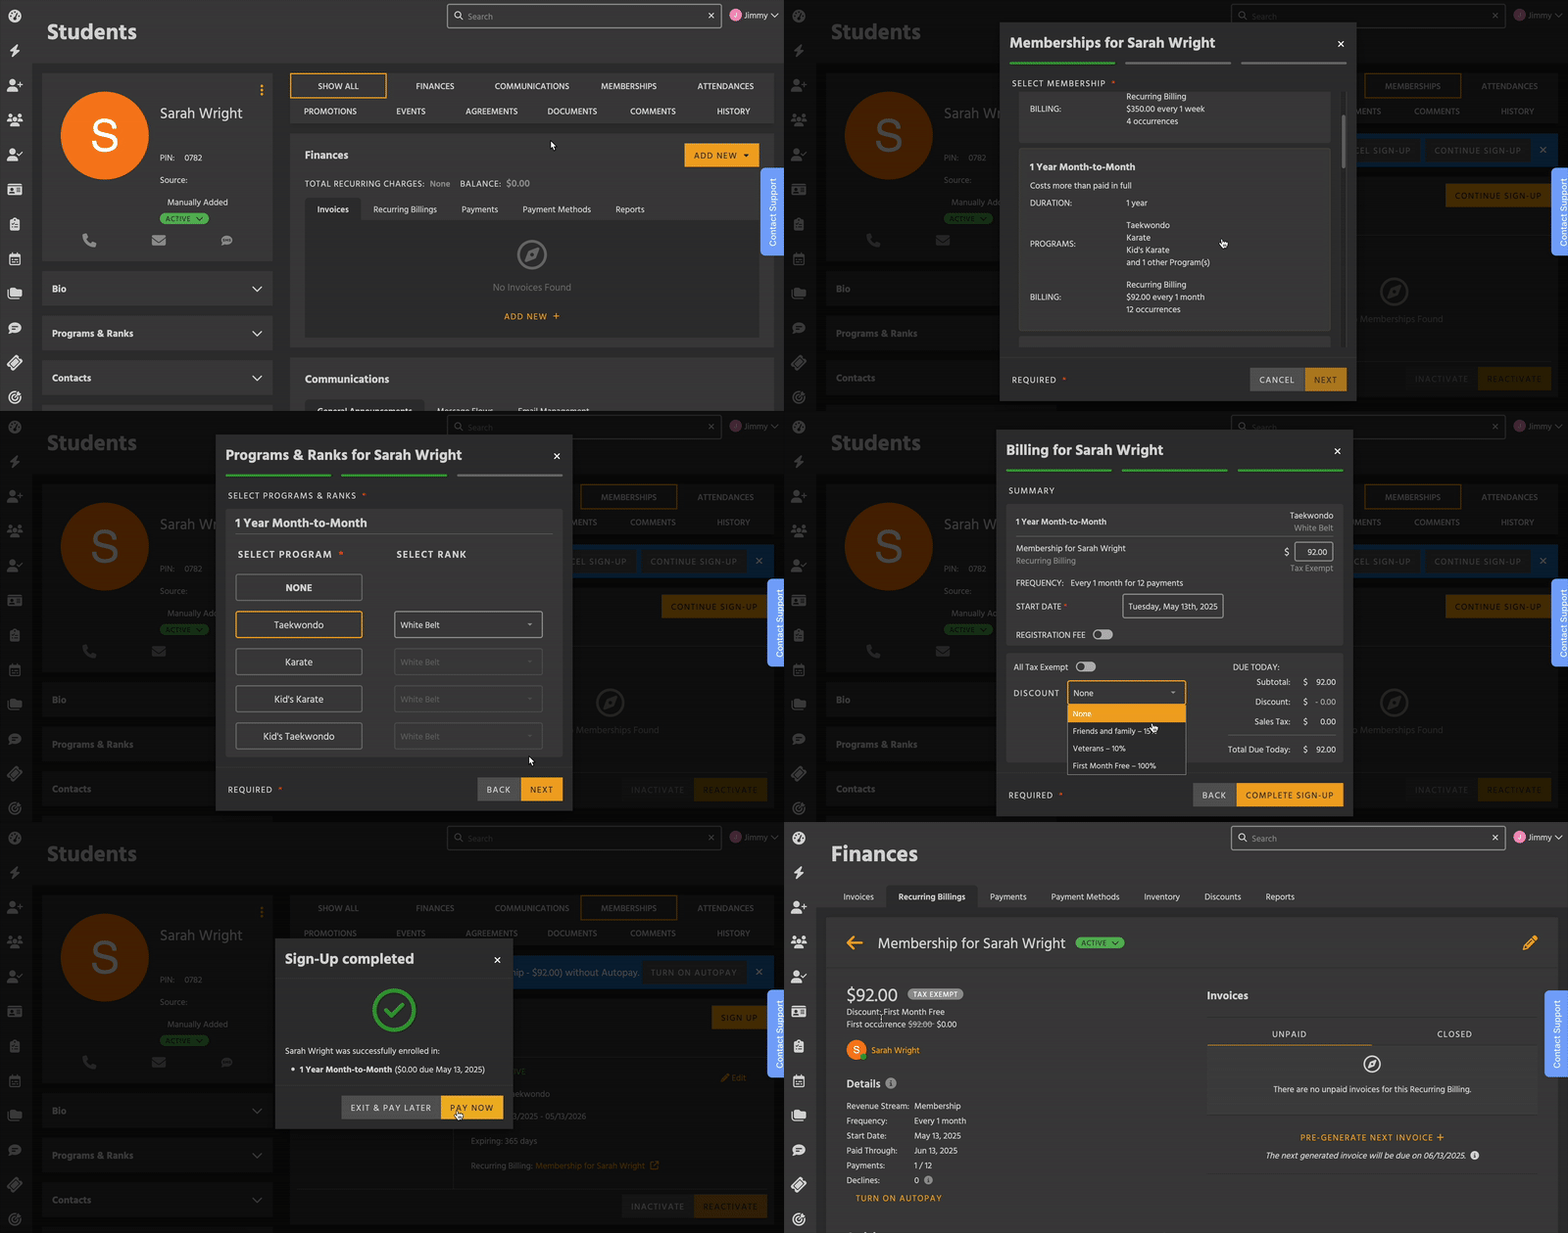
How to Use Discounts
Discounts are a way to offer promotional pricing to your Students, Prospects, and other customers. They can be used within Kicksite as well as on customer-facing Landing Pages.
Types of Discounts
Regardless of the type, Discounts never apply to registration fees or taxes. They are always calculated on the pre-tax amount. Discounts are either a Flat Rate off of the total, or a Percentage.
There are three types of discounts:
General
- Apply to an entire purchase
Membership only
- Used on Recurring Billings or Invoices created by the Sign-Up process (on a Landing Page or in Student Sign-Up)
- If on a Recurring Billing, it can be applied to all occurrences or just the first one.
- For example, if you want to offer the first month free, you would create a 100% Percentage discount applying to only the first occurrence.

Inventory only
- Used on Invoices that have Inventory items in them
- You can set minimum requirements for these to work.
- Minimum purchase quantity – customer must buy at least that many items
- Minimum purchase amount – inventory subtotal must be at least that dollar amount
Additional Options
There are two other ways to customize Discounts.
Limited Time
When creating or editing a Discount, you can choose to only run it for a set amount of time. After the end date, it will automatically archive and can no longer be used.
Discount Code
In order for customers to use a Discount on a Landing Page, it has to have a code. Codes are entered at checkout.
- You can only use letters and numbers.
- Codes are not case sensitive, meaning customers can enter them uppercase or lowercase and they will still work.
Learn more about Discounts on Landing Pages here.
How to Create a Discount
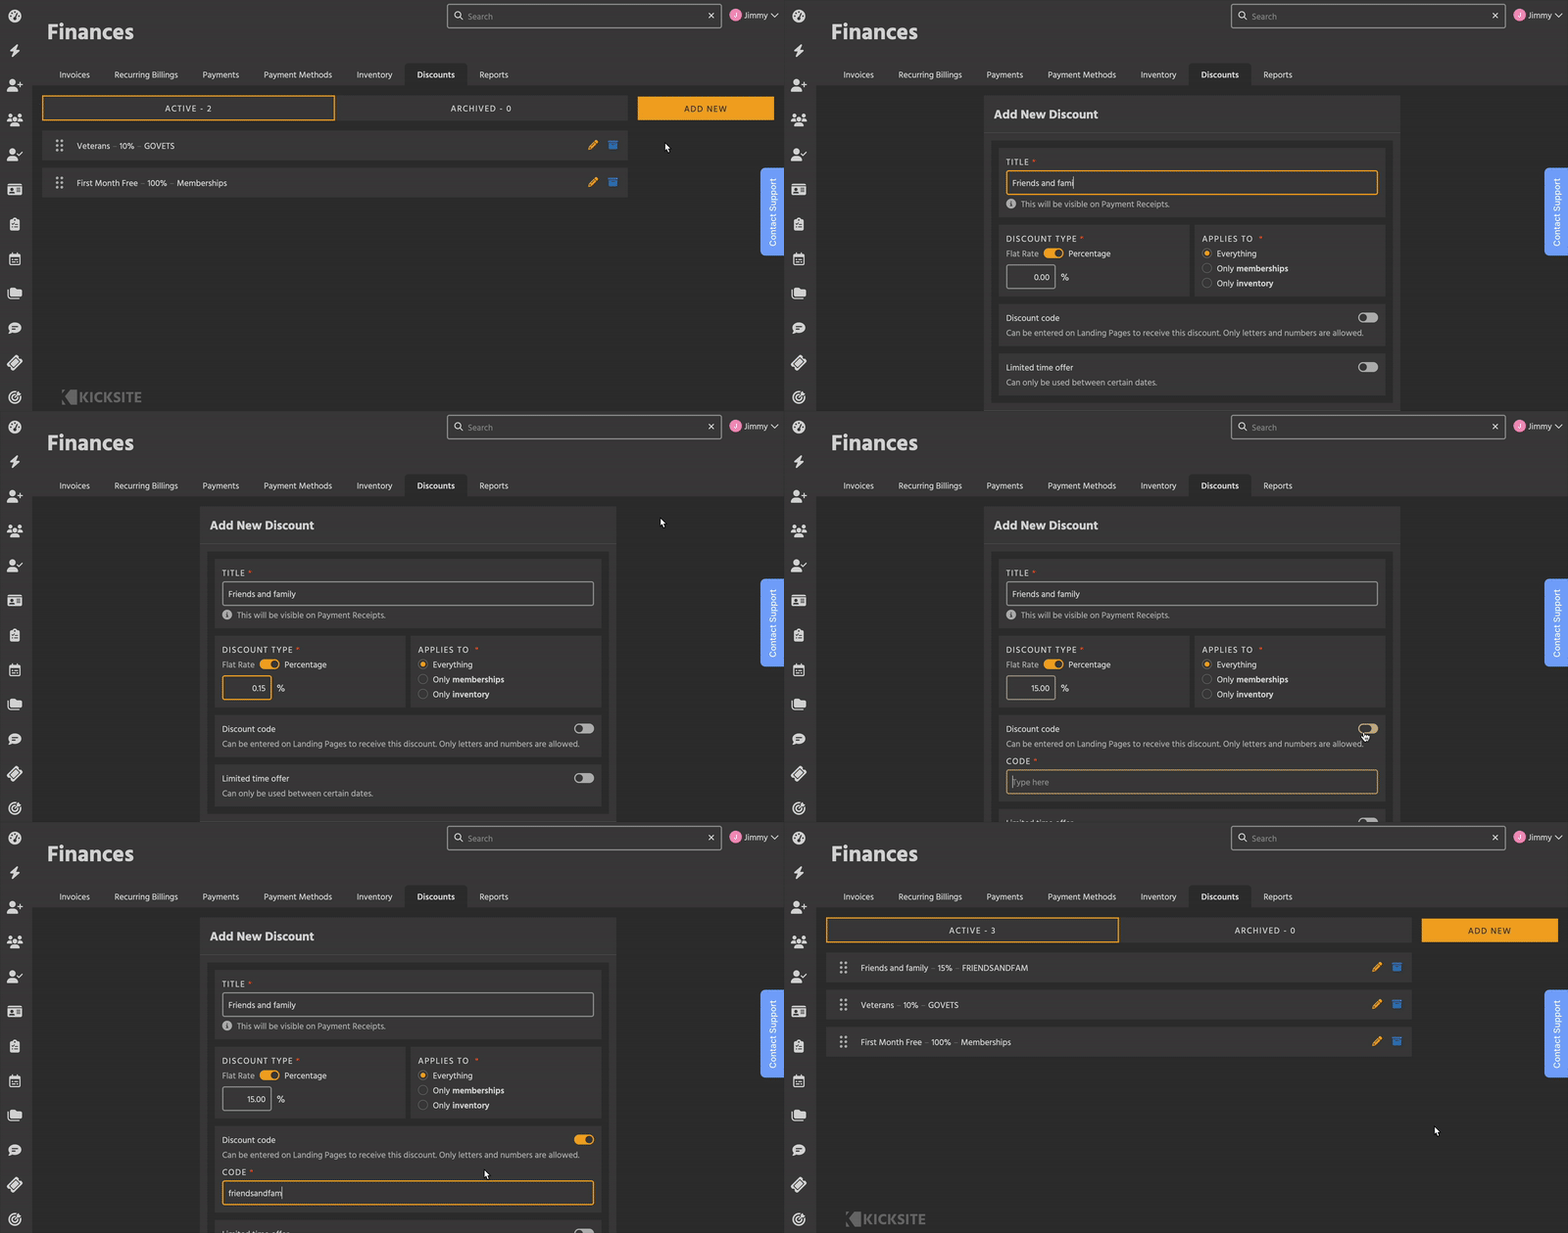
- Go to the Finances section, then click the Discount tab, then click Add New.
- You can also search Quick Links for Add New Discount and select it.
- Enter a title.
- This is visible to customers on payment receipts, and in Kicksite to users.
- Select between Flat Rate and Percentage.
- Enter the amount of the Discount.
- Select what the Discount applies to.
- (Optional) If you selected Only Memberships, choose between applying to all occurrences of a Recurring Billing, or only the first.
- (Optional) If you selected Only Inventory, decide if you want any minimum purchase requirements.
- (Optional) Toggle on Discount Code to enable it on Landing Pages, then enter a code.
- Learn more about discounts on Landing Pages here.
- (Optional) Toggle on Limited Time Offer, and choose a start date and end date.
- Click Add to complete.

On the Discounts List, you can drag and drop to rearrange the Discounts, similar to the Agreement Templates list. This affects the order they appear in dropdown menus.
Discount Restrictions
Discounts can be applied to the following items in Kicksite:
- New Invoices (on the Add New Invoice page)
- Recurring Billings from Student Sign-Up
- Landing Pages (with a code)
They cannot be applied to:
- Existing Invoices (including individual Invoices in Recurring Billings)
- Existing Recurring Billings
- Recurring Billings created outside of Student Sign-Up
- Events
- Memberships created on the full page Create New Student
- One-time charges
- Pay Open Balance
Additionally:
- Membership-only Discounts can’t be applied to Inventory-only Invoices
- Inventory-only Discounts can’t be applied to Membership Recurring Billings.
Flat Rate Discounts can’t be applied if the subtotal is less than the Discount (the total can’t be negative).
Frequently Asked Questions
Can Students apply a discount in the Member Portal?
No, only school admins can apply Discounts to Invoices. The only exception is when signing up with a Landing Page, and even then you have full control of which codes they can use.