Discounts on Landing Pages
Promotions are a great way to attract new customers and offer incentives to existing ones. In Kicksite, you can add Discounts to Landing Pages to drive sales.
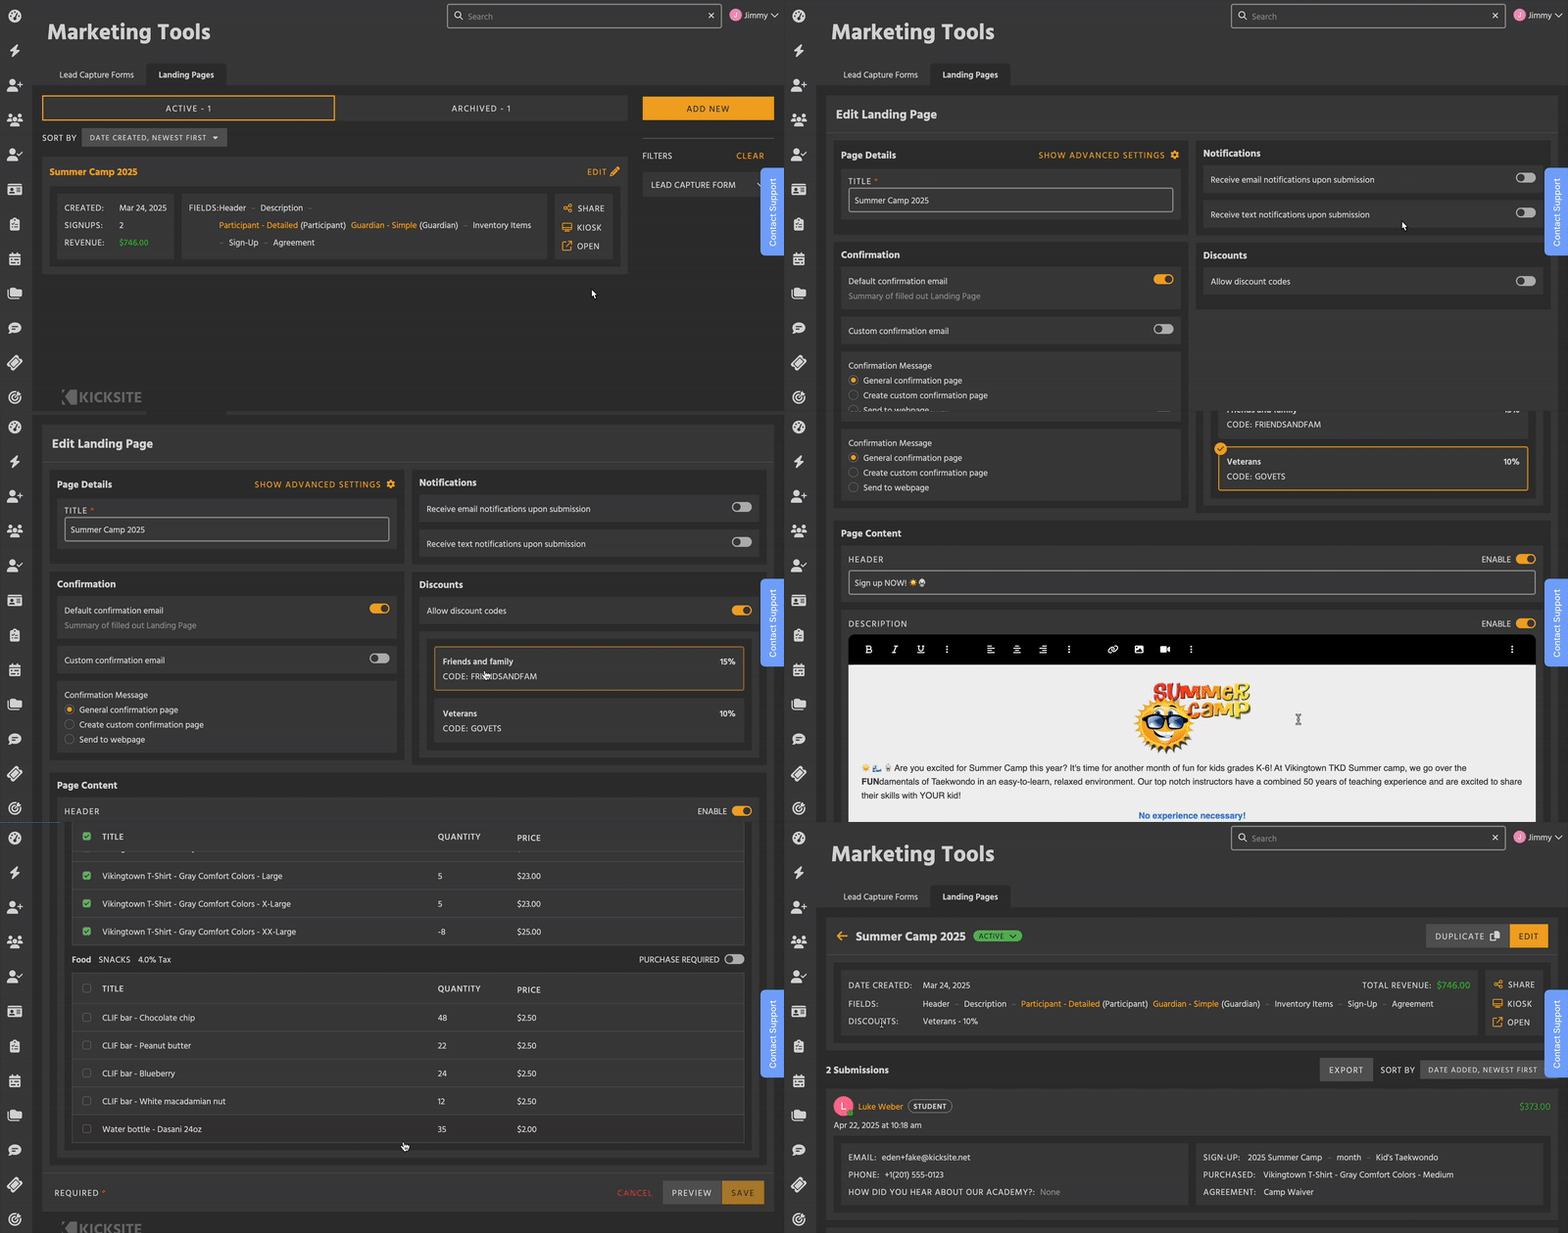
How to Enable Discounts on a Landing Page
- Create a Discount. Learn how here.
- Go to the Landing Page you want to enable the Discount on.
- Click Edit to open the form.
- Toggle on Allow discount codes.
- Select one (or more) codes you want to allow on this Page.
- Limited time Discounts are automatically removed on expiration.
- Click Save.
To add a discount to a Landing Page, it must have a code. Discount codes are short phrases that customers enter at checkout to apply a discount.
You are always in control of which codes are on each Page. If a customer tries to use a Discount that isn’t available for that Landing Page, it won’t work. Additionally, if the cart doesn’t meet the requirements for a Membership or Inventory discount, the discount will not work.

Sharing Codes
There isn’t a list of all available discount codes on the Landing Page. You decide who gets to know about each discount. Email marketing, in-gym signage, and announcements are all good ways to send out codes and promote your Landing Pages.
Limitations
Only one Discount can be applied per transaction. If you are selling both Inventory and Memberships on the same Landing Page, it may be helpful to clarify which codes customers can use for what.