How to Use the Family Profile
The Family profile page lets you view and manage all its members. Families can contain any mix of Student and Contact profiles.
When working with Families, it’s important to remember the following:
- Adding something to the Family’s profile makes it available to everyone in the Family.
- For example, adding a Payment Method to a Family lets each member use it.
- The Family profile lets you view everyone’s information at once, but you can always navigate to an individual member in the tab bar.
- You can also narrow down the members you see in each module. Click Filters, then select the profiles you want.
- If there are more than five people in a Family, additional members can be found in the More Members dropdown on the right of the tab bar.
Getting to a Family Profile
There are multiple ways to get to a Family’s profile.
- Universal Search – In the upper right corner of the Kicksite header, click on the search bar, then type the Family’s name.
- You can also search for a Student in that Family, and get to the Family from their profile.
- Family List – In the sidebar, click the Profiles icon (three grouped people), then click Families.
- Find it in the list via filters, or search for its name on the right side.
- Name – In many parts of the system, Families’ names are links to their profiles.
- Yellow text indicates a link.
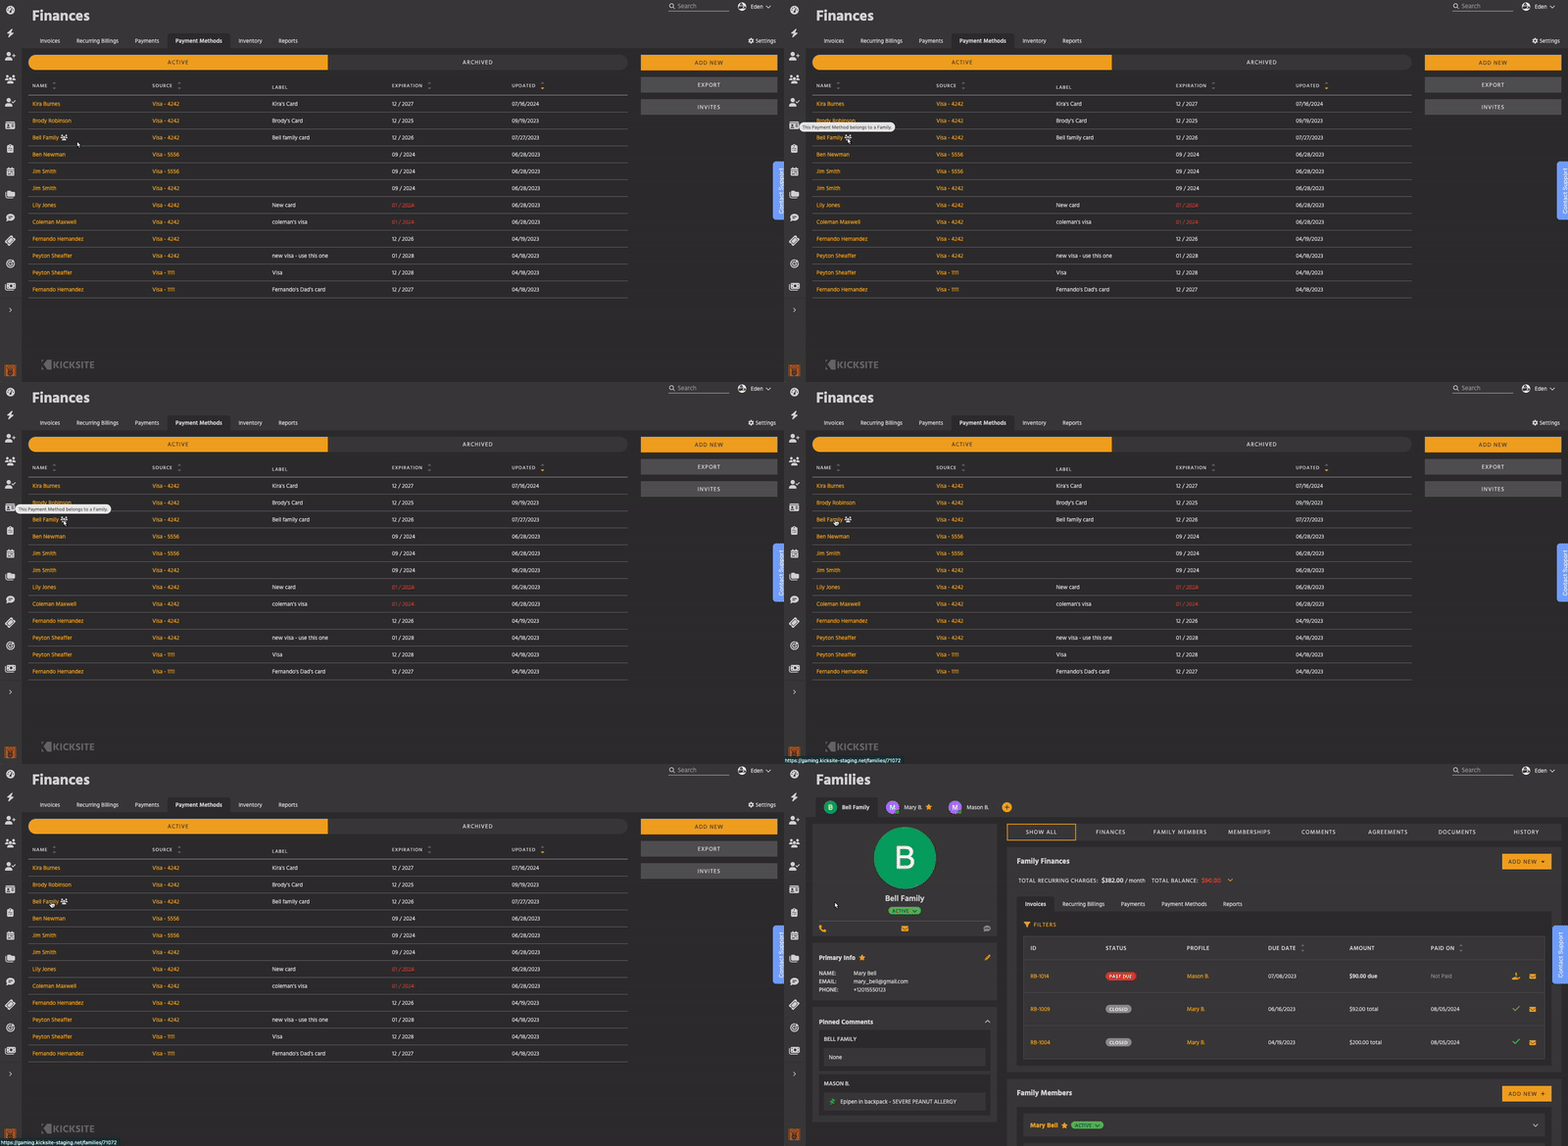
You can also go to the profile of a Student or Contact in a Family and click the Family’s tab in the page header.
Profile Left Side
Click the chevron (downward facing arrow) to expand or collapse modules.
Basic Info
Name – Click a Family’s name to edit it. Use the green check to save your changes, or the red X to cancel.
Status – Families have two statuses: Active and Inactive. Click the status bubble to change it.
- Active – As long as even one member of the family is Active, the Family will remain Active.
- Inactive – Only used if the entire Family is leaving. This inactivates every member of the Family, and pauses all memberships and billings. If only one or some members are leaving, inactivate their profiles separately.
Primary Info
This information is taken from the profile of the Family’s primary person. The Primary is usually a parent or guardian. Primaries can view other family members’ information on the Member Portal.
You can edit the Primary’s information here, by clicking the yellow pencil, or on their individual profile.
Each Family member will also have the Primary’s contact information displayed in their Bio.
- This is useful in situations where individual members (such as young children) may not have their own phone number or emails.
- Additionally, you only need to edit the number once to update it everywhere.
Learn more about setting up Families and choosing a Primary here.
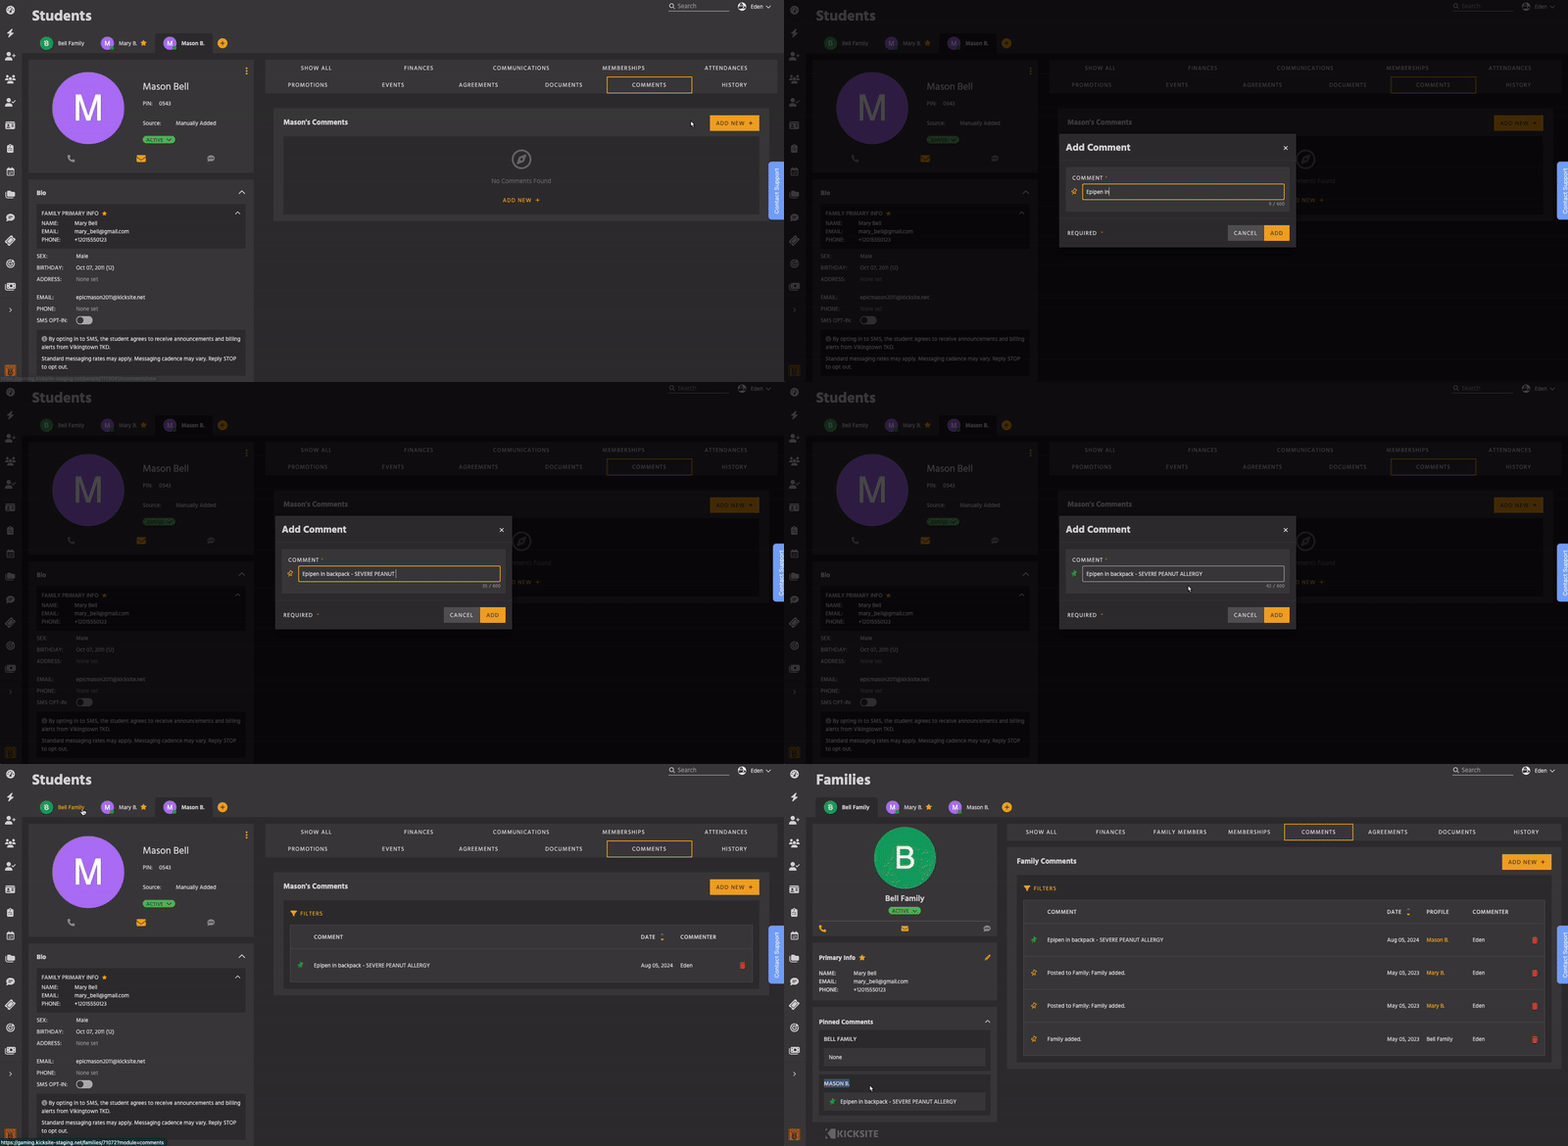
Pinned Comments
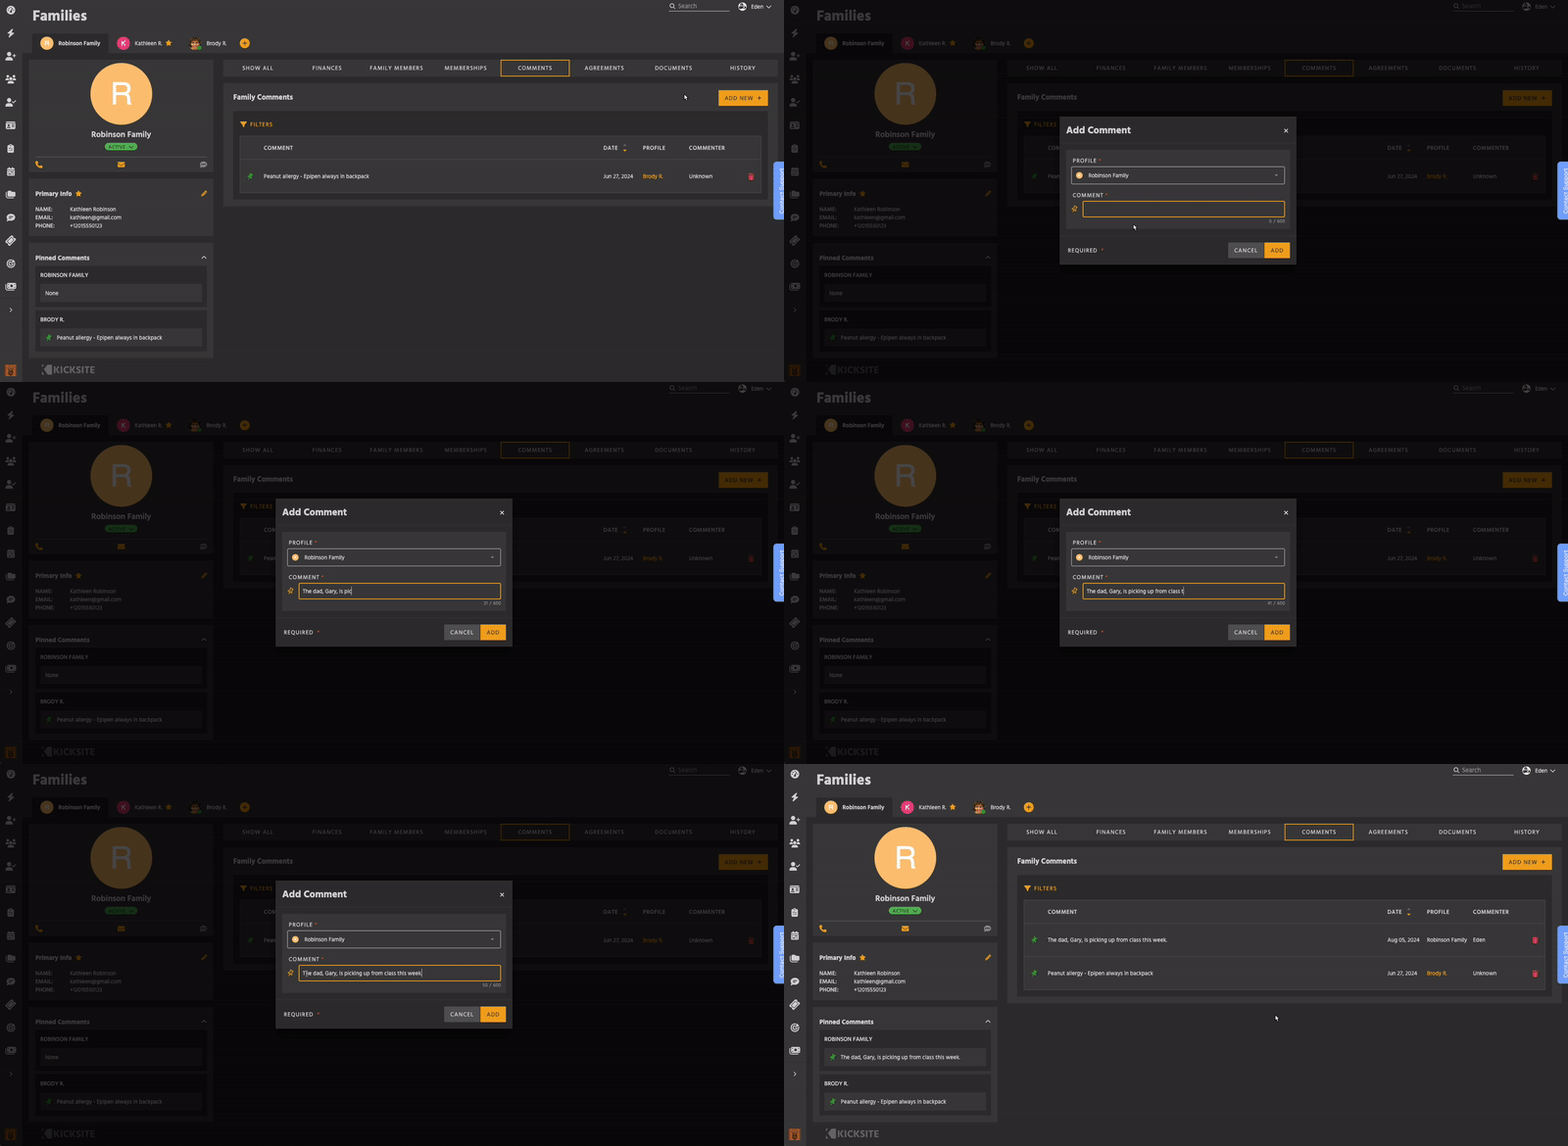
Pinned Comments make sure relevant information is always at hand.
Individual Family members’ pinned comments will also show on the Family profile to give you a complete view of important information.
- You can pin multiple comments, and unpin if they’re no longer relevant or out of date.
- To pin a comment, click the thumbtack icon in the Comments module or in the Add New Comment window.
- All comments, whether or not they’re pinned, can be seen in the Comments module.
Family Profile Modules
Click on a module in the tab bar to focus on only that one.
Each module shows items attached to the Family’s profile, as well as items attached to the individual members of the Family.
- Click the Filters button to select only the members you want to see.
On Contact profiles, the Finances and Agreements modules are only visible if that Contact was added via Landing Page.
Finances
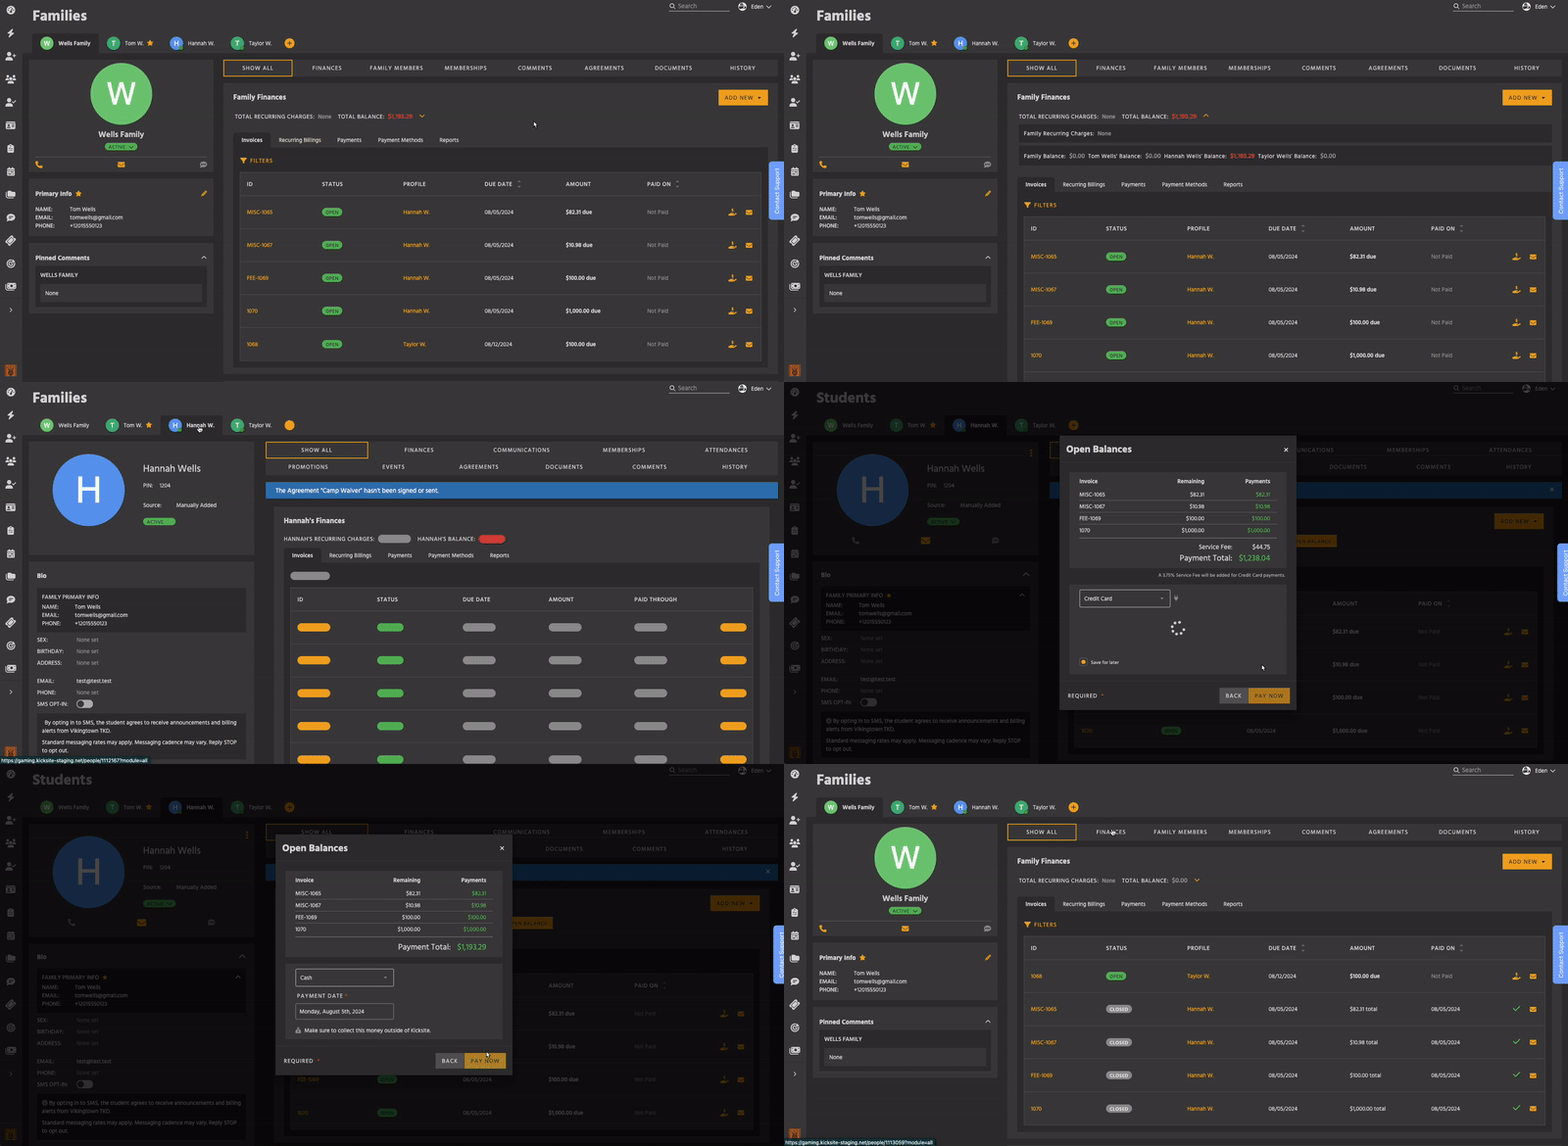
Total Recurring Charges and Total Balance are a sum of the entire Family’s Recurring Billings and open balances.
- Click the chevron to expand the view to show the Family’s Recurring Charge amount, as well as each individual member’s open balance.
- To view an individual’s Recurring Charge amount, go to their profile, or look at the Recurring Billings tab.
- You can’t pay an entire Family’s open balance because payments can only be applied to one profile.
The Add New button lets you create a new Invoice or One-Time Charge, and add a Payment Method. Payment Methods added to the Family are accessible to all members.
You can send a Payment Method Invite for the Family to enter their own card information. They must have a valid email address to be sent an invite.
Use the tabs to view Invoices, Recurring Billings, Payments, Payment Methods, and Reports. All this information is also visible in the Finances section of the system.
Family Members
View a list of all the people in a Family, and take actions on them.
- Click the chevron (downward-facing arrow) to open or close a member’s card.
- Clicking their name takes you to their profile.
Actions on each member include:
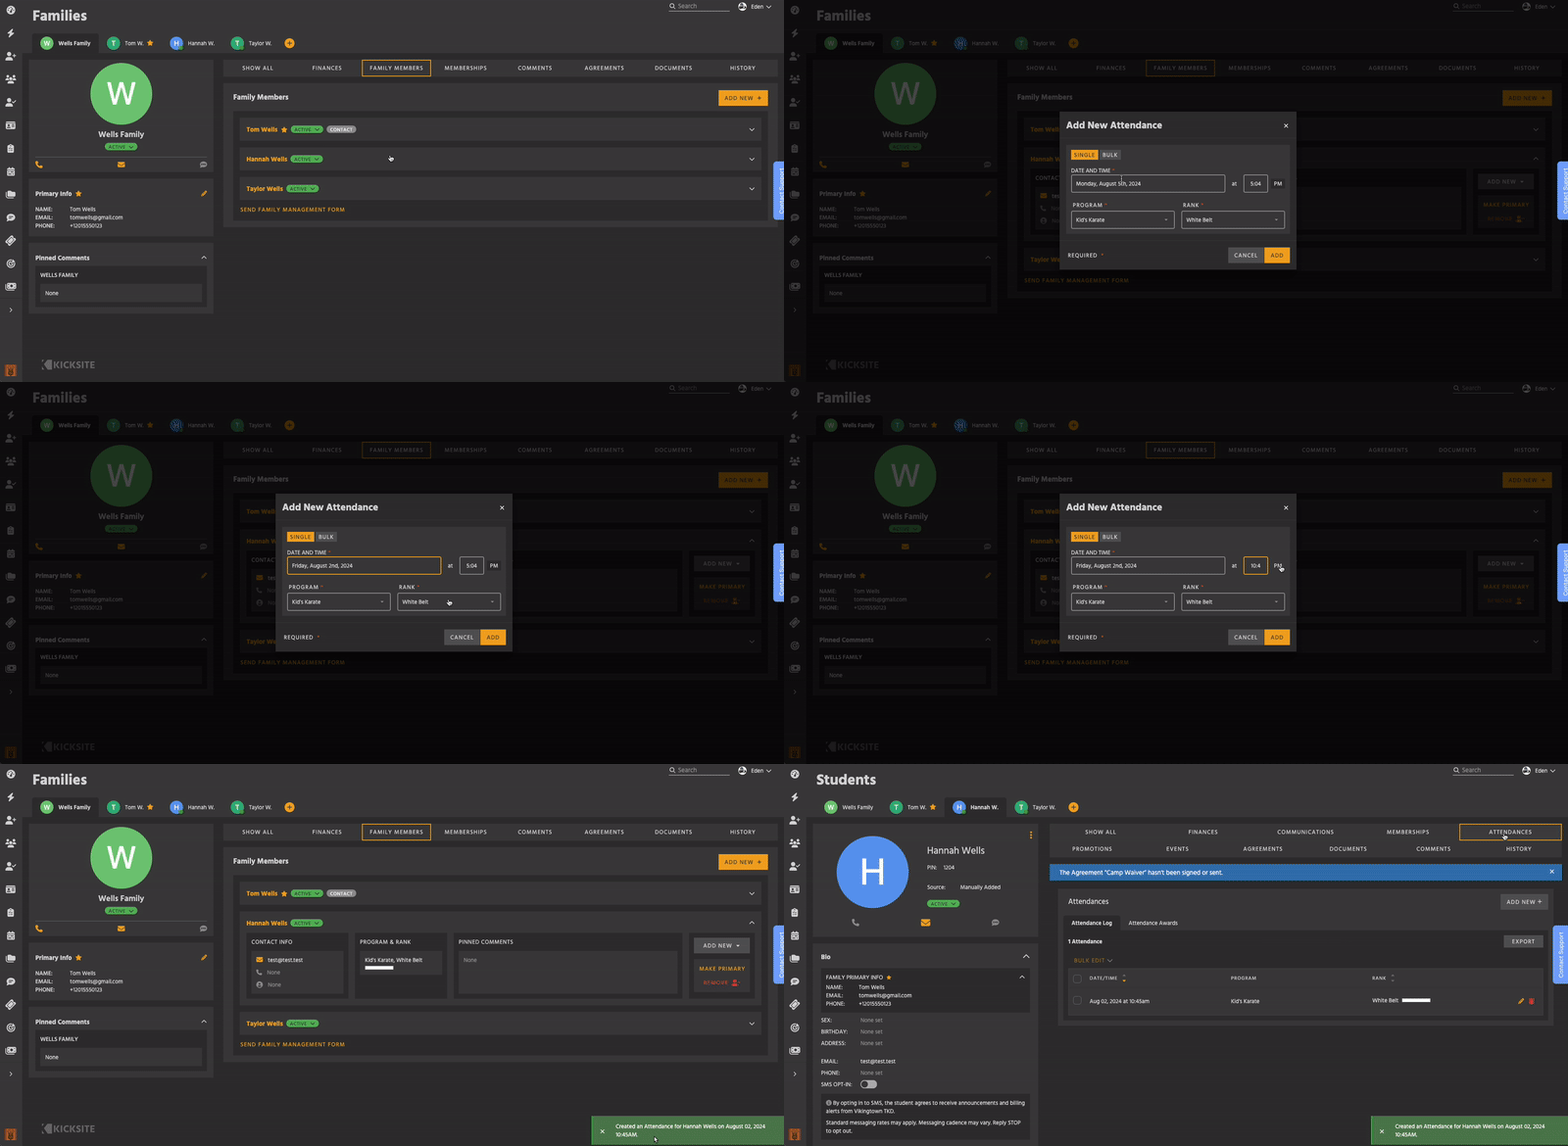
Add Attendance – Click the Add New button, then Add Attendance. Students and Prospects only – Contacts can’t have attendances.
Add One-Time Charge – Click the Add New button, then One-Time Charge.
Change Primary – Click Make Primary on the person you want to be the new Primary. They must have a valid phone number and email address to be Primary.
Remove – Click Remove on the person you want to remove. The Primary can’t be removed until a different person is made Primary.
Information visible on each member includes:
Contact information – Email, phone number, and User Account username (if applicable).
Program & Rank – All active Promotions, with belt graphics. Students only – Prospects and Contacts can’t be in Programs.
Pinned Comments.
Memberships
View current and past Memberships. Each one can be edited, as well as Inactivated or Reactivated (depending on its current status).
Click Add New + to add a Family Membership. This modal lets you choose a Start and End Date, and select members to include.
- Family Memberships can’t currently have billings attached, but this functionality is in development.
Agreements
View the Agreements attached to the Family. Depending on the status of the Agreement, you can Send it to be signed, open it in a new tab to Sign Now, or Send a signed copy.
Use the Add New button to create an Agreement for the Family.
Documents
View the documents (images and text documents) attached to the Family or any of its members. These can be viewed from the Member Portal if Family members have a User Account.
The table can be sorted by title or by date uploaded. Click the yellow document icon to download a file for viewing. Click the red trash can to delete it.
Use the Add New button to upload new files.
- You can add multiple documents at once, but each one has a maximum file size of 30 MB.
- Files added to the Family profile are visible to all its members.
Comments
A list of all comments made on the Family or any of its members. Can be filtered by commenters – such as to see only certain employees’ messages – in addition to by Profile.
Click the yellow thumbtack to pin a comment. Pinned comments are indicated with a solid green thumbtack and are shown in the left side module. Click the red trash can to delete a comment.
Use the Add New button to make a comment.
History
A list of changes and updates made to the Family and its members, along with who performed the change.
- Can be sorted by date, and filtered by both Profile and User (the employee or admin who made the change).
- Can be sorted by date
- Click the Filters button to select only the Profiles and Users you want to see. Users are the employees or admins who made a change.
- Some History items are performed by System – this means the action was automated.