How to Update Calendar Settings
The Calendar settings page enables you to add, archive, and delete Task Category Settings and Appointment Reason Settings. These help clarify the reason for an appointment or task. When you add a new appointment or task, you have the option to select any Appointment Reason or Task Category that you’ve added in Calendar settings.
To view the Calendar settings page, click your username in the upper-right corner and then click Settings. Click the Calendar tab. Alternatively, click Quick Links in the left panel, click Settings, and then click Calendar Settings.
Click the following link to view the video on Calendar Settings.
Task Category Settings
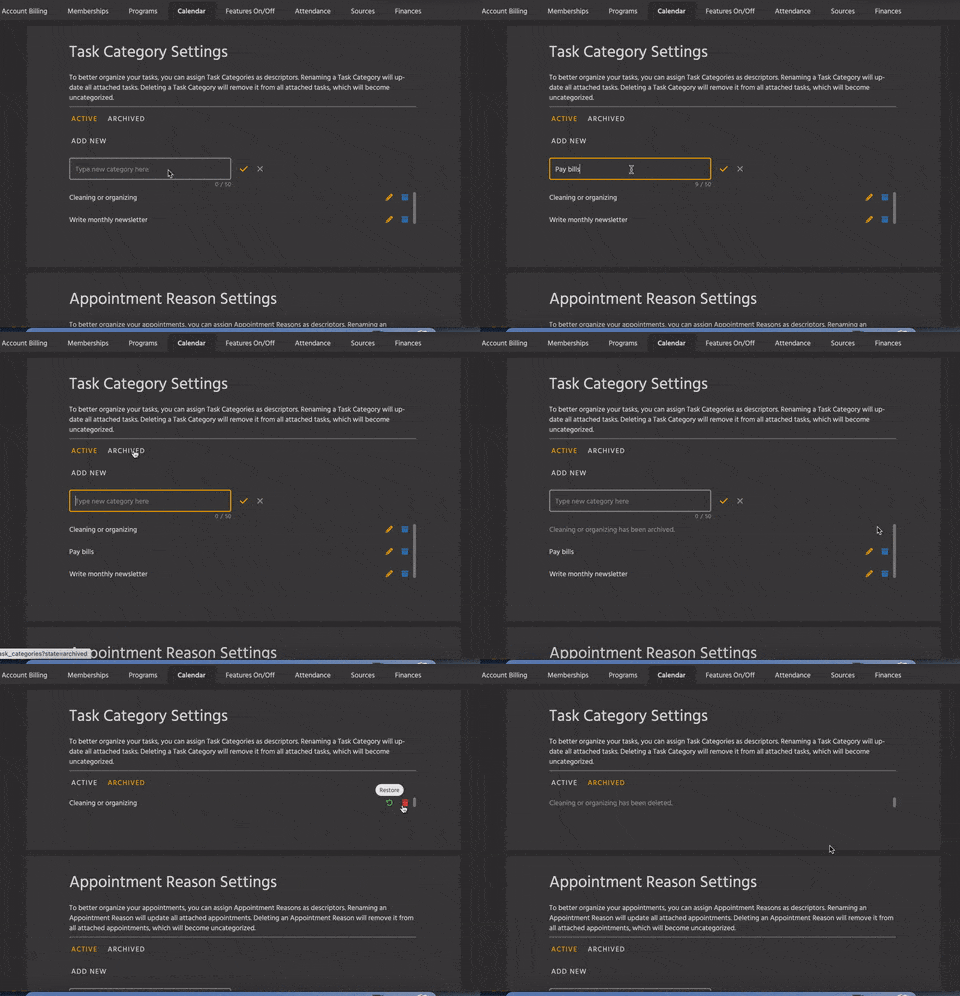
The Task Category Settings module enables you to add, edit, archive, and delete categories for the tasks you add to the Calendar.

To add a category, type the name in the field under Add New Task Category. Click the check mark or press Return/Enter when you’re done. (Note that you only have 50 characters; text will appear in red as you type if you go over 50 characters.
To edit a category, click the Edit icon (the orange pencil) beside the category you wish to edit. Change the text as desired, and then click the check mark or press Return/Enter to save the change.
To archive a category, click the Archive icon (the blue box). You see a message that the category has been archived. It will now appear on the Archived tab.
To make an archived category active, click the Archived tab. Click the Restore icon (it looks like a green, circling arrow). You see a message that the category has been restored; it will now appear on the Active tab.
To delete a category, click the Delete icon (the red trash can). In the dialog box that appears, click the Delete button. If you delete a category, it is removed permanently.
Appointment Reason Settings
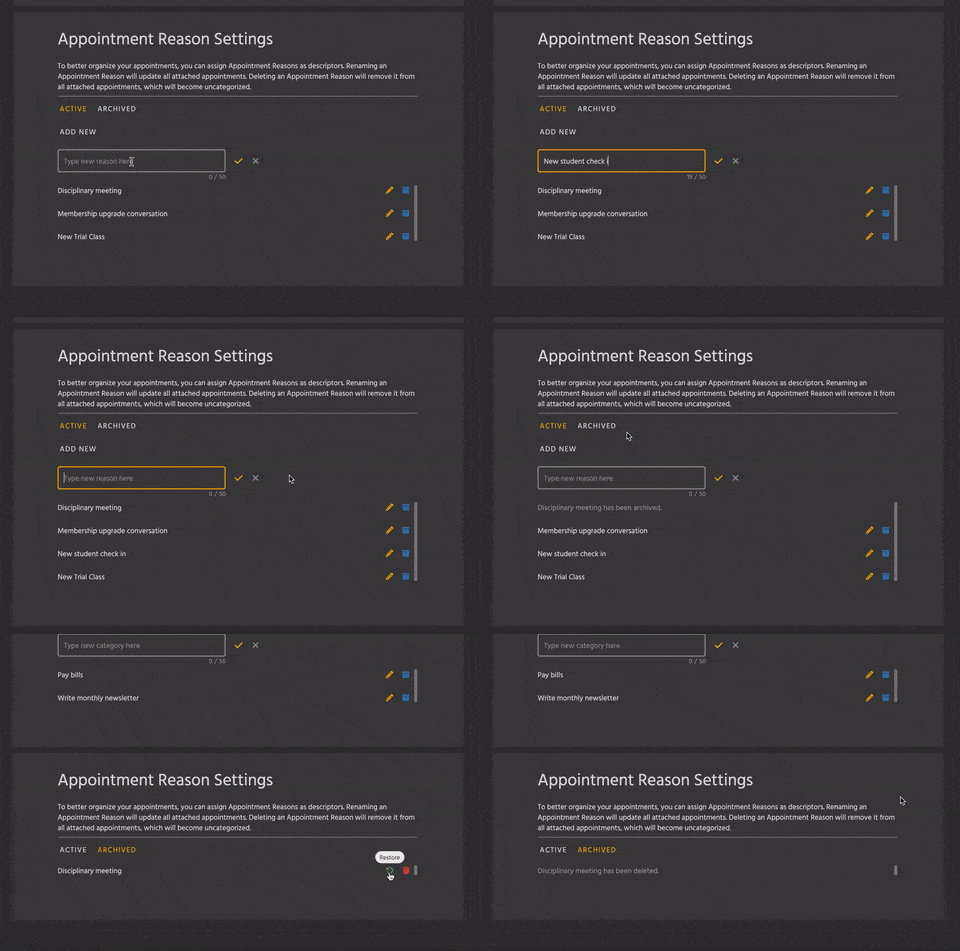
The Appointment Reason Settings module enables you to add, edit, archive, and delete reasons for the appointments you add to the Calendar.

To add a reason, type the name in the field under Add New Appointment Reason. Click the check mark or press Return/Enter when you’re done. (Note that you only have 50 characters; text will appear in red as you type if you go over 50 characters.
To edit a reason, click the Edit icon (the orange pencil) beside the category you wish to edit. Change the text as desired, and then click the check mark or press Return/Enter to save the change.
To archive a reason, click the Archive icon (the blue box). You see a message that the reason has been archived. It will now appear on the Archived tab.
To make an archived reason active, click the Archived tab. Click the Restore icon (it looks like a green, circling arrow). You see a message that the reason has been restored; it will now appear on the Active tab.
To delete a reason, click the Delete icon (the red trash can). In the dialog box that appears, click the Delete button. If you delete a reason, it is removed permanently.
After you have added Appointment Reasons or Task Categories on the Active tabs, you will be able to select one of the options when you add or edit an appointment or task, respectively. See the article on how to use the Calendar for details on creating a new appointment or task.