How to Tell Students Their Check-In PIN
Every student gets a random PIN when their profile is created. It’s what they type at the kiosk.
There are four ways to provide students with their PIN and navigate check-in.
| Option | Good for | Downside |
| Member Portal | Ongoing, once accounts are set up | Needs email addresses and student logins |
| Printed cards or keytags | Kids, and anyone who won’t remember a number | Needs a barcode scanner |
| Name Check-In | Schools that would rather skip PINs entirely | Needs profile photos to disambiguate |
| A printed list by the kiosk | The first two weeks | Everyone’s PIN is on a wall |
Member Portal
If a student has a user account, their PIN is in the Member Portal — tap the username in the top-right menu. Family primaries can see PINs for everyone in the family.
Send user account invites in bulk from the Student List to give everyone access to their accounts.
Barcode cards and keytags
Skip the number entirely. Print a card, keytag, or QR code for each student and they scan instead of typing. Best option for young children.
See How to Print Barcode Labels. Needs a 2D scanner at the kiosk.
Name Check-In
Replaces the PIN box with a name search, so students type their name instead. Turn it on in Settings → Attendance → Name Check-In.
If you use it, add profile photos — two students called Ryan look identical in a list otherwise. See How to Use the Kiosk Check-In Screen.
A printed list
A stopgap for the first couple of weeks. Be aware you’re posting a list of names and access codes on a wall in a public room, so take it down once people know their numbers.
- Click Profiles in the left panel, then Students. The Status filter defaults to Active, which is what you want — frozen and inactive students can’t check in.
- Click Export. A .csv downloads.
- Open it in Excel, Numbers, or Google Sheets.
- Sort by First Name, then Last Name, so students can find themselves.
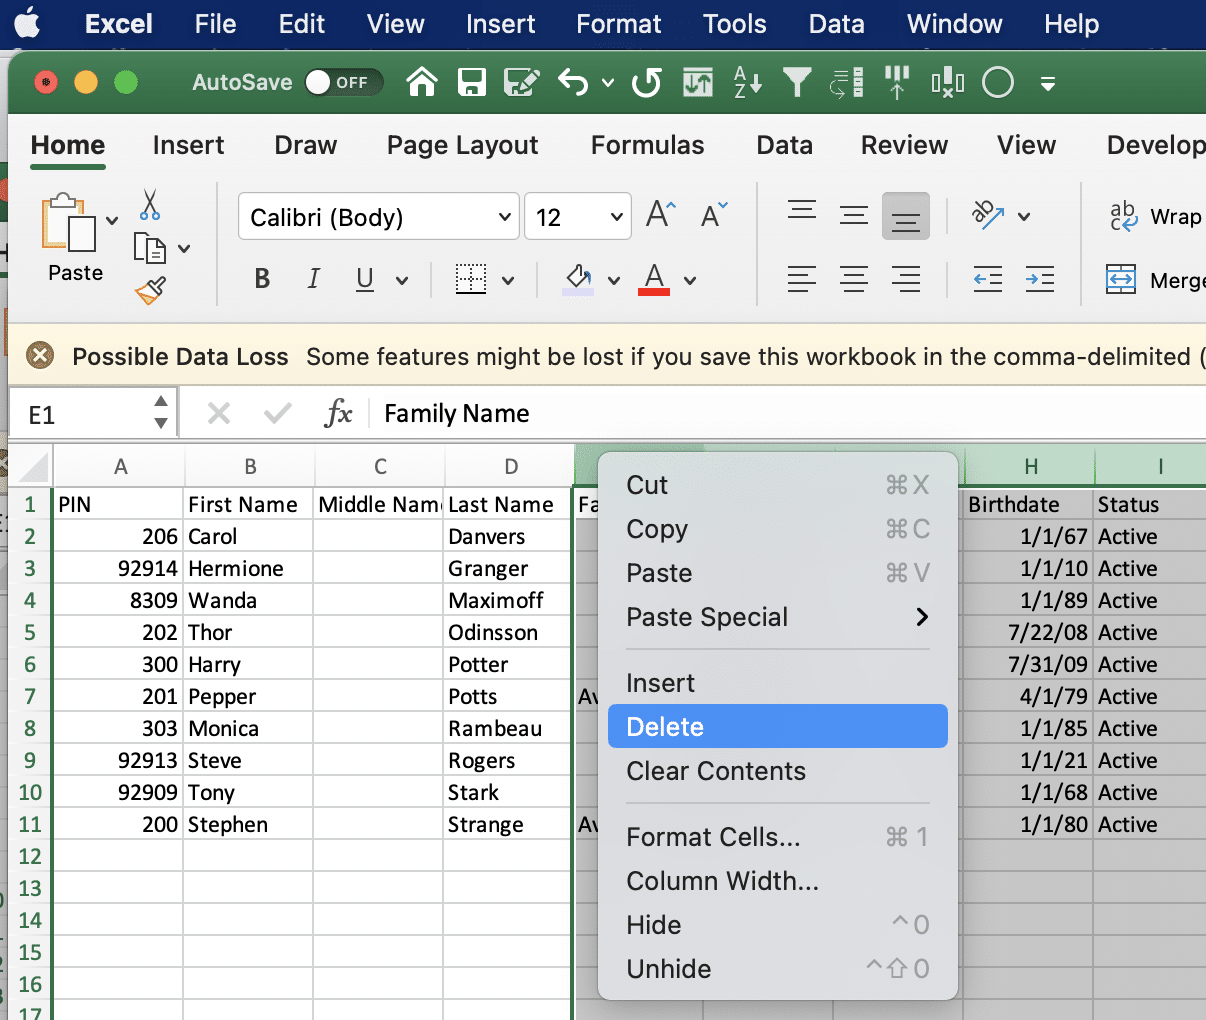
- Delete every column except the PIN and the names. The export contains addresses, phone numbers, and email addresses — none of which belongs on a wall.
- Widen the columns, then print.
Troubleshooting
A PIN doesn’t work at the kiosk. Check the leading zero. Then check the student is Active. Then check they have at least one program attached — a student with no program can’t check in.
Two students have the same PIN. They can’t. PINs are unique. If it looks that way, one of them is reading someone else’s row.
I want longer PINs. Settings → Attendance → Custom PIN Length, anywhere from 4 to 8 digits. Changing it only affects students created afterwards; existing PINs stay as they are.
Limitations
- Students need to be provided with their PINs – by barcode, Member Portal access, or telling them directly.