How to Use the Programs Section (Ranks Overview, Eligible to Promote, Promotions)
The Programs Section includes three important pages for managing your Students: Ranks Overview, Eligible to Promote, and Promotions. It also links to the Program Settings, where you can create and manage your school’s Programs.
First Steps
Before you use these pages, set up at least one Program in Settings. Learn how to do that here.
Getting To Programs
There are two ways to navigate to the Programs section:
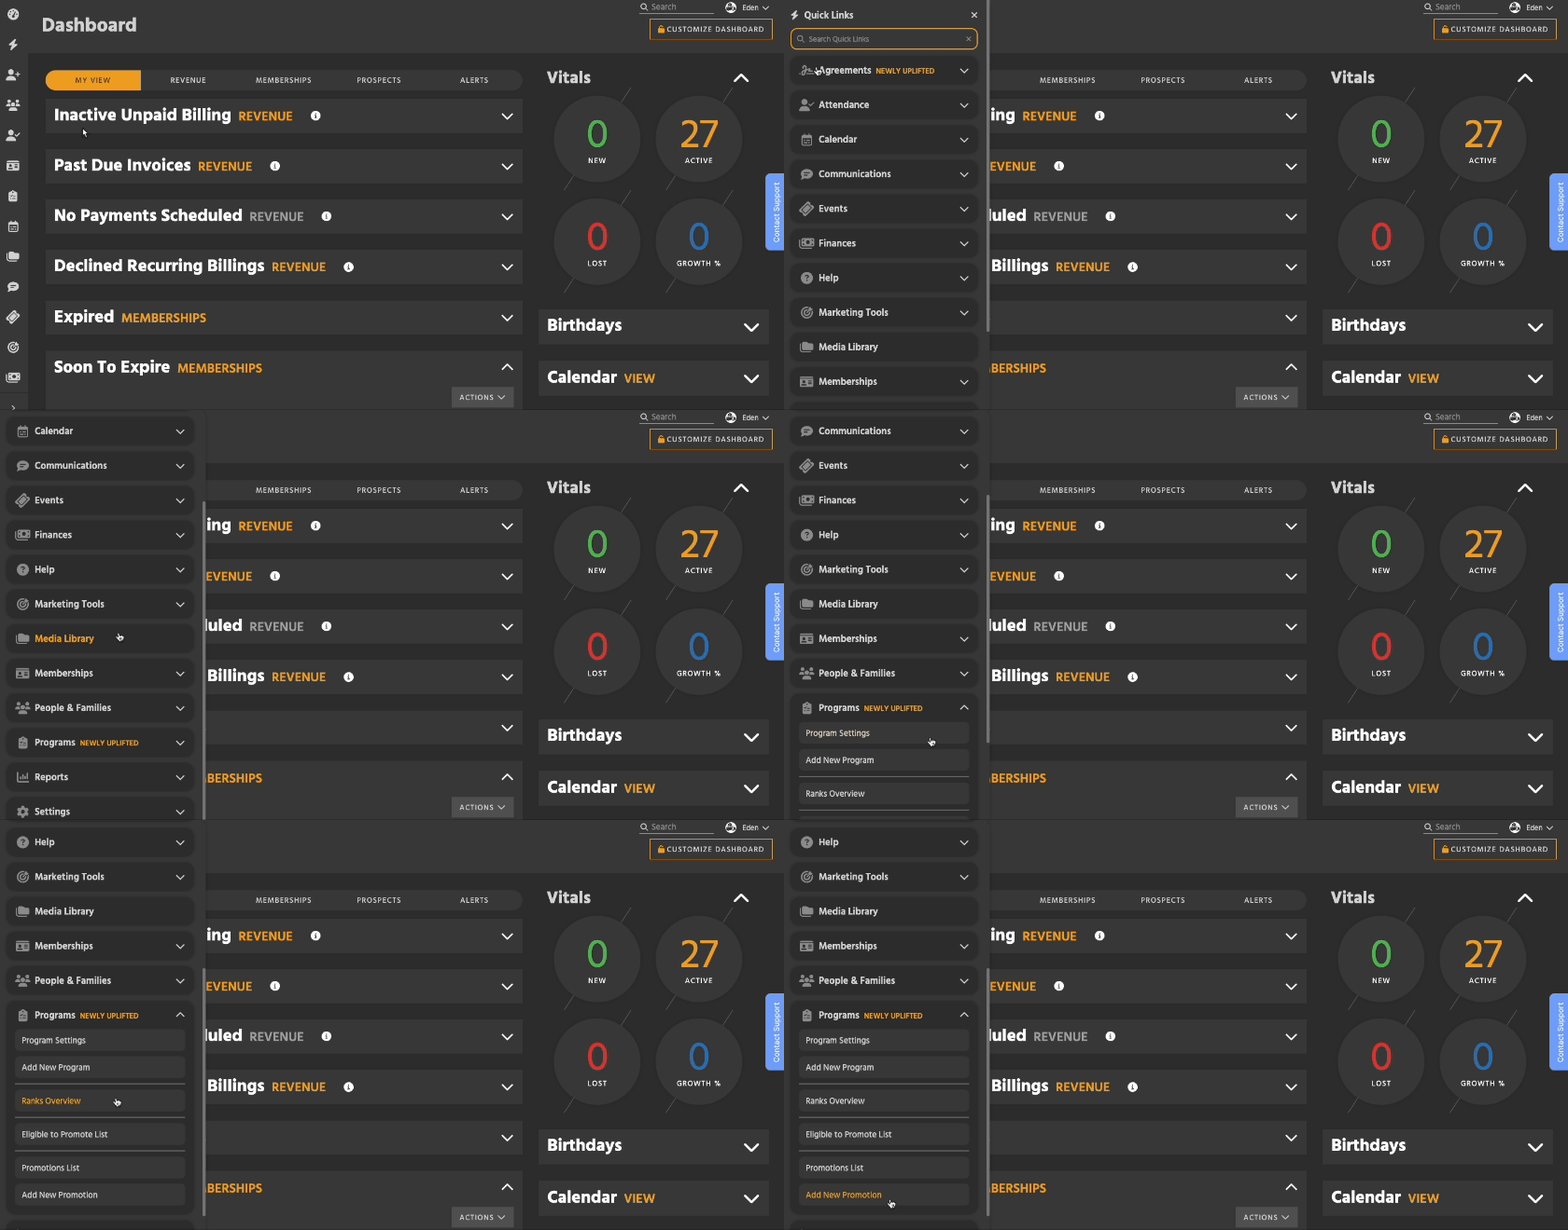
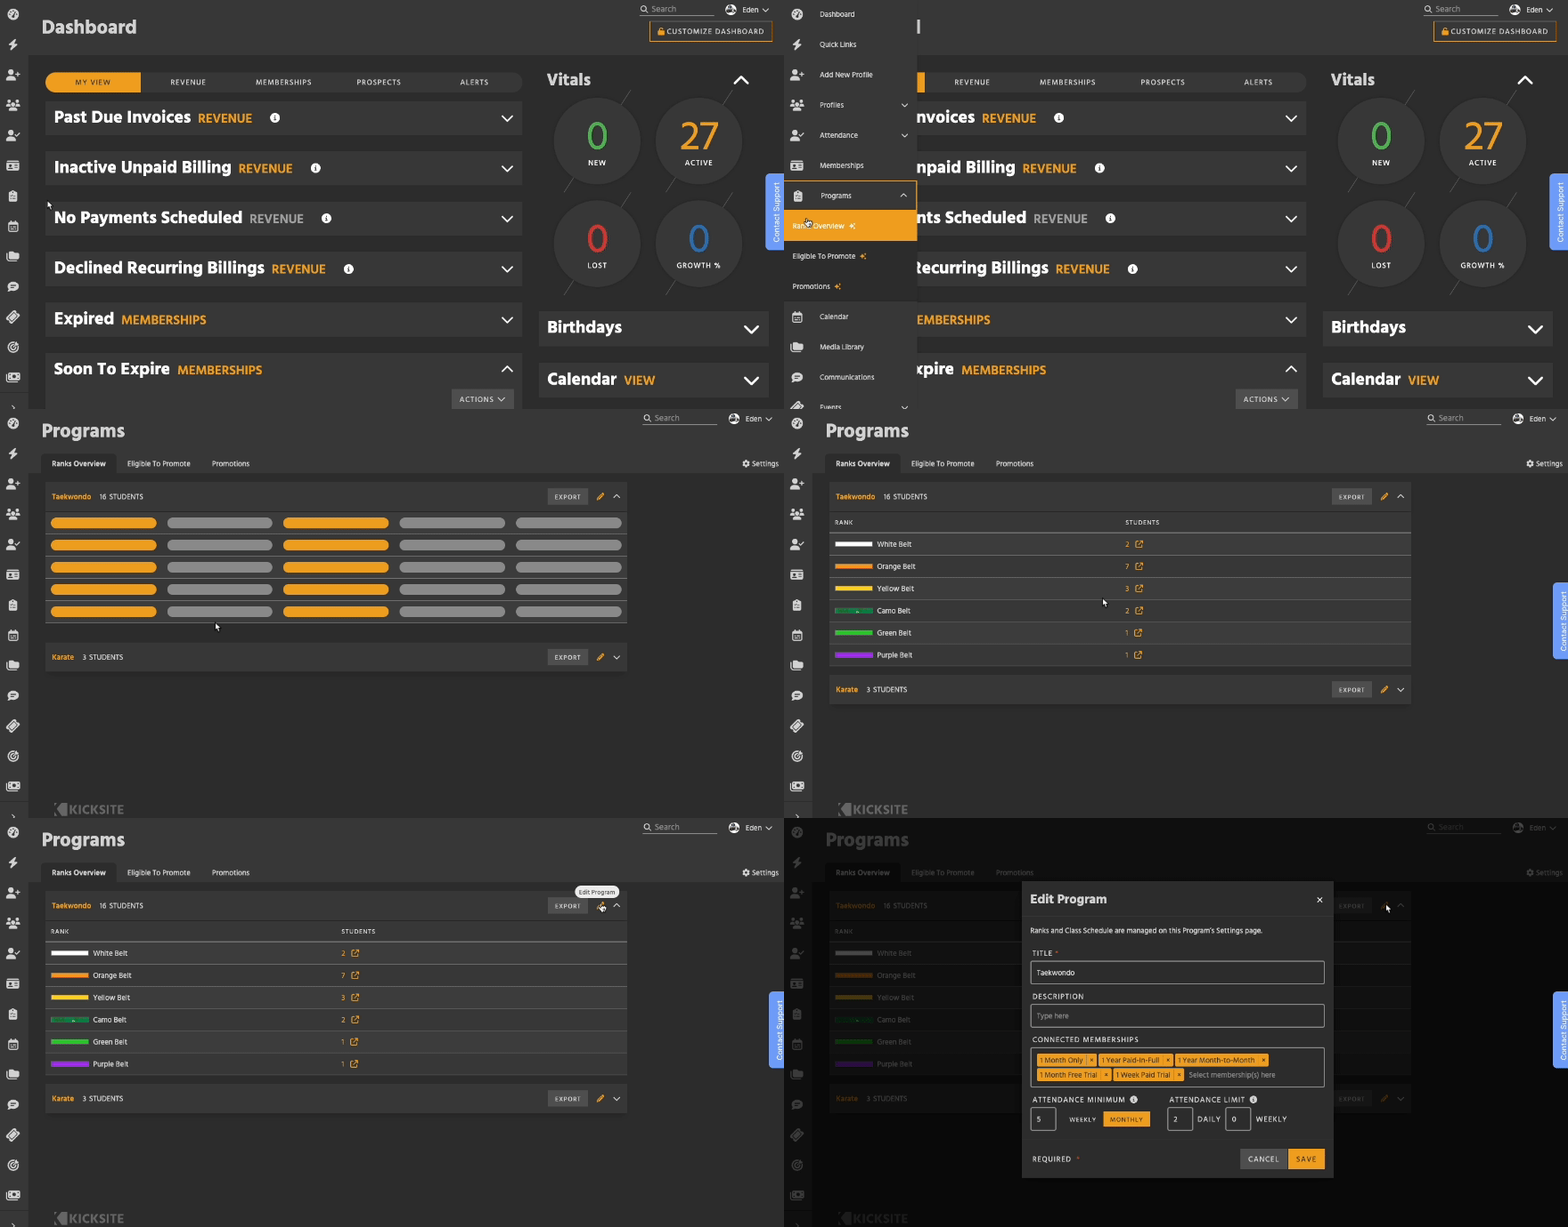
- In the left sidebar, click the Programs icon (a clipboard). Then, select either Ranks Overview, Eligible to Promote, or Promotions.
- Open Quick Links (the lightning bolt in the sidebar). Then, click on Programs or search for Ranks Overview, Eligible to Promote, or Promotions.
- You can easily open Quick Links by clicking
/on your keyboard.
- You can easily open Quick Links by clicking

The Programs Section
There are three subsections:
- Ranks Overview
- View each Program and its ranks
- Eligible to Promote
- View the Students in each Program and Promote individuals
- Promotions
- View Promotion History and Promote multiple Students at once
Plus:
- Program Settings (on the far right of the tab bar)
- View, add, and manage Programs at the highest level
Ranks Overview
Ranks Overview displays each Program at your school and its ranks.
- You can see the belt graphic and number of Students in each rank.
- Clicking on the number of Students will take you to the Student List, filtered to those people.
By default, each Program is collapsed. Click on the box or the chevron (arrow pointing down) to expand it.
- The system will remember which Programs you left expanded and keep them open next time.

From Ranks Overview, you can click the Program’s title to view its full Settings page. Clicking the Edit icon (represented by a pencil) opens the Edit Program modal. Clicking Export downloads a .csv of all the Students in each Rank.
Eligible to Promote

(Formerly called Eligible to Test)
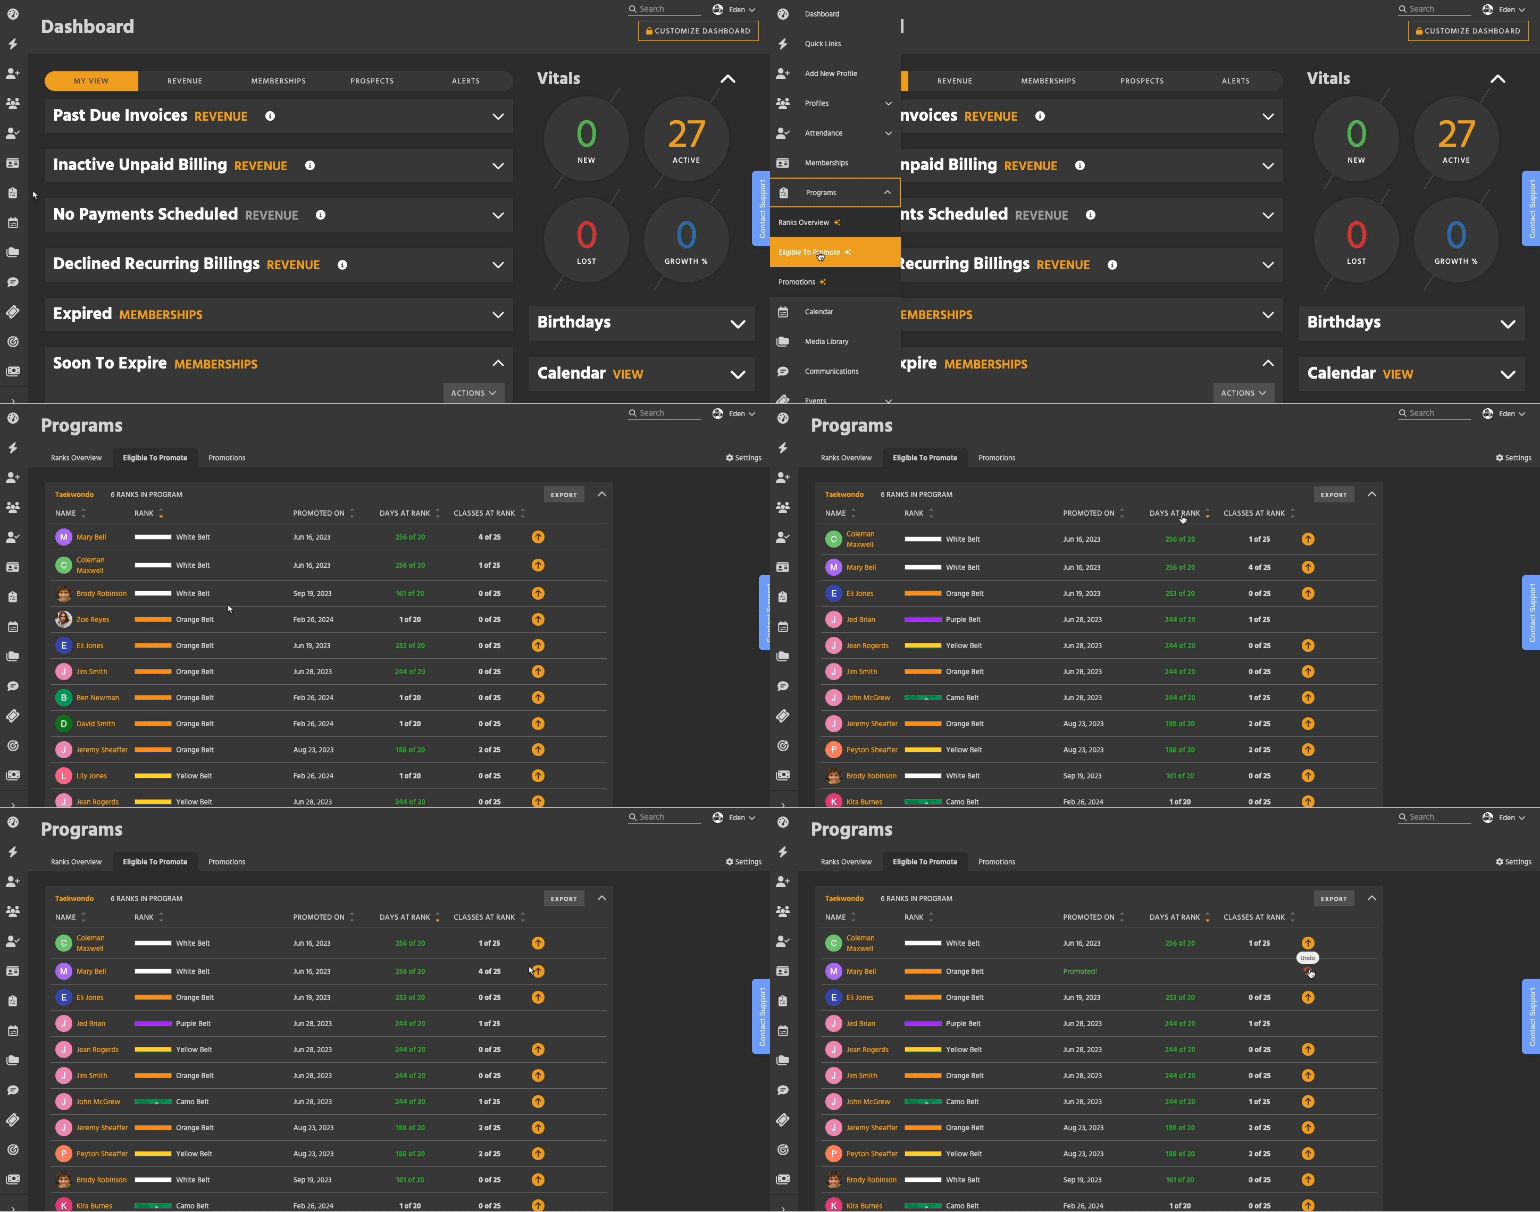
This is a list of the Students in each Program, sorted by Rank. If someone is Eligible to Promote (meaning they’ve met or surpassed the Days at Rank or Classes at Rank requirement), the text will be green.
- You can also sort by the date of their most recent Promotion, and the number of Days and Classes at Rank for each person.
Clicking the Promote icon (an upwards arrow in a circle) will move that Student up to the next Rank in the Program.
- A Promotion can be undone by clicking the red Undo icon, or by deleting the Promotion from their profile.
As with Ranks Overview, you can click the Program’s title to view its Settings page.
Promotions
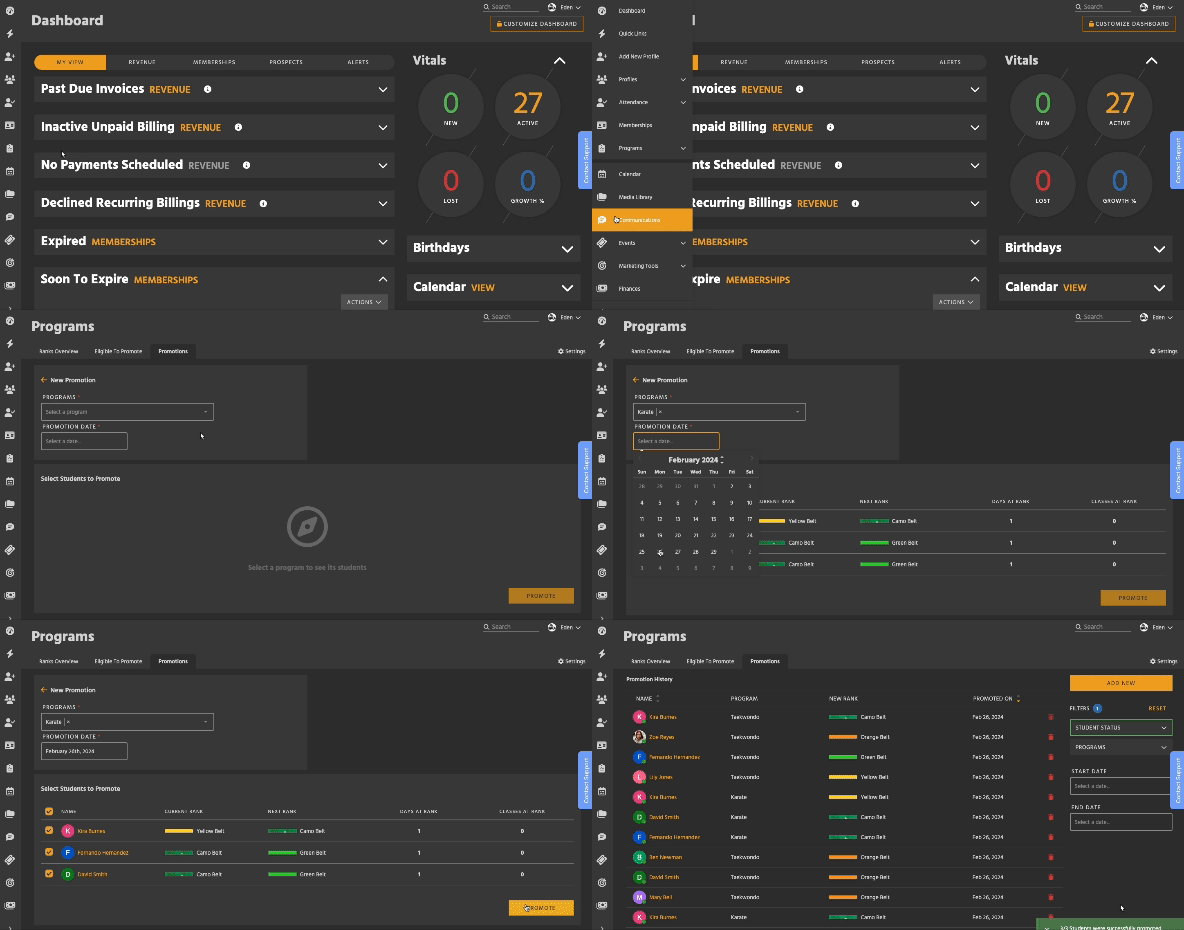
This table shows a history of all Promotions at your school.
- You can specify a date range to view. By default, the most recent Promotions are at the top.
Deleting a Promotion will remove it from that Student’s profile, and revert them to the rank they were before.
- You can’t delete the first Promotion a Student has, since they can’t be reverted to nothing.
From the Promotions page, you can Promote multiple students in a Program at once.

How to Create a New Promotion
- Click the Add New button in the upper right of the Promotions page. This opens a full page form.
- Select a Program, then a date. You can choose any date in the future or past.
- Choosing a future date will immediately promote the Student, but the future date will be listed.
- Select at least one student, then click the Promote button to finish.
- Students who were successfully promoted will now display as their new rank.
- Any promotions that failed will be flagged.
- Click Exit to return to the Promotions page.
Program Settings
On the far right of the Programs tab bar, click Settings. This list shows each Program at your school. Use the gripper dots on the left to rearrange them.
To learn how to create and edit Programs, click here.