How to Use the Media Library
The library is a place to store videos and documents for student curriculum use. Content can be uploaded for all of your students to have access to or can be set with restrictions based on program or belt rank. Students will be able to access the library by logging into their student account. They will only be able to see what is available to them based on the restrictions set by the admin or authorized employees.
Tip: You can also watch a video on how to use the media library, as well as how to enable students to view the media library; watch the video here.
To create a new Media Folder:
- A Media Folder is where you upload videos, text, images, and documents.
- Along with the list of Media Folders, you can see who can view the content in those folders.
1. Click Media Library on the left sidebar. Alternatively, from within Kicksite, hover over the Library menu and then click Video.
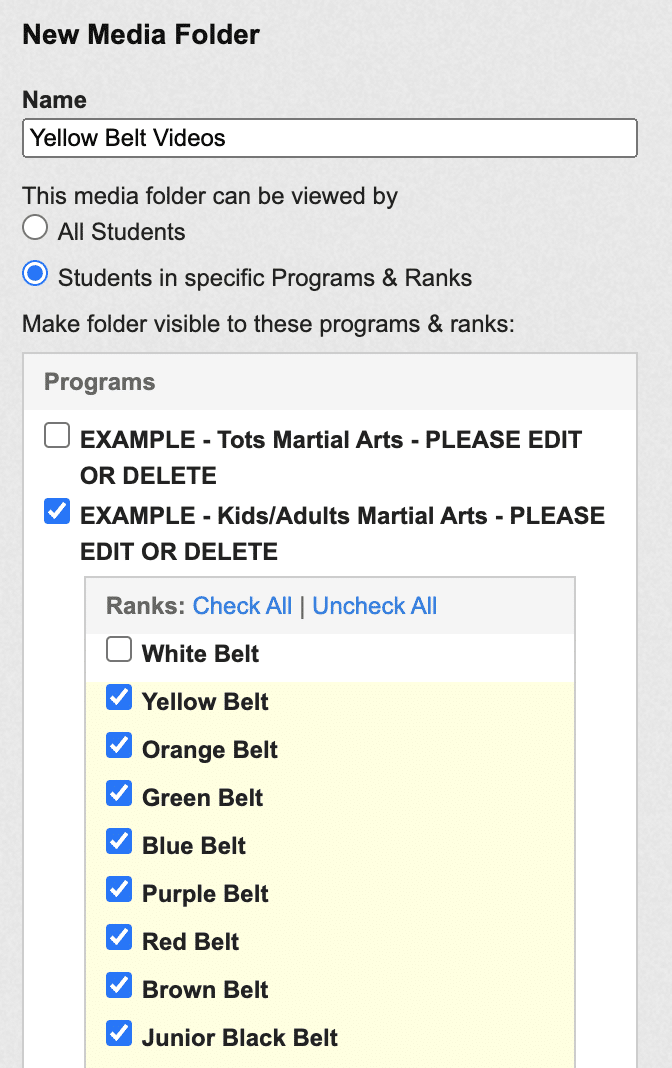
2. On the right-hand side of this page, type a name for the Media Folder in the Name text box.
3. (Optional) If you want to restrict which students can view the file(s) in the folder, select the Students in Specific Programs & Ranks option. If you wish to allow everyone to view the file(s) in the folder, leave All Students selected.
- Note: If the folder is restricted, only the belt colors with a check mark will be able to access that folder.
- If you restrict by program and rank, when a student is promoted, they will immediately be able to view the next level of media content.
4. Click the Create Media Folder button to save the new folder.
Note: If desired, you can further organize your media content by adding a subfolder within the folder you just created. For example, you could create a Testing Requirements folder, and then create folders within it for each belt’s specific videos and documents.
To add a file to the library:
1. Click Media Library on the left sidebar.
2. To add a file outside a folder, type a name under New Media File in the Title field, and then click Create Media File (see step 3 for instructions on restricting who can view the file). If you want to add the file within a folder, click the name of the folder you want to add the file(s) into, and then on the right side, enter a name in the Title field under New Media File.
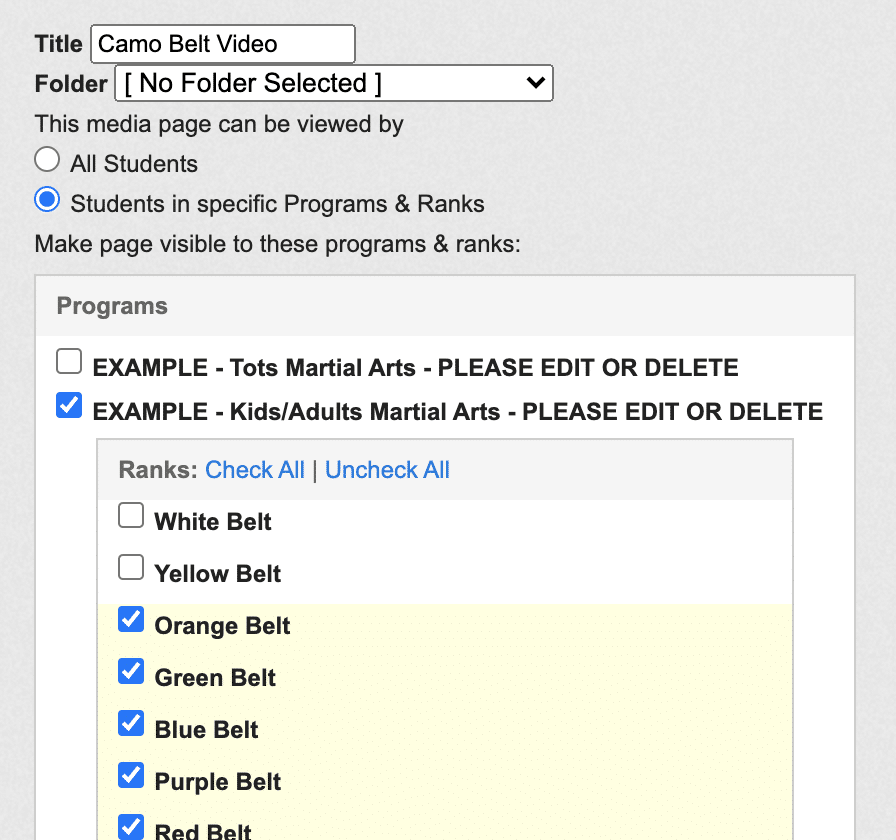
3. (Optional) To restrict who can view the file, select the Students in Specific Programs & Ranks option and select only the desired programs and ranks. To allow everyone to view the files, leave the All Students option selected.
4. Click Create Media File.
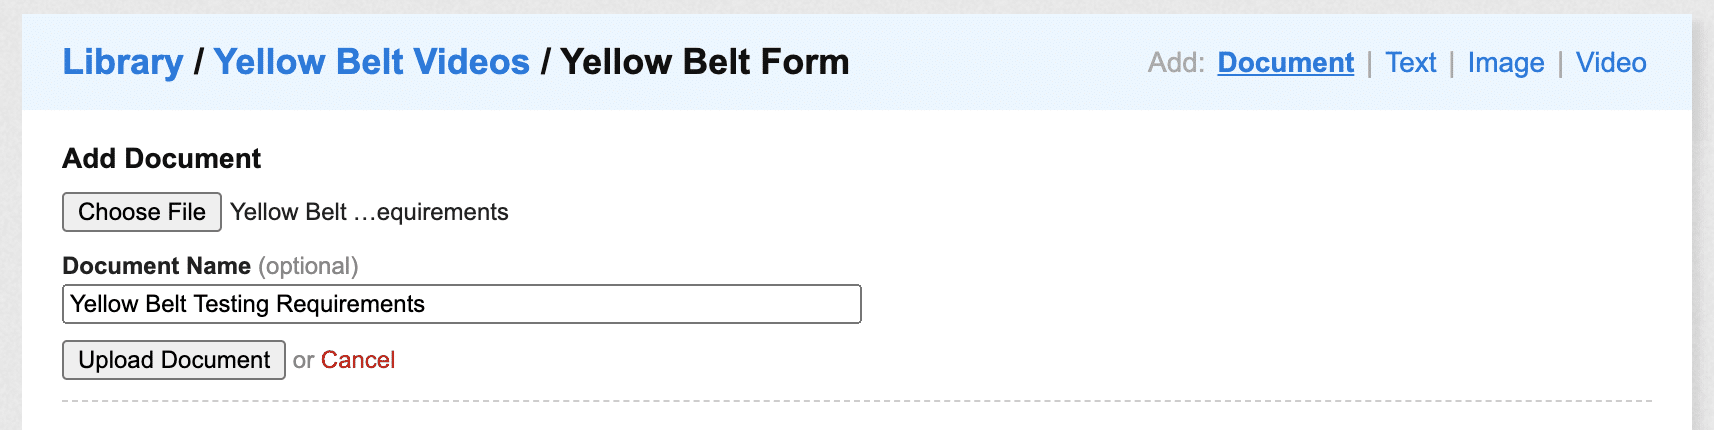
5. In the blue section at the top, click the desired file type:
- Document: Click Choose File, select the desired file. (Optional) Enter a name in the Document Name field, and then click Upload Document.
- Text: Type or copy and paste the text into the Add Text box. Click the Add Text button when you’re done.
- Image: Click Choose File, select the desired image file. (Optional) Enter a name in the Image Caption field, and then click Upload Image.
- Video: Click Choose File and select the video.
Warning: Do not upload multiple files (documents, text, images, or videos) into one Media File. A Media File should only hold ONE file to ensure that students can properly view that file through their member portals.
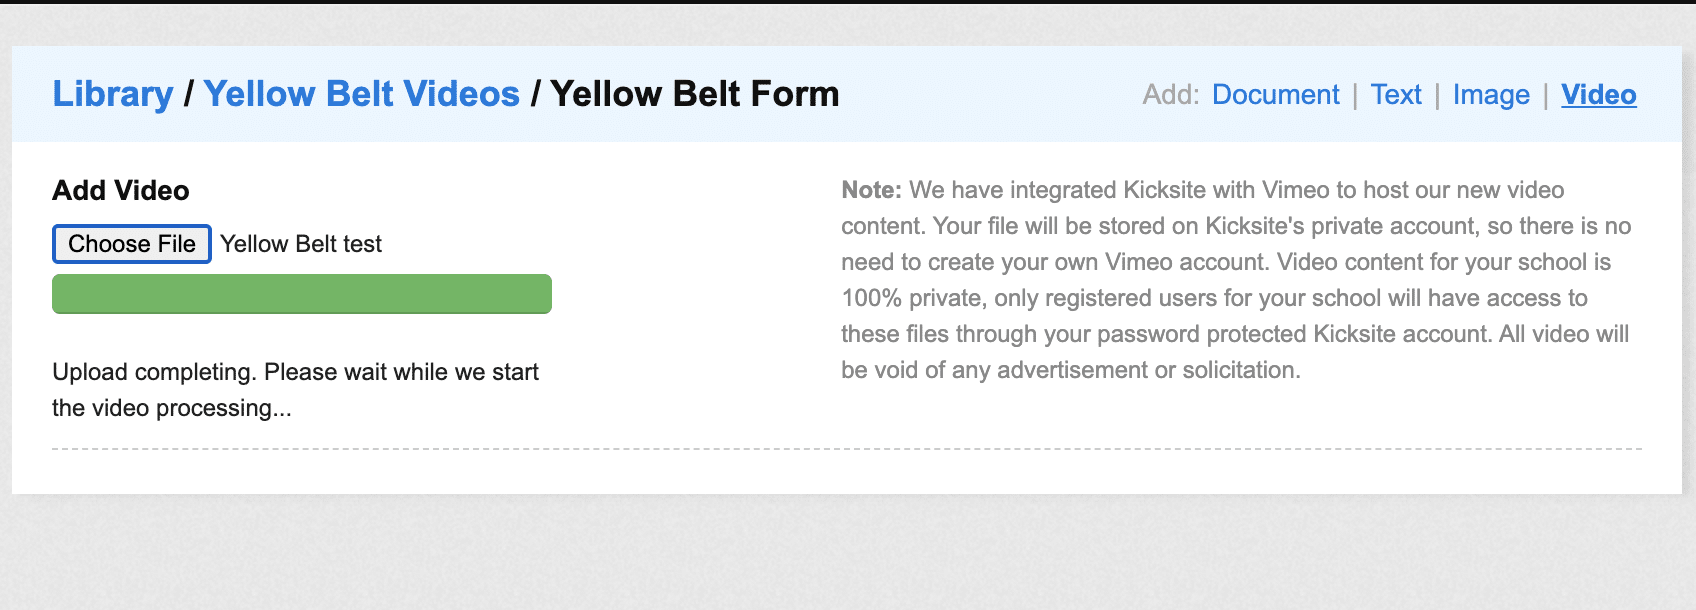
Note: Uploading a video may take a few minutes, especially if the video file size is large. Do not leave the page until it has finished loading and processing the video. Otherwise, the video will not be uploaded.
Kicksite’s video hosting platform is through Vimeo, which supports most video file types. For example, Vimeo supports these common formats: MP4, MOV, WMV, AVI, and FLV. In the rare circumstance that a file format is not supported, an Invalid File error is displayed on the video page. The upload limit is 1.25GB per file, and the total storage space is 5TB. If your video is over 1.25GB, you will need to compress or edit the video to reduce the file size.
After the files have been uploaded, the content will be available to your active students through their student account, as long as they are within the program and rank restrictions set. This content can be viewed on any device, so students can watch your videos on their computer, tablet, or phone.
To edit or delete content from the library:
If you want to move a file into a folder (or move it to a different folder):
1. Click Media Library on the left sidebar.
2. Click the name of the file in the Files list (if the file is not in a folder); click the folder name and then click the file name if the file is within a folder.
3. Click the red Edit File link on the right side.
4. You can edit the title, select a folder from the Folder drop-down list, and update the programs and ranks that can view the file.
5. Click Save to save your changes.
To delete a folder, click the folder name, and then click the red Delete link of the right side. Keep in mind that if you delete a folder, you also delete all the content within that folder.
To delete a file within a folder, click the folder name. Click the red Remove link on the row of the file you want to delete.