How to Customize the Dashboard
On the Dashboard, you can click an arrow (the caret ^ character) to hide or show a module. You can further customize the Dashboard to show the items you want to see most at the top. For example, you can move a module and put your Unpaid Students (Revenue) module near the top of the Dashboard.
Click the tabs along the top of the Dashboard to narrow the modules shown. The My View tab shows your customized module view. The Memberships tab shows the memberships modules. The Revenue tab shows financial modules. The Prospects tab shows modules related to leads. The Alerts tab shows the frozen and absent student modules.
To customize the Dashboard:
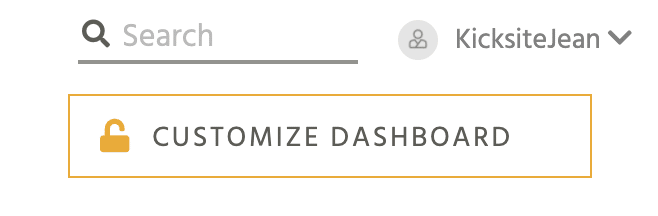
1. Click the Customize Dashboard button.
Tip: You can also change the theme colors (which show prominently on the Dashboard) by clicking your username and then selecting Dark Theme or Light Theme.
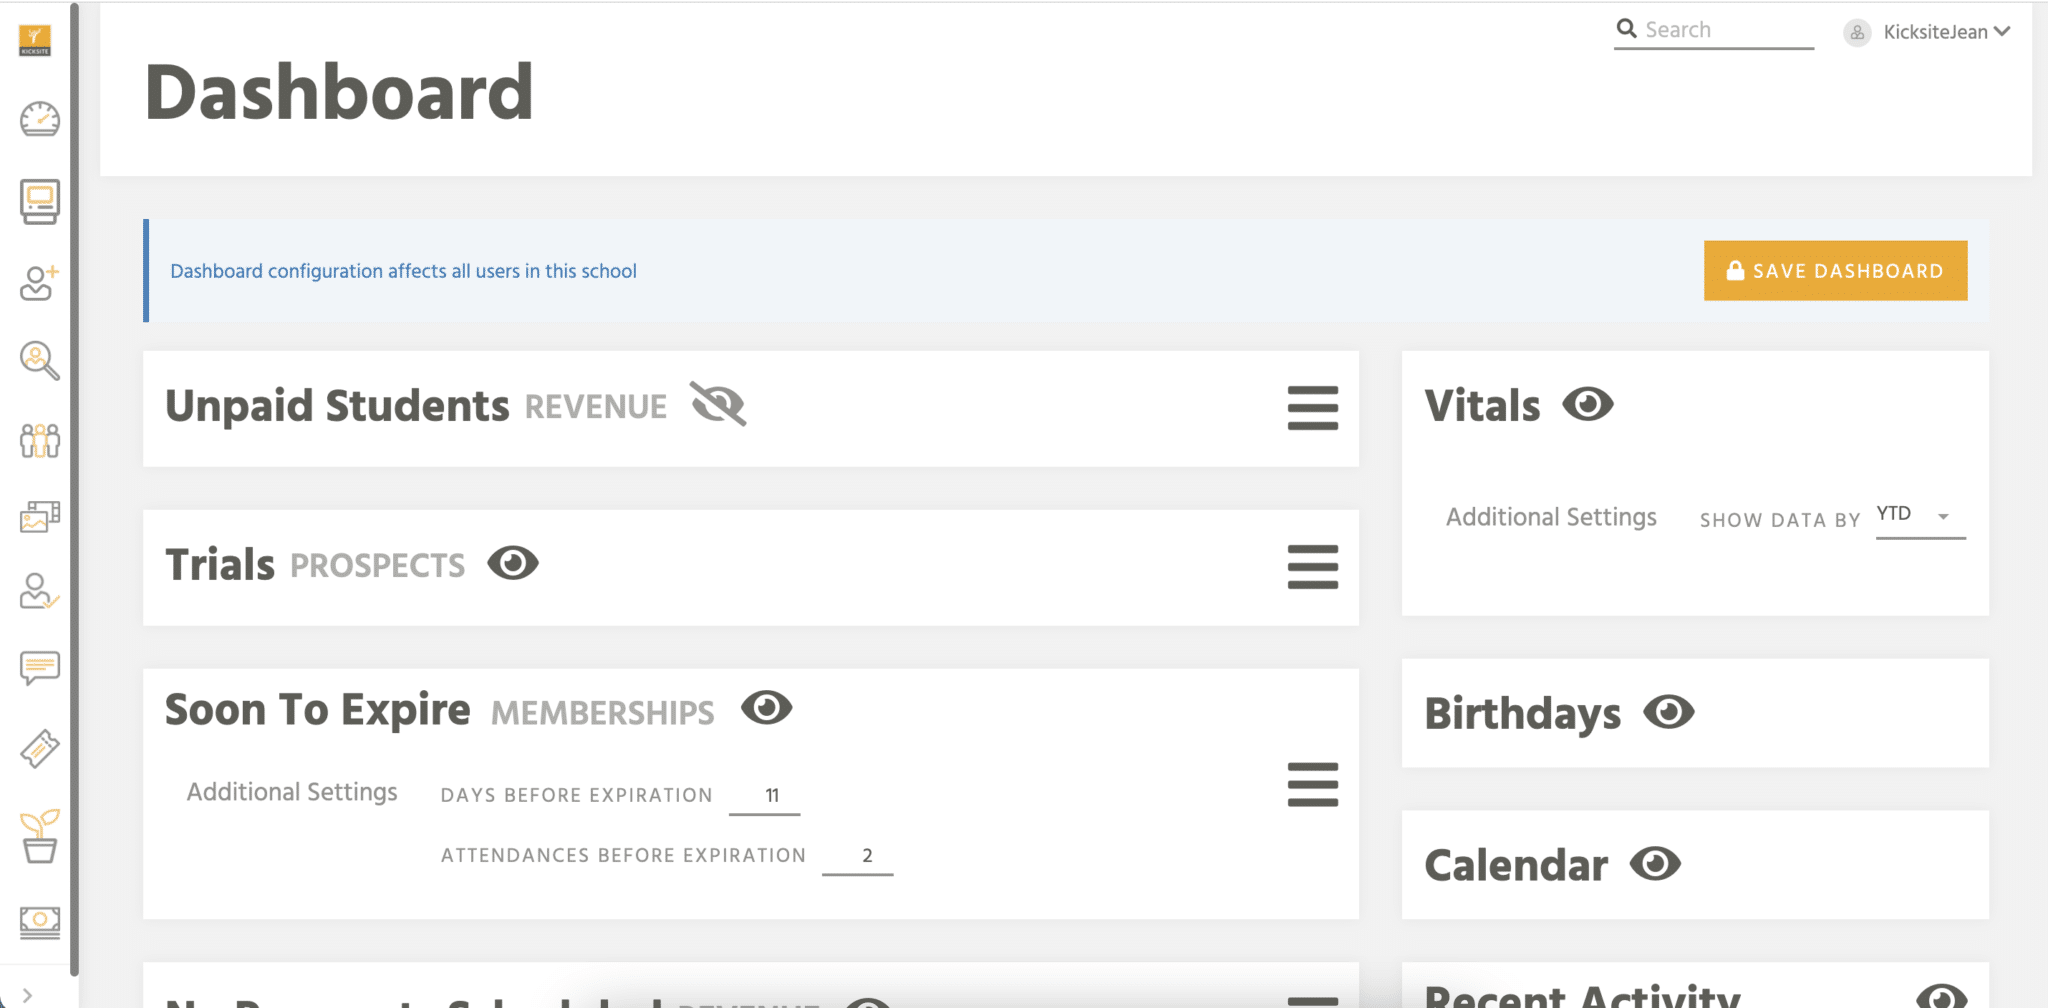
2. After you unlock the Dashboard, you can:
- Move modules by dragging and dropping. Click on the heading area and drag to move a module up or down.
- Show or hide modules. Click the eye icon to hide a module. Click the icon again to show a hidden module. (See the top module in the screenshot below to see what a hidden module looks like.)
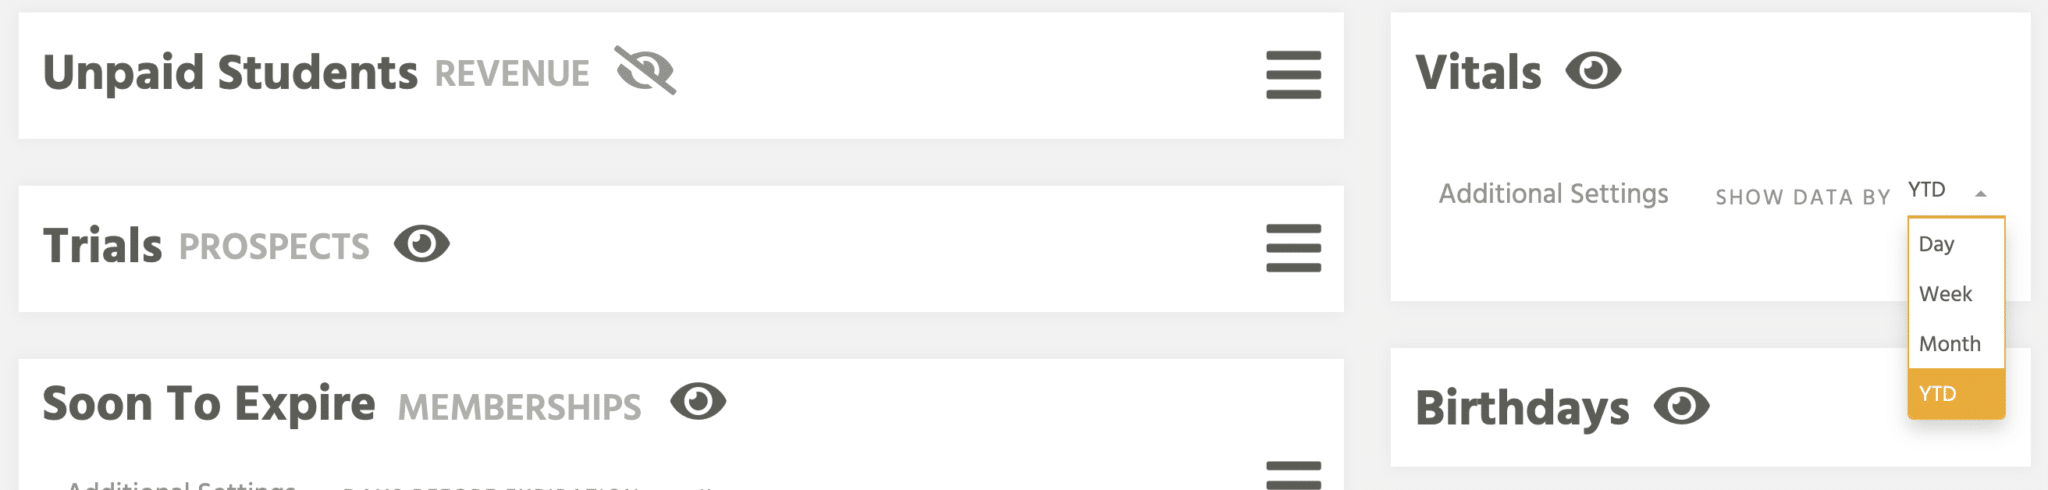
- Adjust what is shown in a module: Some modules enable you to change how the data is presented by selecting from a drop-down list or using a toggle to increase or decrease a number. For example, you can change the time period shown for the Vitals module (see the screenshot below).
3. When you’re done customizing your Dashboard, click the Save Dashboard button.