Kicksite Knowledge Base
Tip: How to Set Up a Family Membership
After creating a Family profile in Kicksite, some schools prefer to have one Membership applied to the Family instead of having an individual membership for each person. There are three steps to creating a Family Membership.

Family Membership Templates
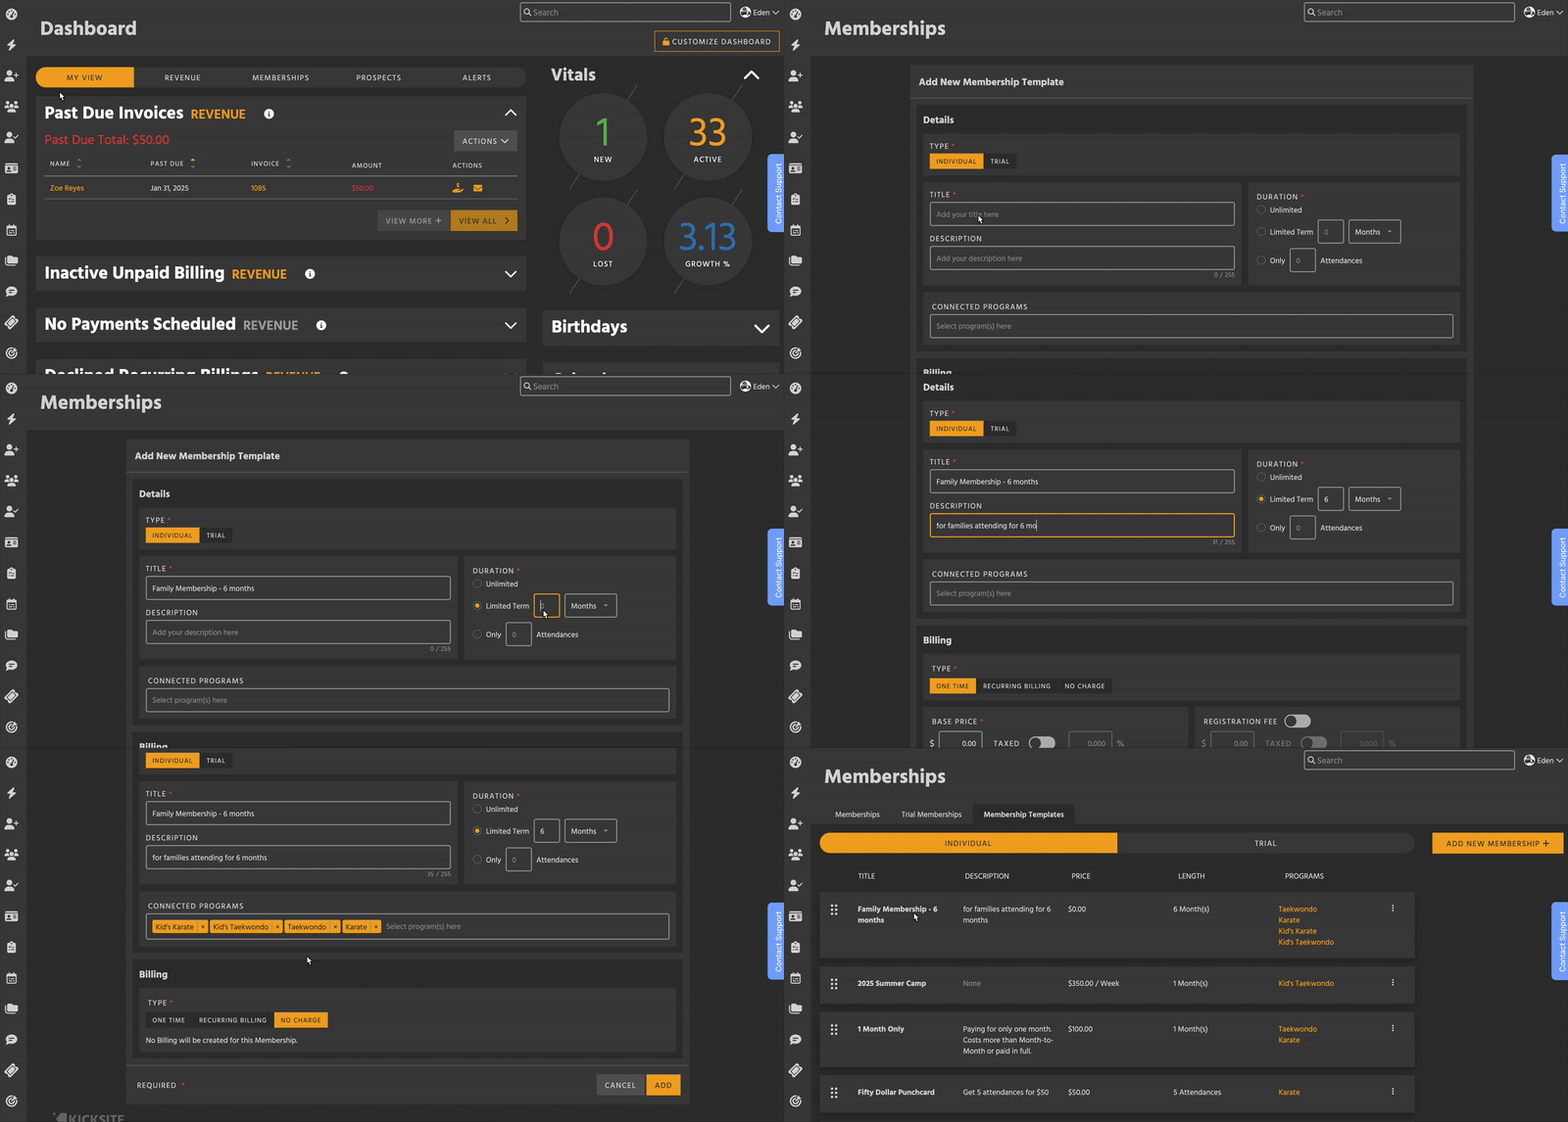
- First, make sure to set up at least one Family Membership Template. To make one, go to the Membership Templates list and create a new Individual membership.
- Billing functionality is not yet available for Family Memberships, so the template you make should have No Billing selected.
- Duration must be either Unlimited or Limited Term – Family memberships can’t be Limited Attendance.
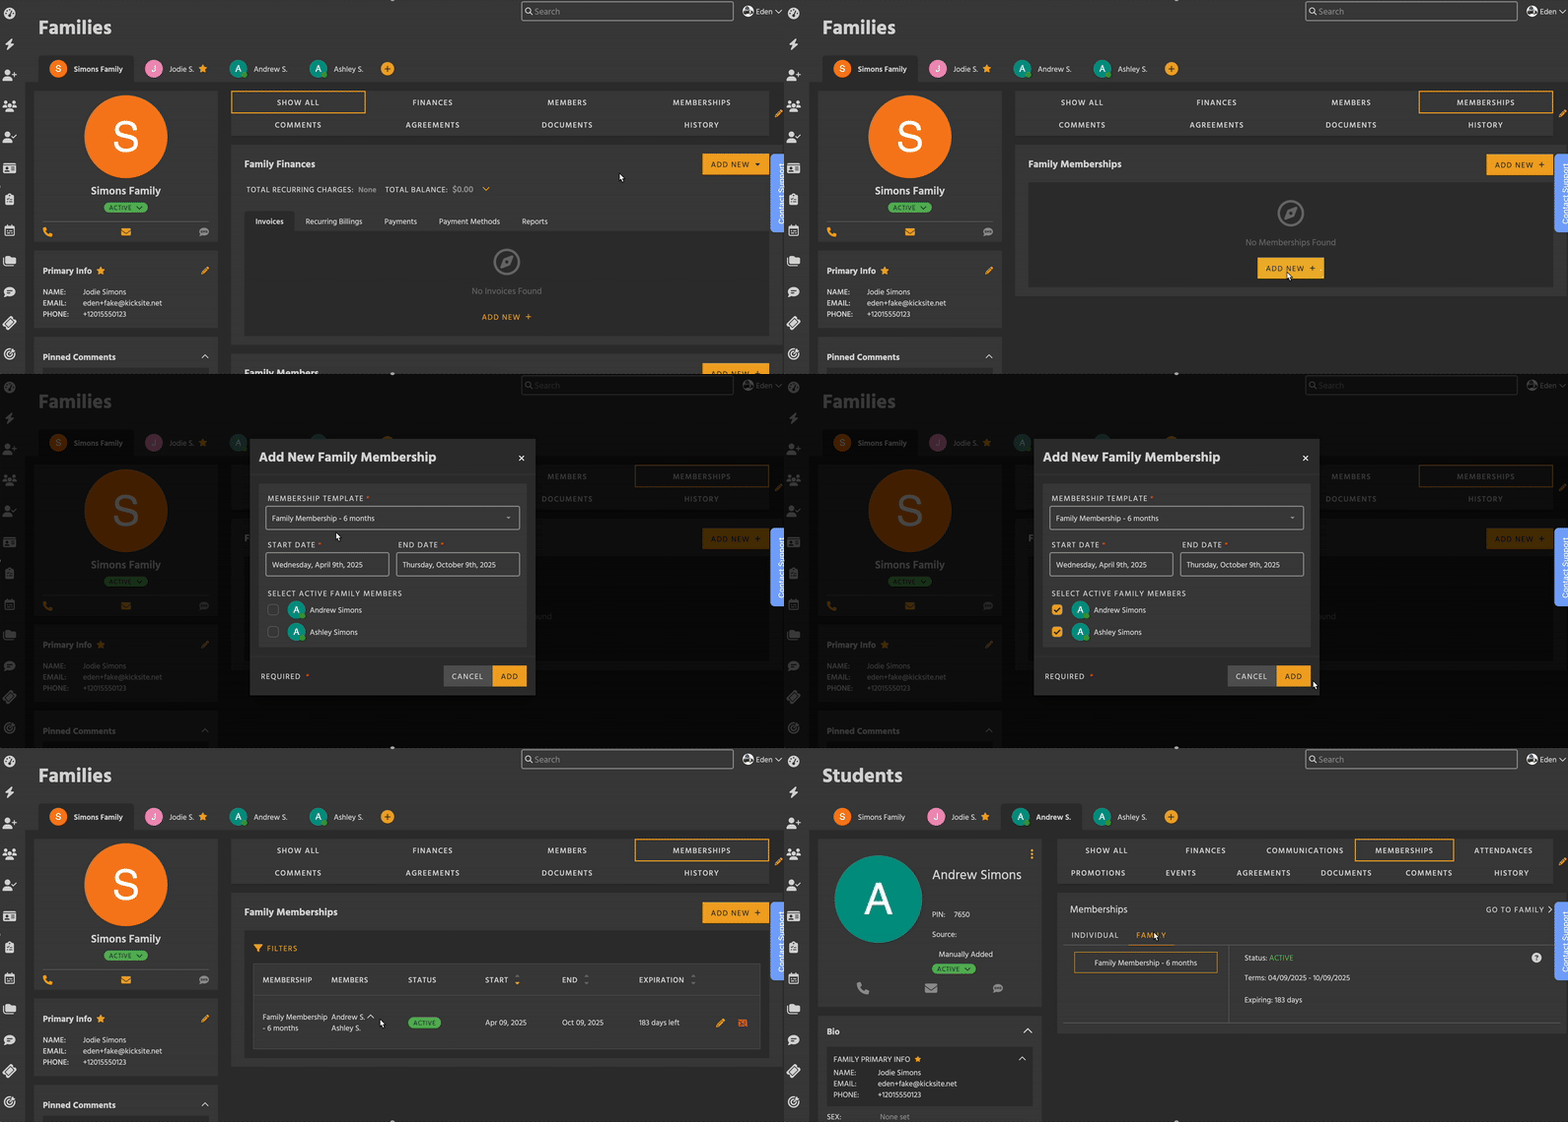
- To apply the Membership Template, go to the Family’s profile and scroll to the Memberships module. Then, click Add New in the upper right.
- Select the Membership Template you want from the dropdown.
- Adjust the Start Date as needed. The End Date will automatically select based on the Template’s duration, but can be changed.
- Select each active Student in the Family you want to include in the Membership.
- Click Add to confirm.
After creating the Membership, it will appear on the Family profile, as well as on each person’s Memberships module under the Family tab.

Recurring Billing
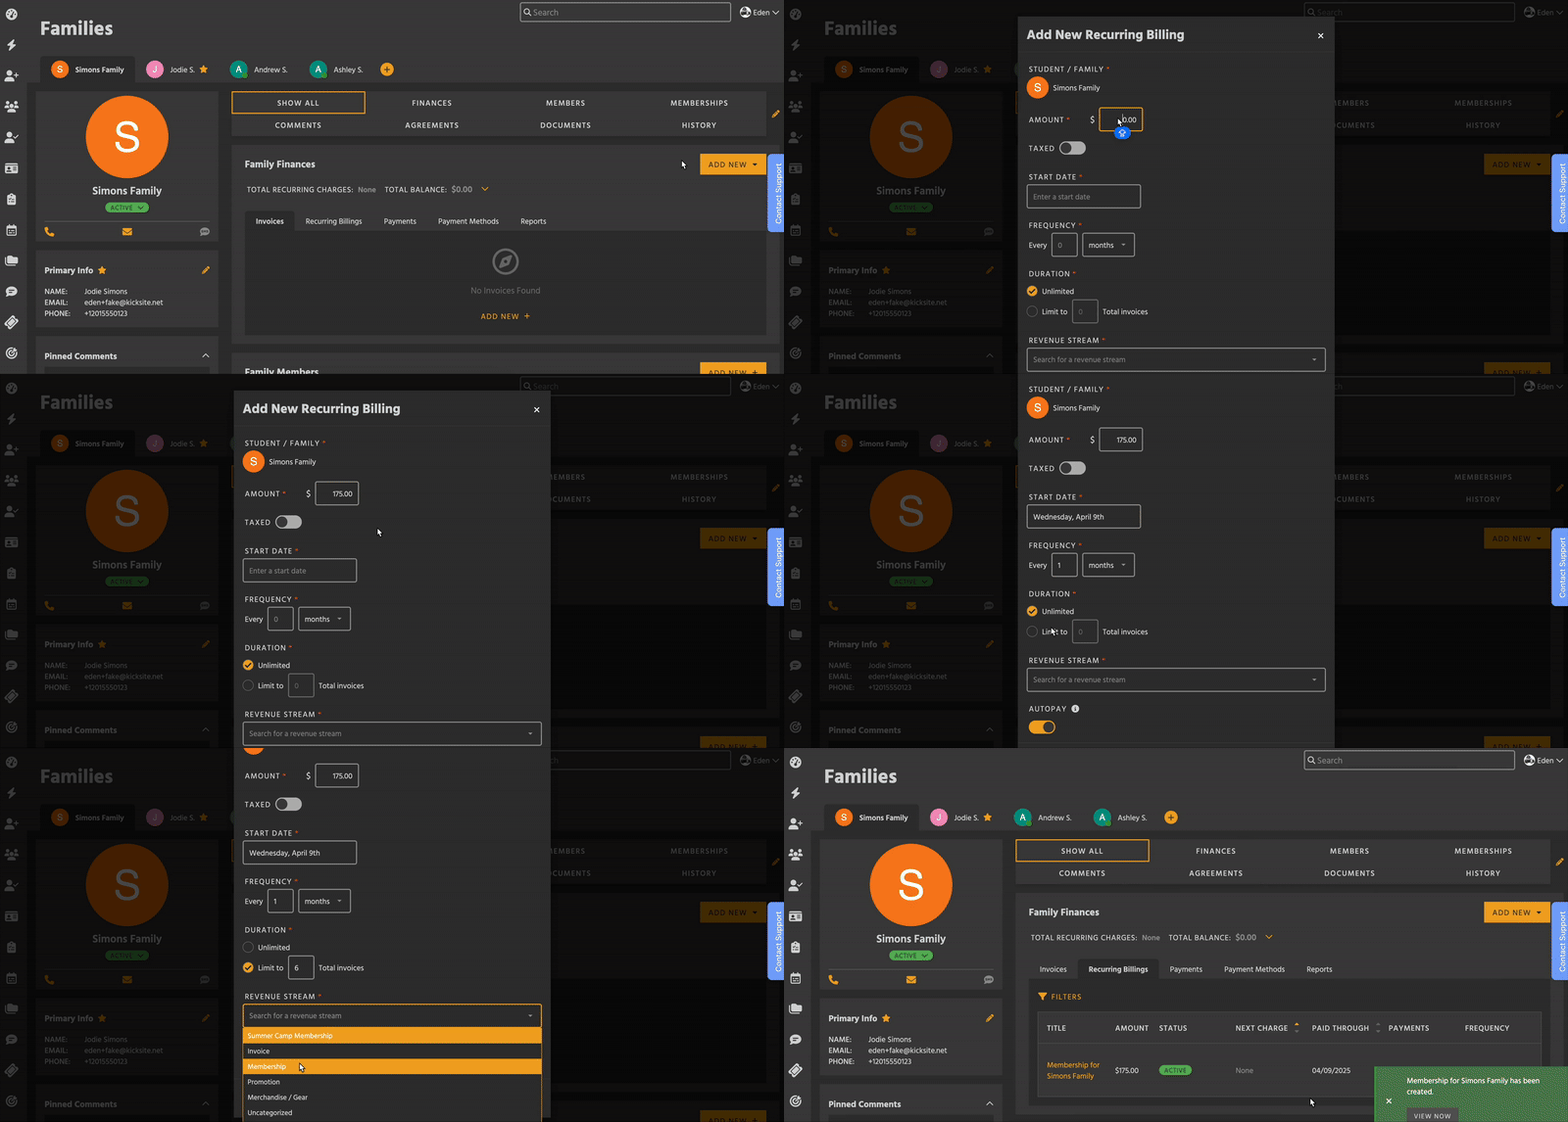
- On the Finances module of the Family’s profile, click Add New, then Recurring Billing.
- The amount is the total price for all members – calculate it based on your school’s pricing.
- Decide if the Billing should be taxed, or tax exempt. Some locations require taxes on membership services, and others don’t. Check your local laws to make sure.
- Select the Start Date. This should be the same as the date you chose for the Family Membership.
- Choose the Frequency. This is how often the Family will be charged.
- Set the Duration. Ideally, the Recurring Billing should end when the Membership ends.
- For example, if you have a 1 year membership, and you want them to be charged every month, set Frequency to Every 1 Month and Duration to Limit to 12 Total Invoices (which would be 12 months).
- Select a Revenue Stream. Some schools use the same as their Individual or Trial Memberships, while others choose to have a separate Family Memberships Revenue Stream for reporting purposes.
- Decide if you want Autopay on. Autopay automatically charges the card or bank account on file when the invoice is due. You can turn it on or off later.
- Click Add to confirm, or Continue if you turned Autopay on. If Autopay is on, select or add the Payment Method you want attached to this billing.

Programs & Ranks
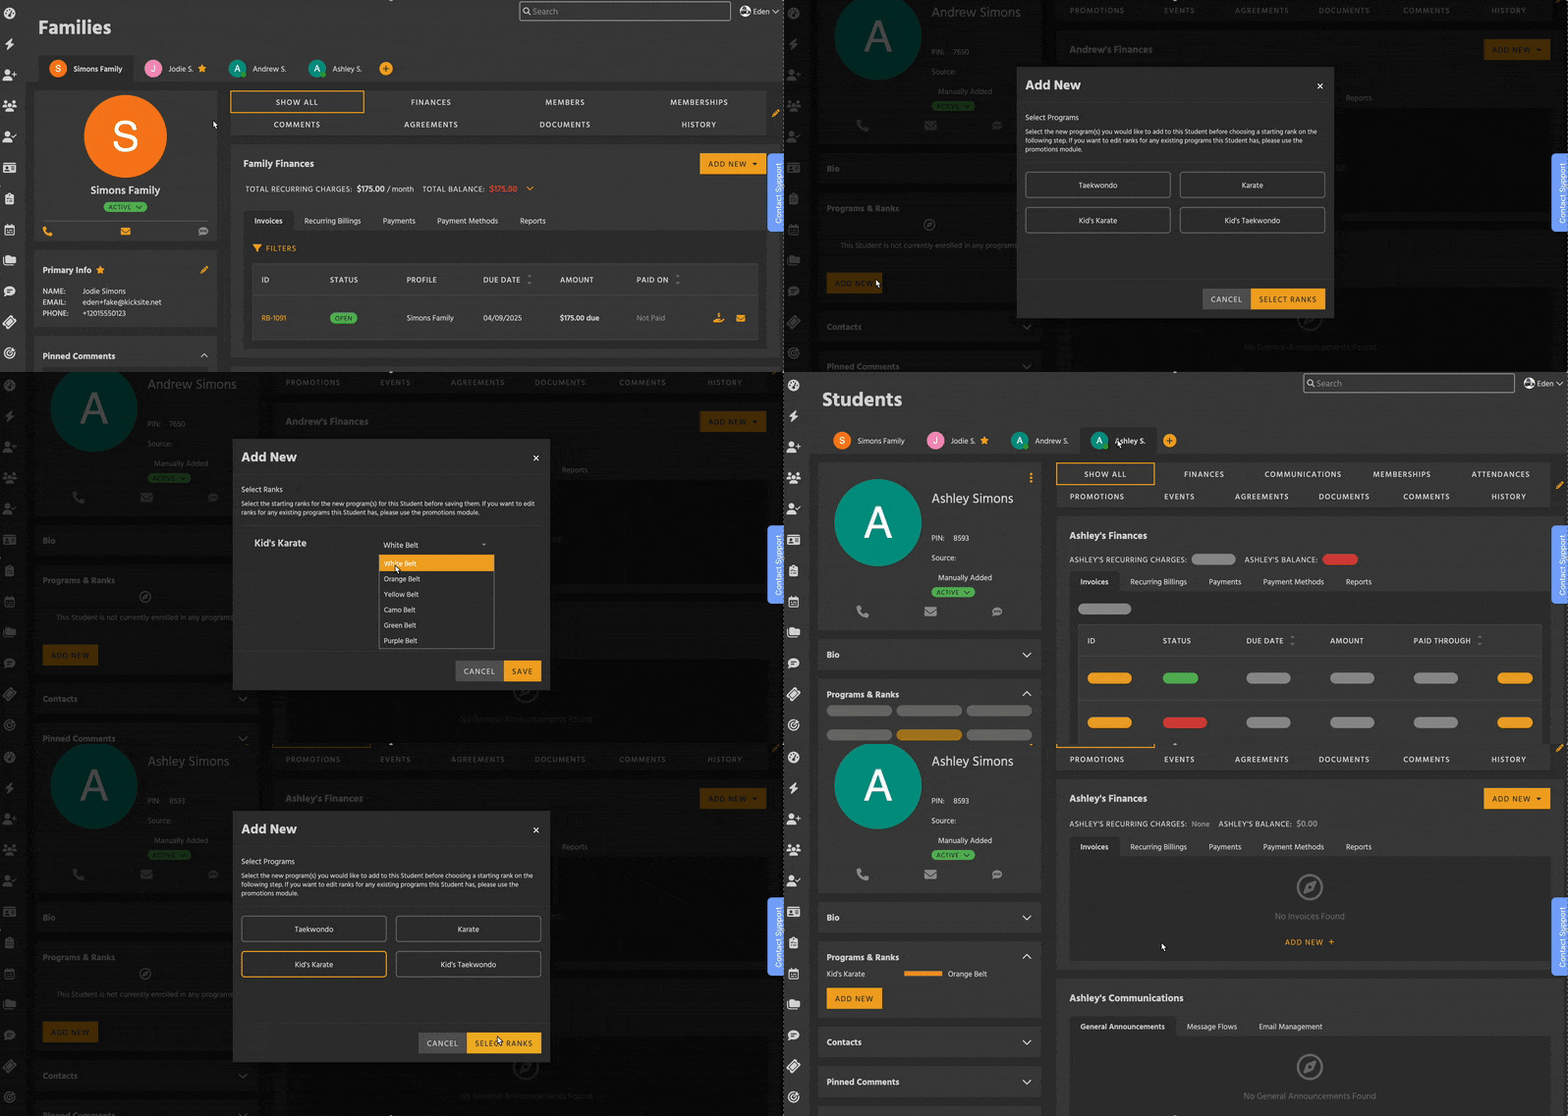
Finally, go to each individual Family member’s profile and add the Programs they are attending for.
- Select the Student you want from the tab bar.
- Scroll to the Programs & Ranks section on the left side of their profile, below the Bio section. Click Add New.
- In the modal, select at least one Program.
- If the Student already has a Program that you want to edit, use the Promotions module. The Programs & Ranks module is for adding new Programs.
- Click Select Ranks to move to the next step. Then, choose the starting rank for each Program you selected.
- Click Save to complete.

The Promotions module will now show the Program and Rank you chose. Click the Edit button (yellow pencil) if you want to change the date they achieved that Rank, or add a testing score.