How to Set Up Inventory
Kicksite will keep track of how much inventory you have for your physical items.
To set up the Inventory:
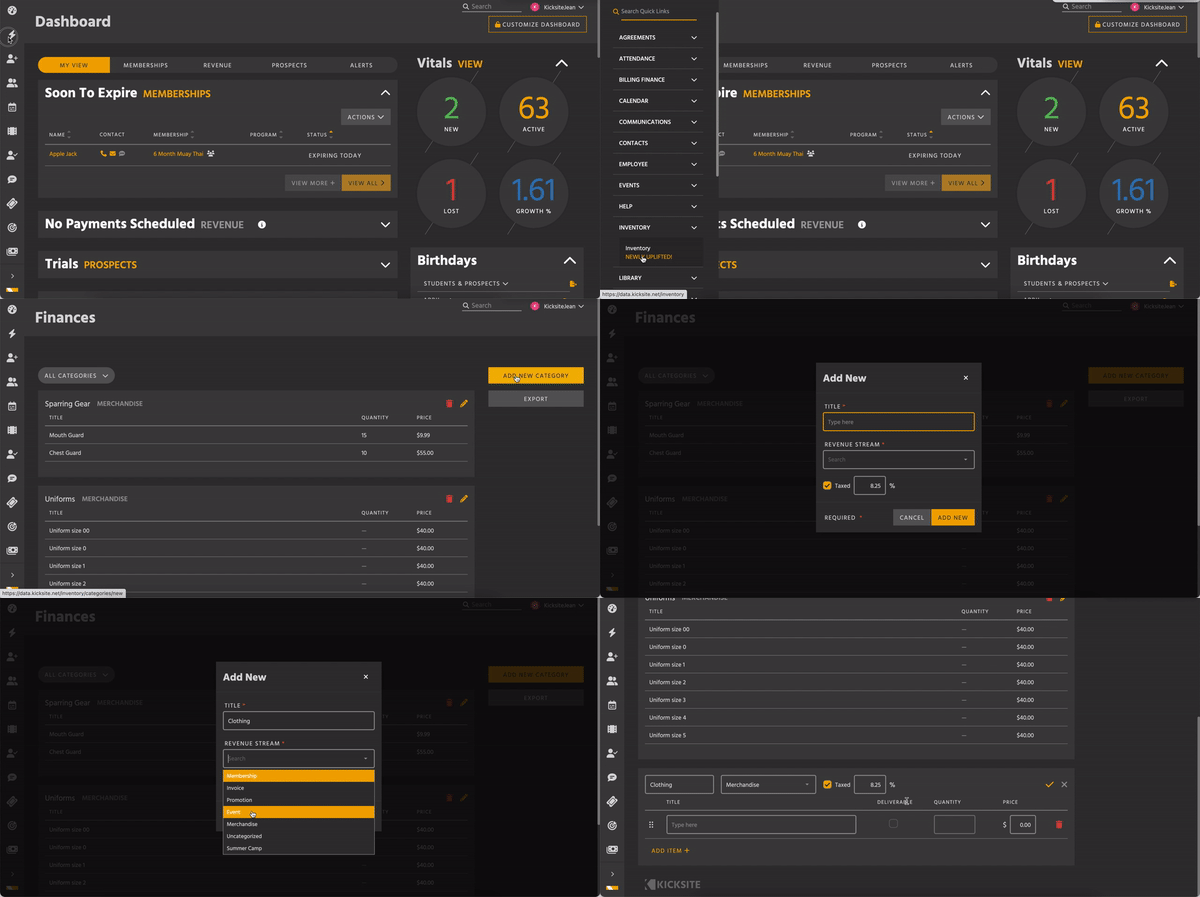
1. Click Quick Links on the left panel, click the Inventory heading, and then click Inventory. (If you have the new, uplifted Finances, you can click the Finances icon in the left panel and then click the Inventory tab.)

2. To create a category, click the Add New Category+ button.
3. In the Title field, type the category name. (Some examples are Membership Fees, Gear, Testing Fees, Uniforms, or Apparel.)
4. Select an option from the Revenue Stream drop-down list. This can be helpful later for your financial reports. (You can add or edit Revenue Streams in Finances Settings.)
5. (Optional) The Taxed check box will be selected or deselected by default based on your Finances settings. If you need to make a change for the category, you can select or deselect the check box and update the percentage in the text field.
6. Click the Add New button.
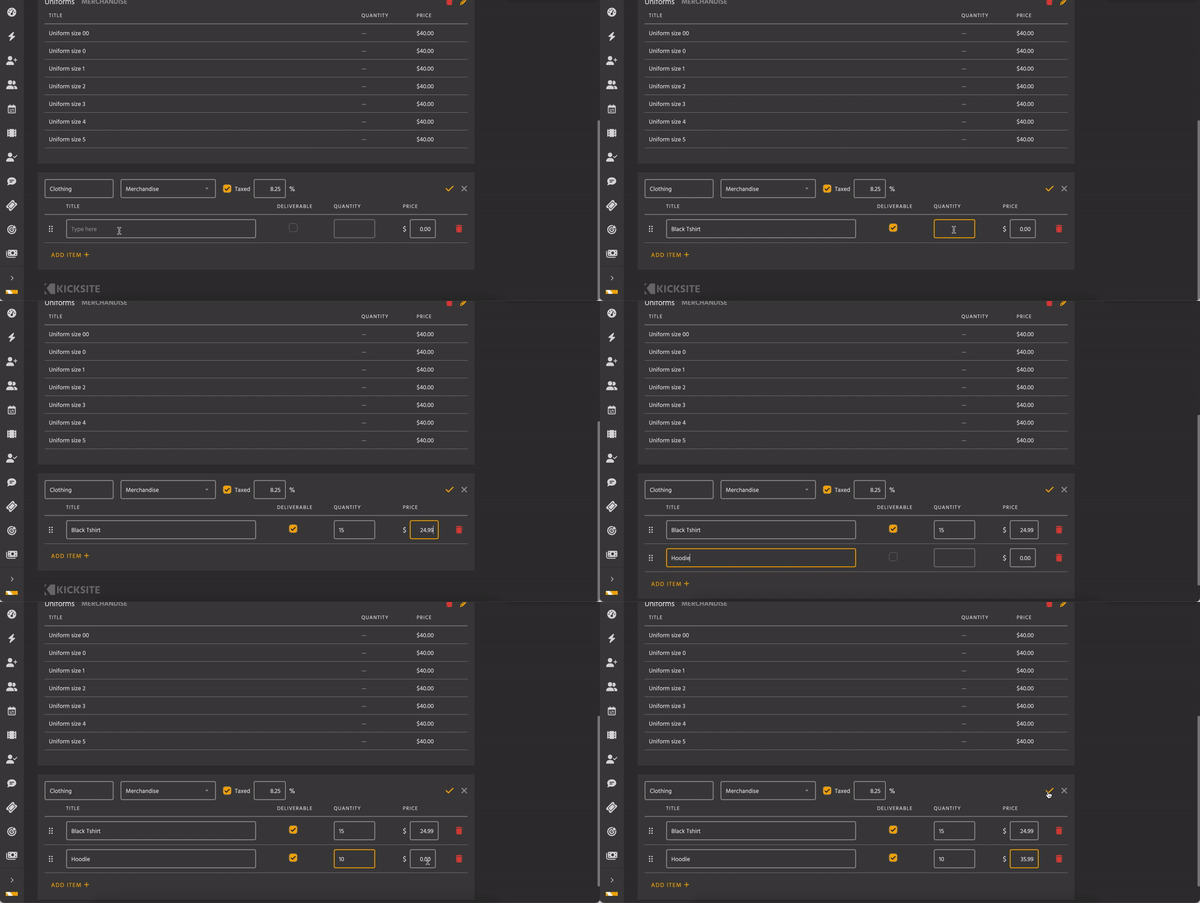
7. To add an item in the inventory, click in the Name field (where it says Type Here) and type the item’s name.

8. (Optional) If the item is physical, select the check box in the Deliverable column and then type the number of items you have in stock in the Quantity field. If the item isn’t physical (such as a testing fee), leave the Deliverable check box unchecked and the Quantity field blank. (The next time you add the item on an invoice and mark that it’s a physical item, the inventory will update that item’s quantity).
9. Type the price of the item in the Price field.
10. To add more items, click Add Item+ and repeat steps 7-9.
11. Click the check mark or press Return/Enter to finish adding items.
To edit categories or items:
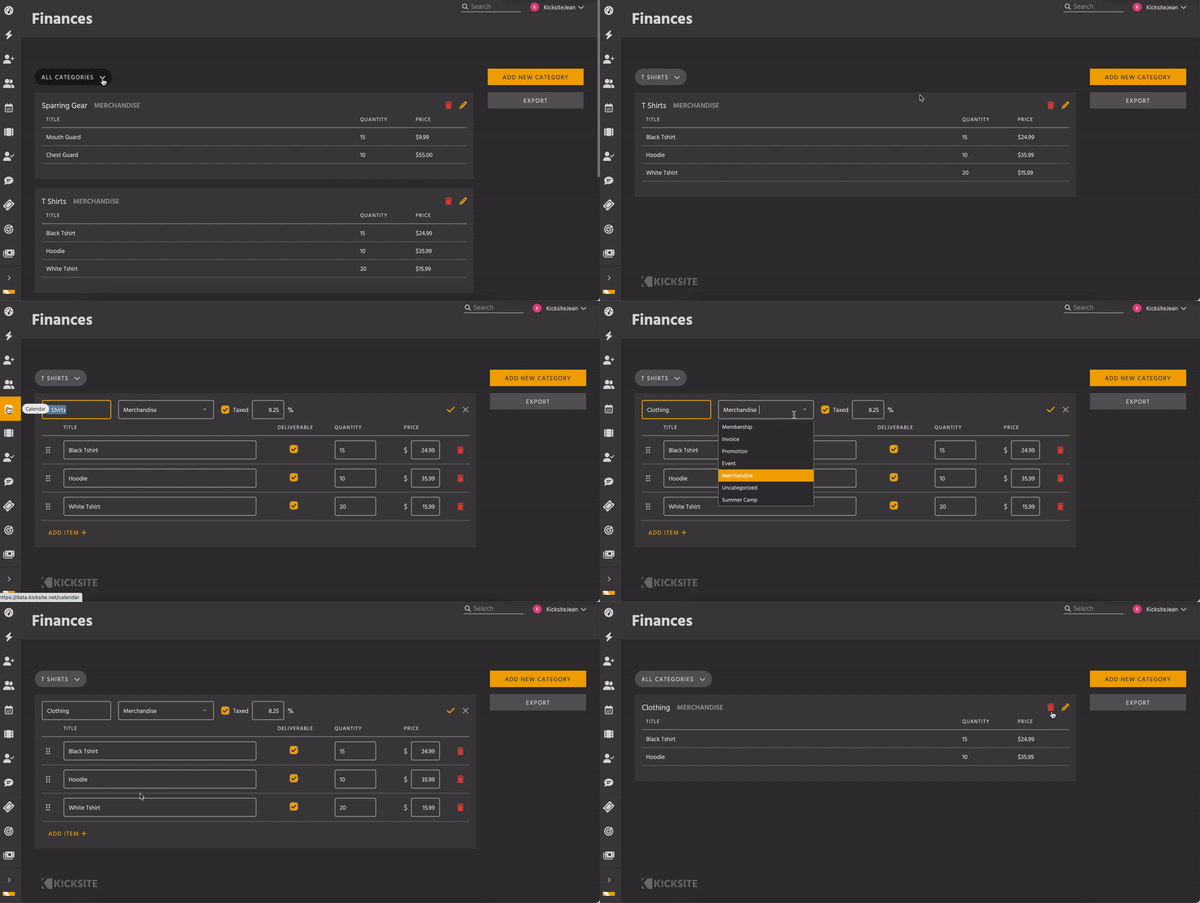
To filter to show just one category (to make it easier to edit the category or items in the category), click All Categories, and then select the desired category from the list.
To remove a category, click the Delete (red trash can) icon in the top-right corner of the category section. Click Delete to confirm.

To make changes to a category or item, click the Edit (pencil) icon in the top-right corner of the category section. To rename the category, click the category name and type a new name. You can select a new payment reason from the drop-down list. Click the check mark to save your change.
To remove an item within a category, click the Edit (pencil) icon in the top-right corner of the category box. Click the Delete (red trash can) icon button on the right of the item. (If you clicked the wrong item, click the green circle arrow to undo the deletion.) Click the check mark to save your changes.
To change the order of an item, click the grabber (six dots) icon, and drag the item to where you want it within the category.
To export the inventory:
To export the inventory, click the Export button. Keep in mind that if you are showing only one category (selected from the All Categories list), the exported file will only include the items, prices, and quantities for that category. If you have all categories shown, the exported file will show all categories, items, prices, and quantities.