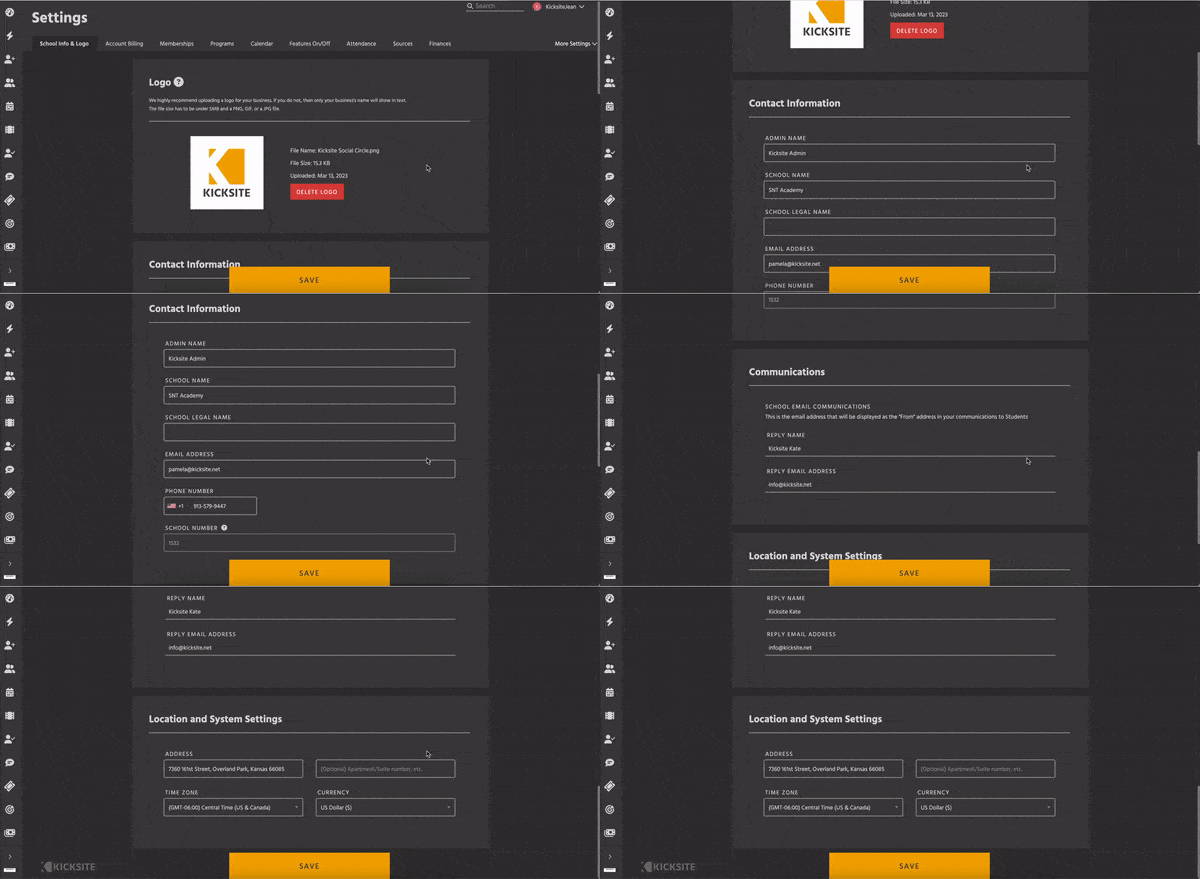
School Info and Logo
The School Info & Logo page is where you add:
- Contact information regarding your school (such as school’s name, business name, address, phone, email)
- Which type of currency your school uses
- What time zone your school is in
To navigate to the School Info & Logo page:

You can access the School Info & Logo page in any of the following ways:
- From the Dashboard, click the down arrow beside your username and click Settings.
- Click the Quick Links menu on the left panel, click Settings, and then click School Info & Logo.
To upload your school’s logo:
The school logo appears on the top-left corner of the dashboard and sidebar; it also appears on the student check-in screen and in emails you send.
1. Go to the School Info & Logo page, as described in the options above.
2. Hover over the logo icon and click when you see a pencil icon. (If you haven’t yet uploaded an image, you will see the Your Logo Here icon, as shown in the first image below.)
3. In the dialog box that appears, select your image, and click the Open button. Your logo appears in the icon (as shown in the right side image below).
Note: You may need to use an image editor to adjust your school logo if the file size or image’s dimensions are too large. The image’s file size must be less than 5 megabytes. Kicksite will decrease the image size to make the logo fit in the dashboard, student check-in screen, and emails, but it’s a good practice to upload an image that is 500 x 500 pixels or smaller.
To update your school’s contact info, communications preferences, time zone, or currency:
1. Navigate to the School Info & Logo page as detailed in the options at the beginning of this article.
2. In the Contact Information section, update one or more of the following as needed:
- Admin Name: If you need to update the administrator’s name, you can type a name in this field.
- School Name, School Legal Name: The school’s name is set when you open your account. You can change it if needed in the School Name field. If your school operates under a different business name (for financial or tax purposes, for example), enter that name in the School Legal Name field.
- Email Address: This is the default email address for your school.
- Phone Number: This is the default phone number for your school.
Note: You can’t change the School Number that appears at the bottom of the Contact Information section. (This school number is your Kicksite school’s account number. If your school is part of an association, your association number will be different than your Kicksite school number.) The school number is helpful to know if you contact Kicksite Support, because the school number will enable Support to more quickly locate your school and assist you.
3. If you made any changes in the Contact Information section, click the Save button.
4. In the Communications section, you can review and update your Reply Name and Reply Email Address. (This is the name and email address that will appear in the “From” field in the email messages you send to students.) Click Save if you made an update.
5. In the Location and System Setting section, you can update:
- Address: Enter or correct the address in the Address field. If your address has a suite or floor number, you can add that in the field to the right of Address.
- Time Zone: Select your time zone from the drop-down list.
- Currency: Select the correct option in this drop-down list. The currency you choose will show on billings, recurring payments, and invoices.
6. If you make any changes in the Location and System Setting section, click the Save button to save those changes.